

Playhouse
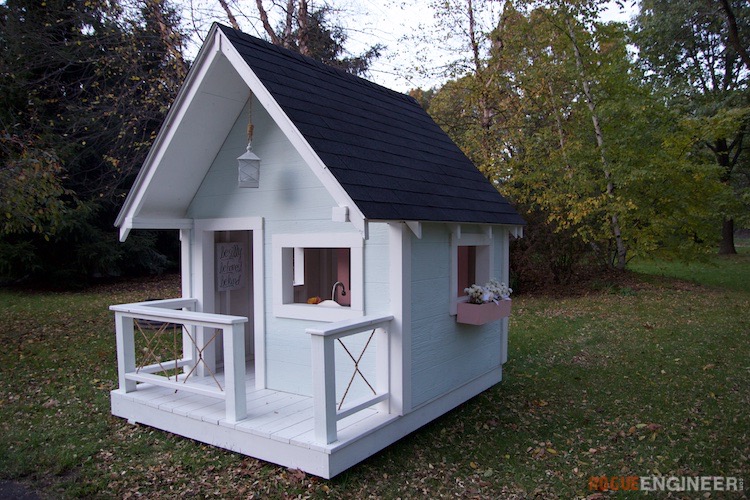
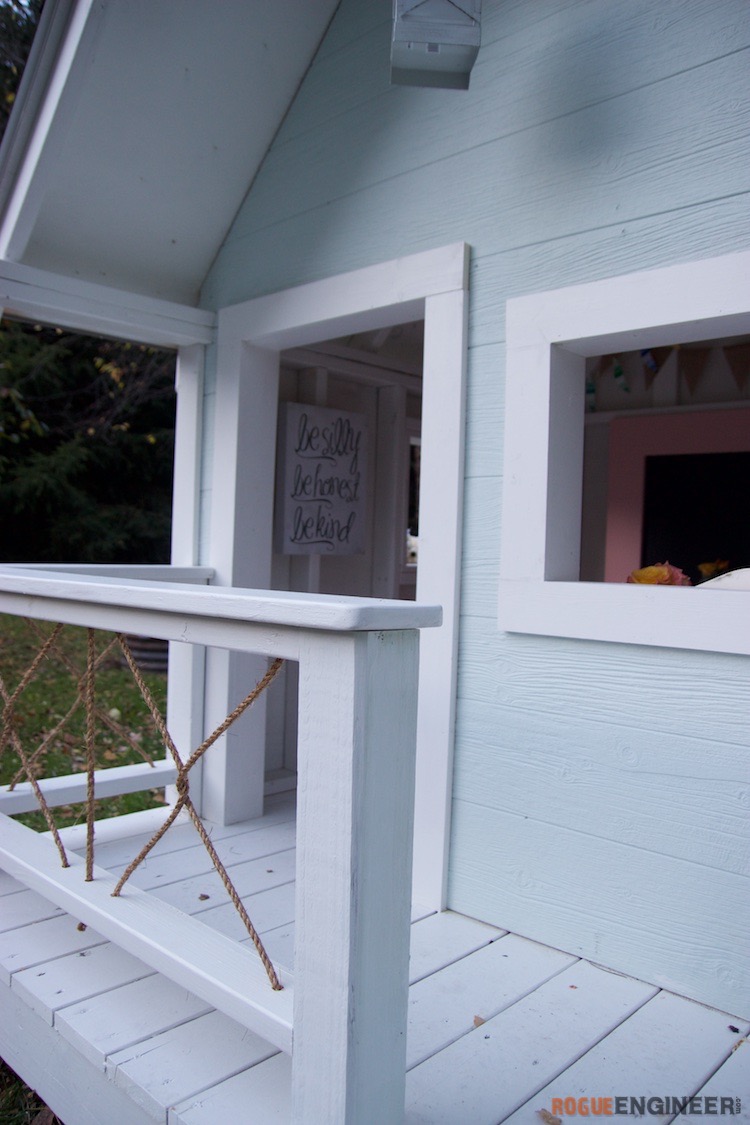
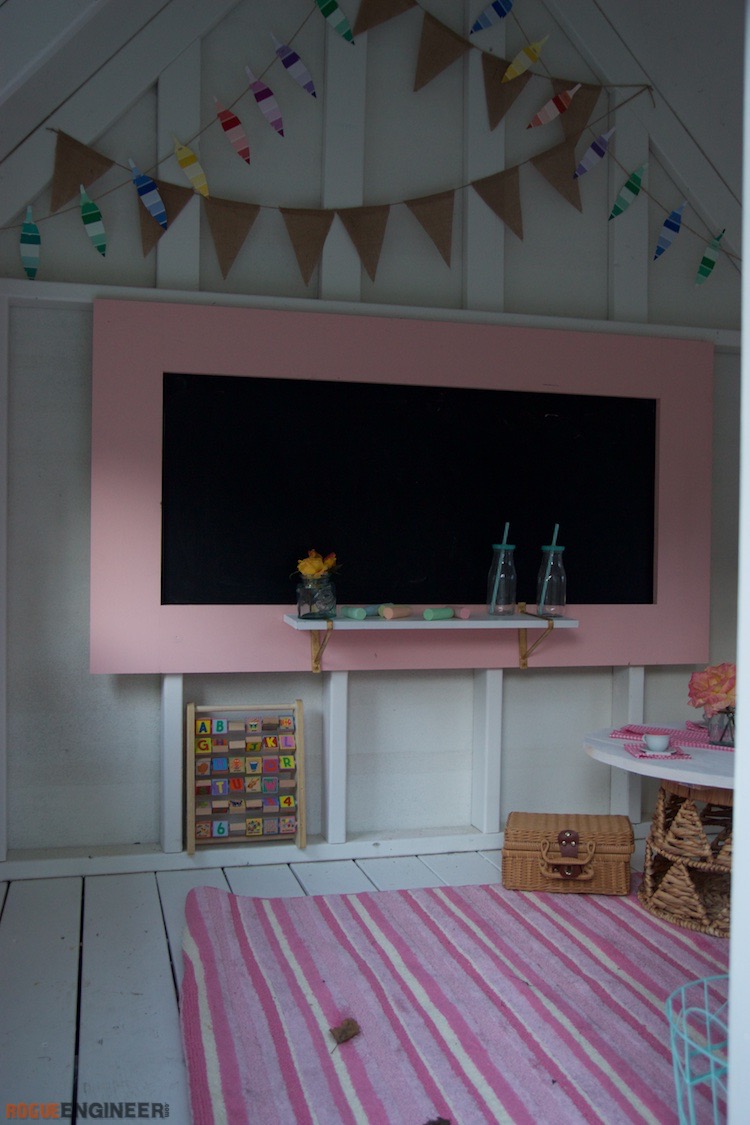
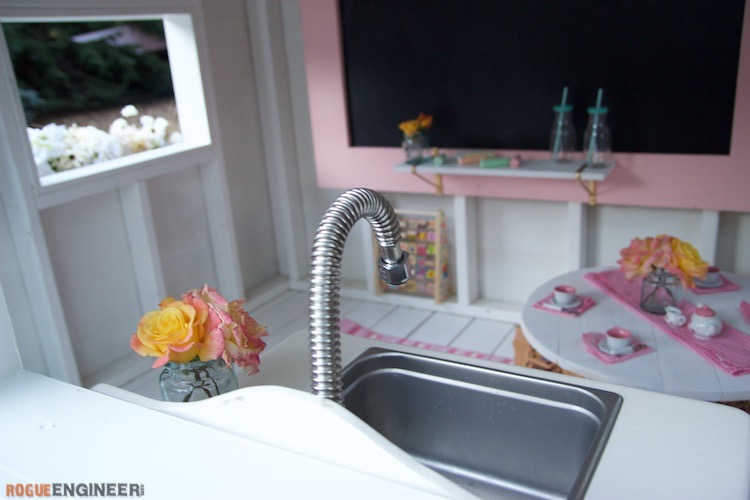
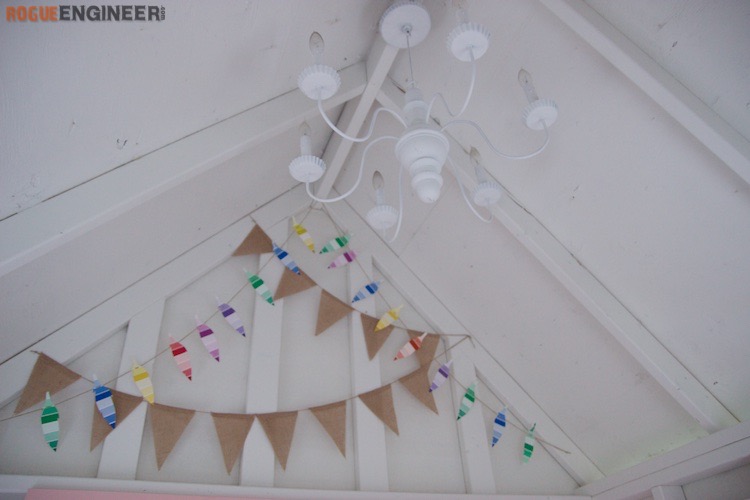
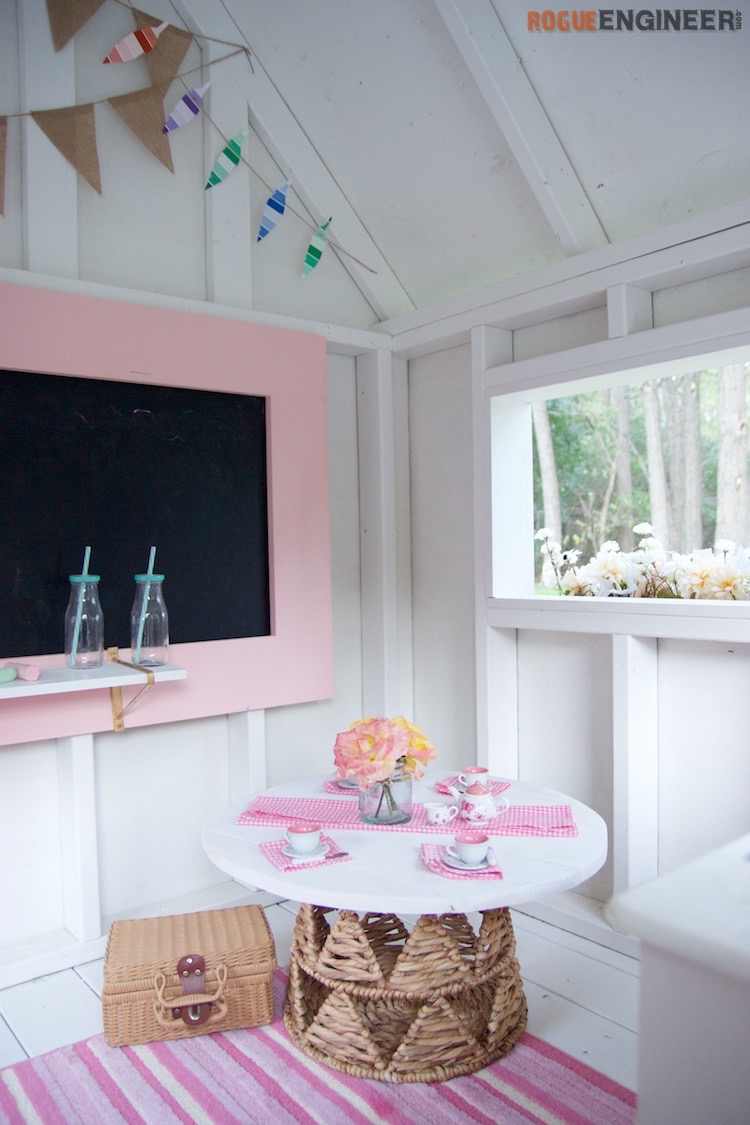
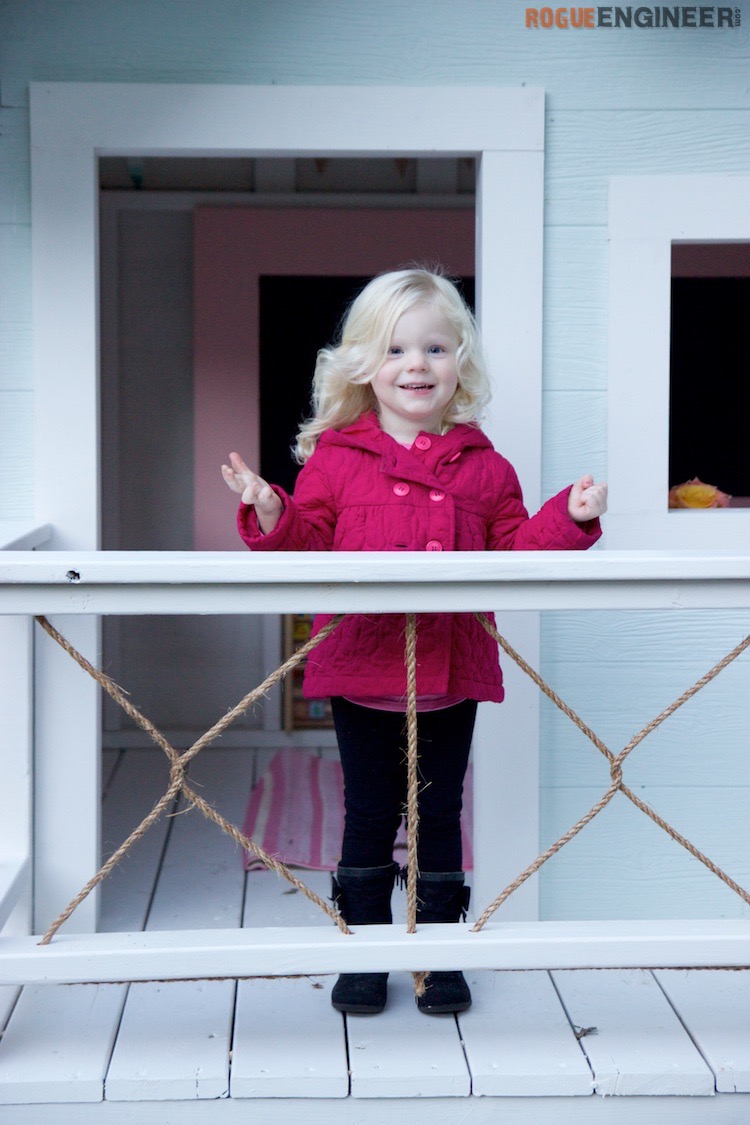
Every little girl needs a playhouse. My wife Jamie has talked about her childhood playhouse and I’ve always wanted to give my daughter Madison the opportunity to have those same memories. When I was designing this playhouse I wanted to make it durable and easy to transport. Well, as easy as a playhouse could be to transport. Keeping those things in mind, I still wanted it to be cute for our little girl but not too girly so that our little boy could play in it too.
While the design of the playhouse was a big deal to us, so was the color and exterior paint. Not only do we love the colors that we chose for this project, it is great knowing that PPG’s Manor Hall Exterior Paint will protect our playhouse for years to come. And it helps that it’s dirt resistant. To see more about the planning for this playhouse check out our planning post. On to the plans!
For sneak peeks of our upcoming projects be sure to follow me on Facebook and Instagram. Also, follow me on Pinterest to get tons of projects plans from all around the web!
Disclosure: This post was sponsored by PPG. Brands like this help to keep this content free for all. Please show some love and support these brands in return.
Time to Complete
2 Wknds
Estimated Cost
~$800
Skill Level
Advanced
Required Tools
- Pocket Hole Jig (Optional)
- Drill
Materials
- Qty 3 – 19/32” x 4’ x 8’ Sheathing
- Qty 6 – 3/8” x 4’ x 8’ Exterior Paneling
- Qty 16 – 5/4 x 6 x 8’ Decking Boards
- Qty 3 – 4 x 4 x 8’ Pressure Treated Posts
- Qty 10 – 2 x 6 x 8’ Pressure Treated Lumber
- Qty 35 – 2 x 4 x 8’ Premium Studs
- Trim
- Qty 9 – 1 x 4 x 8’ Common Boards
- Qty 5 – 1 x 5 x 8’ Common Boards
- Qty 5 – 1/2” Drip Cap (10’ long)
- Roofing Material for about 100 sq ft
- 4 Bundles – 3 Tab Shingles
- 1 Roll – Tar Paper
- Staples
- Roofing Nails
- 3” Exterior Wood Screws
- 1-1/4” Exterior Wood Screws
- Wood Glue
- Trim nails
- PPG Paints Manor Hall Exterior Paint
- Exterior Color – SEA PEARL PPG1136‑1 (Flat)
- Trim Color – GYPSUM PPG1006‑1 (Satin)
- Accent Color – SILVER STRAWBERRY PPG1187‑3 (Flat)
Disclosure: The links provided in the “materials” and “required tools” sections are affiliate links. If you would like to support our site and help keep our content free come find out more about how we can make money with no extra cost to you.
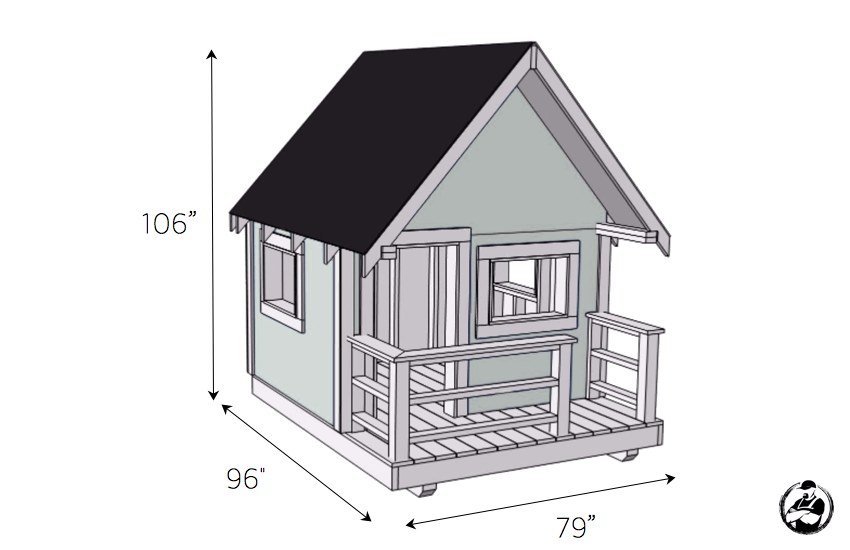
Dimensions
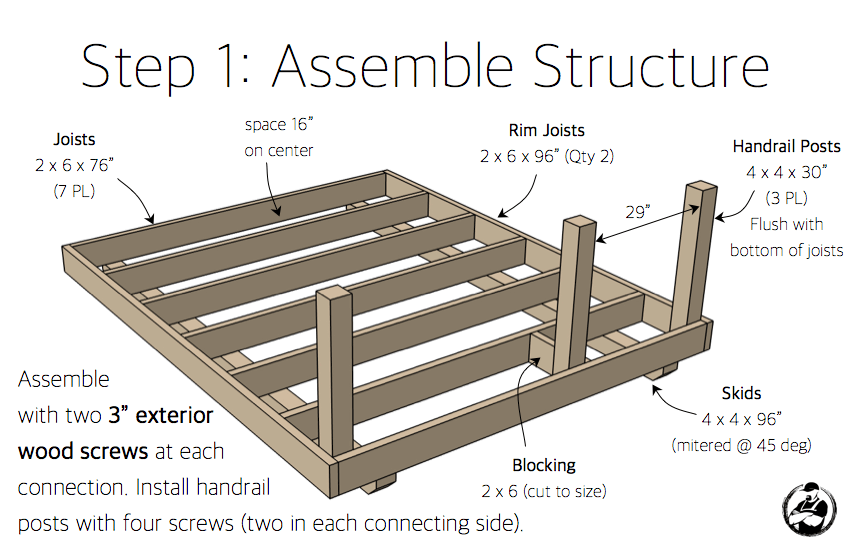
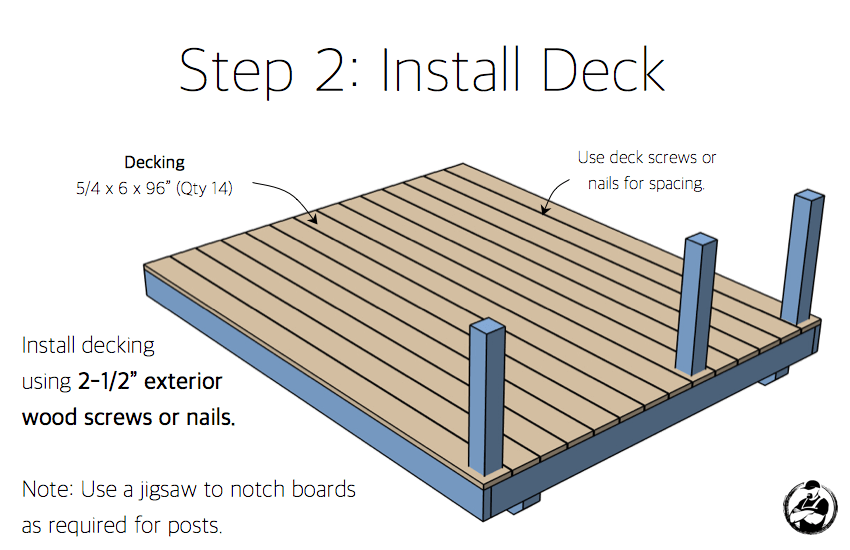
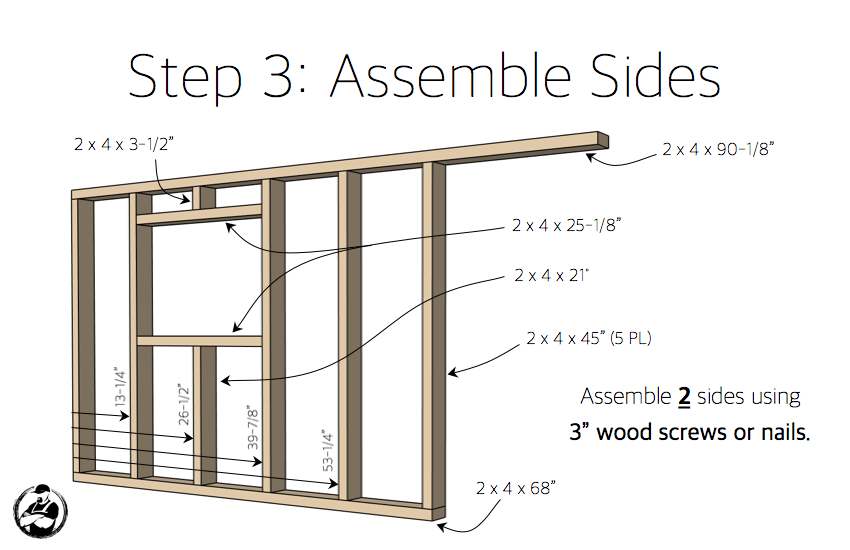
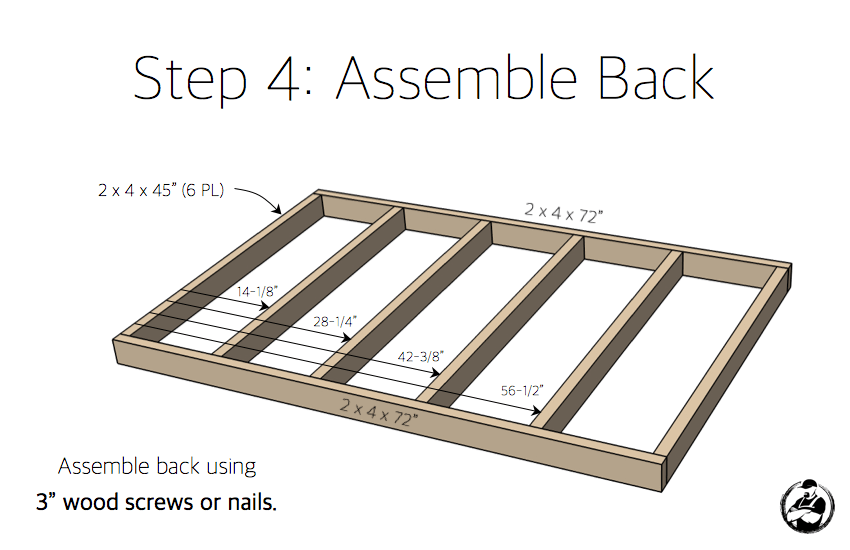
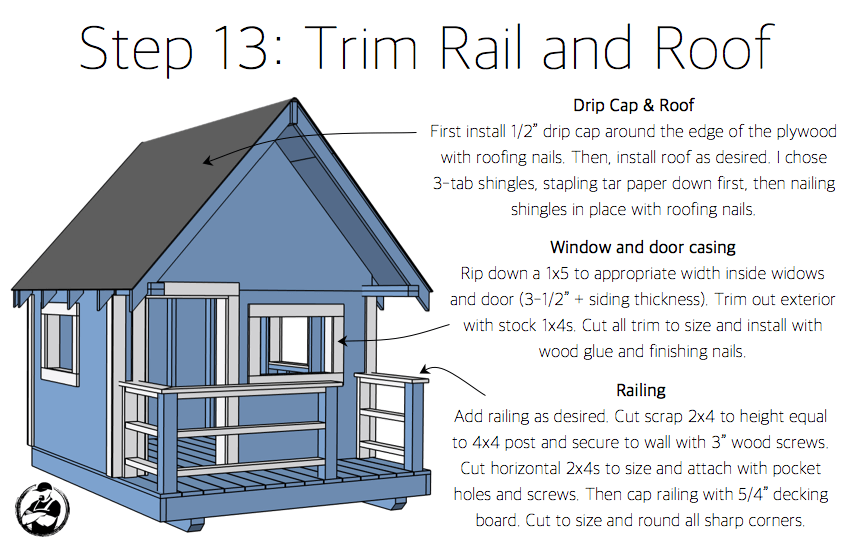
Paint and Transform!
With all that building out of the way now we can paint and transform this dull structure into an amazing playhouse for our kids. We went with PPG Paints Manor Hall Exterior paint for superior durability.
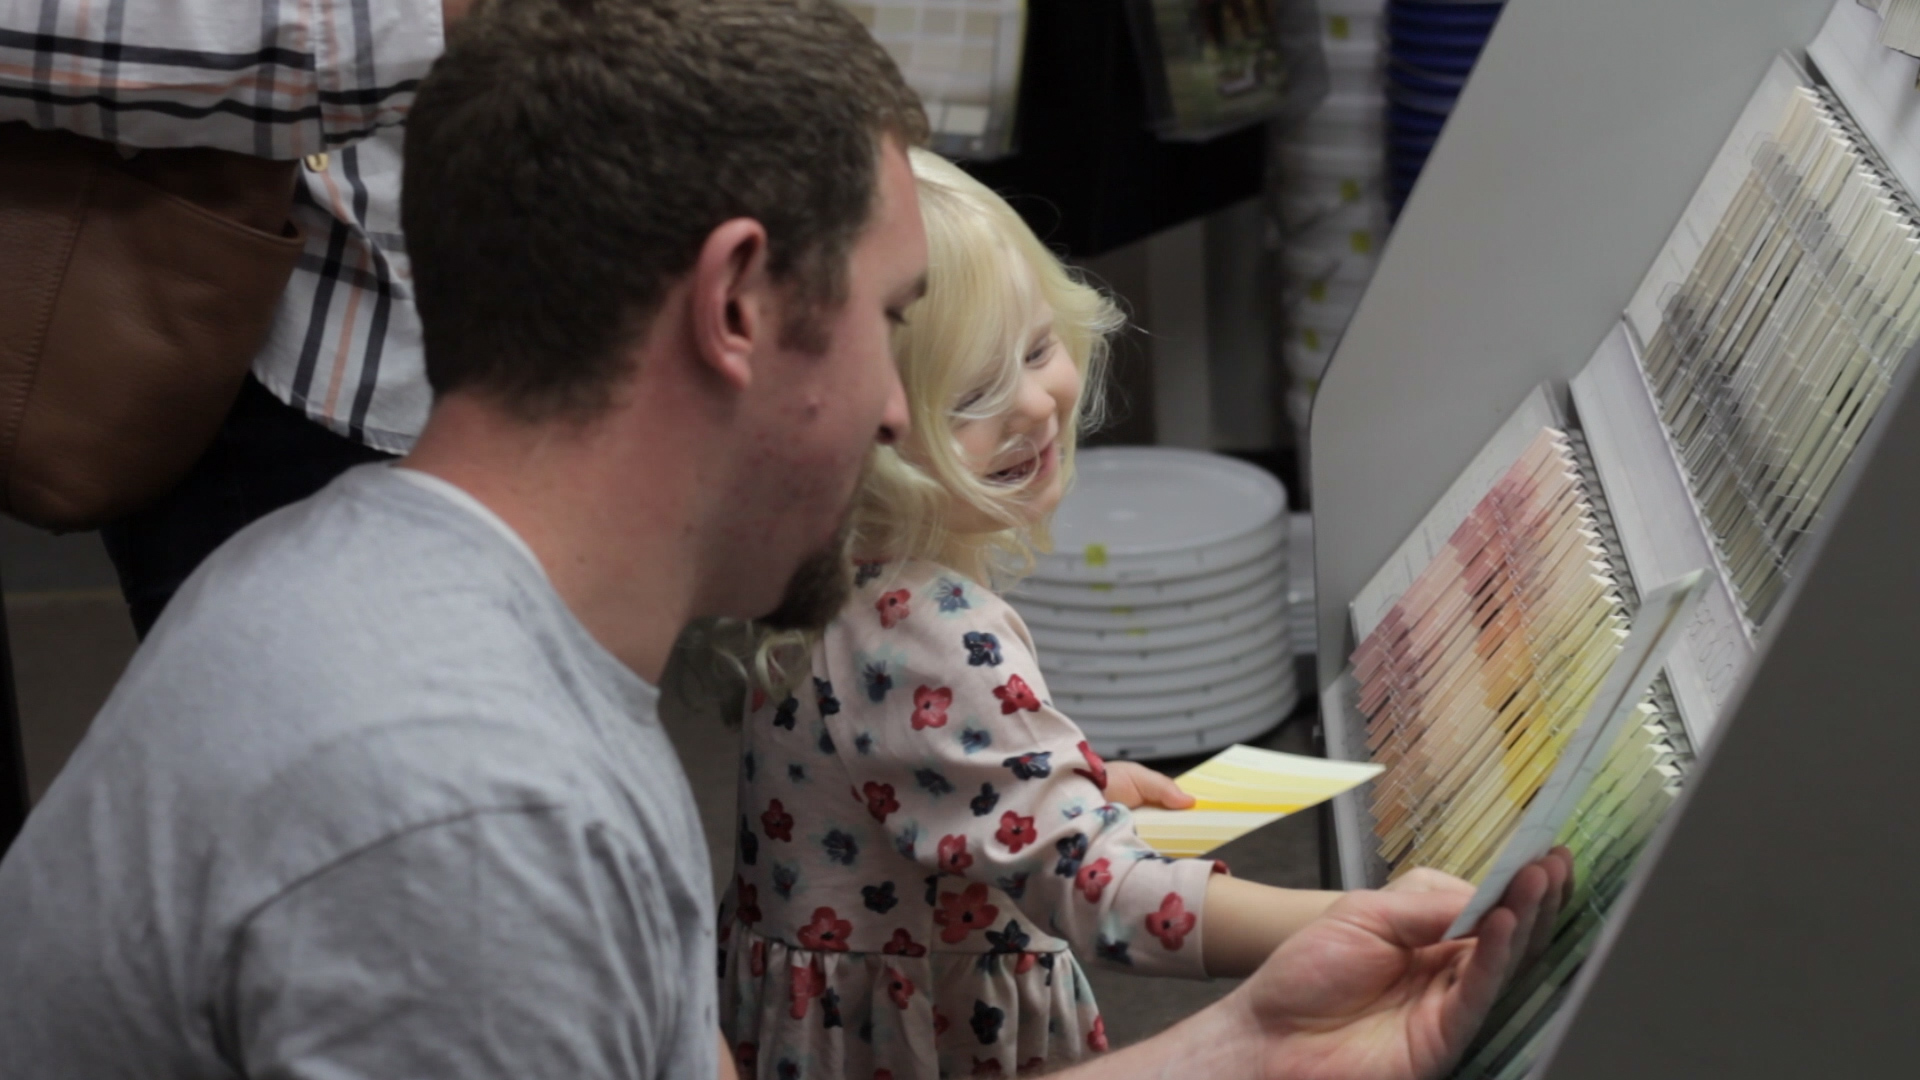
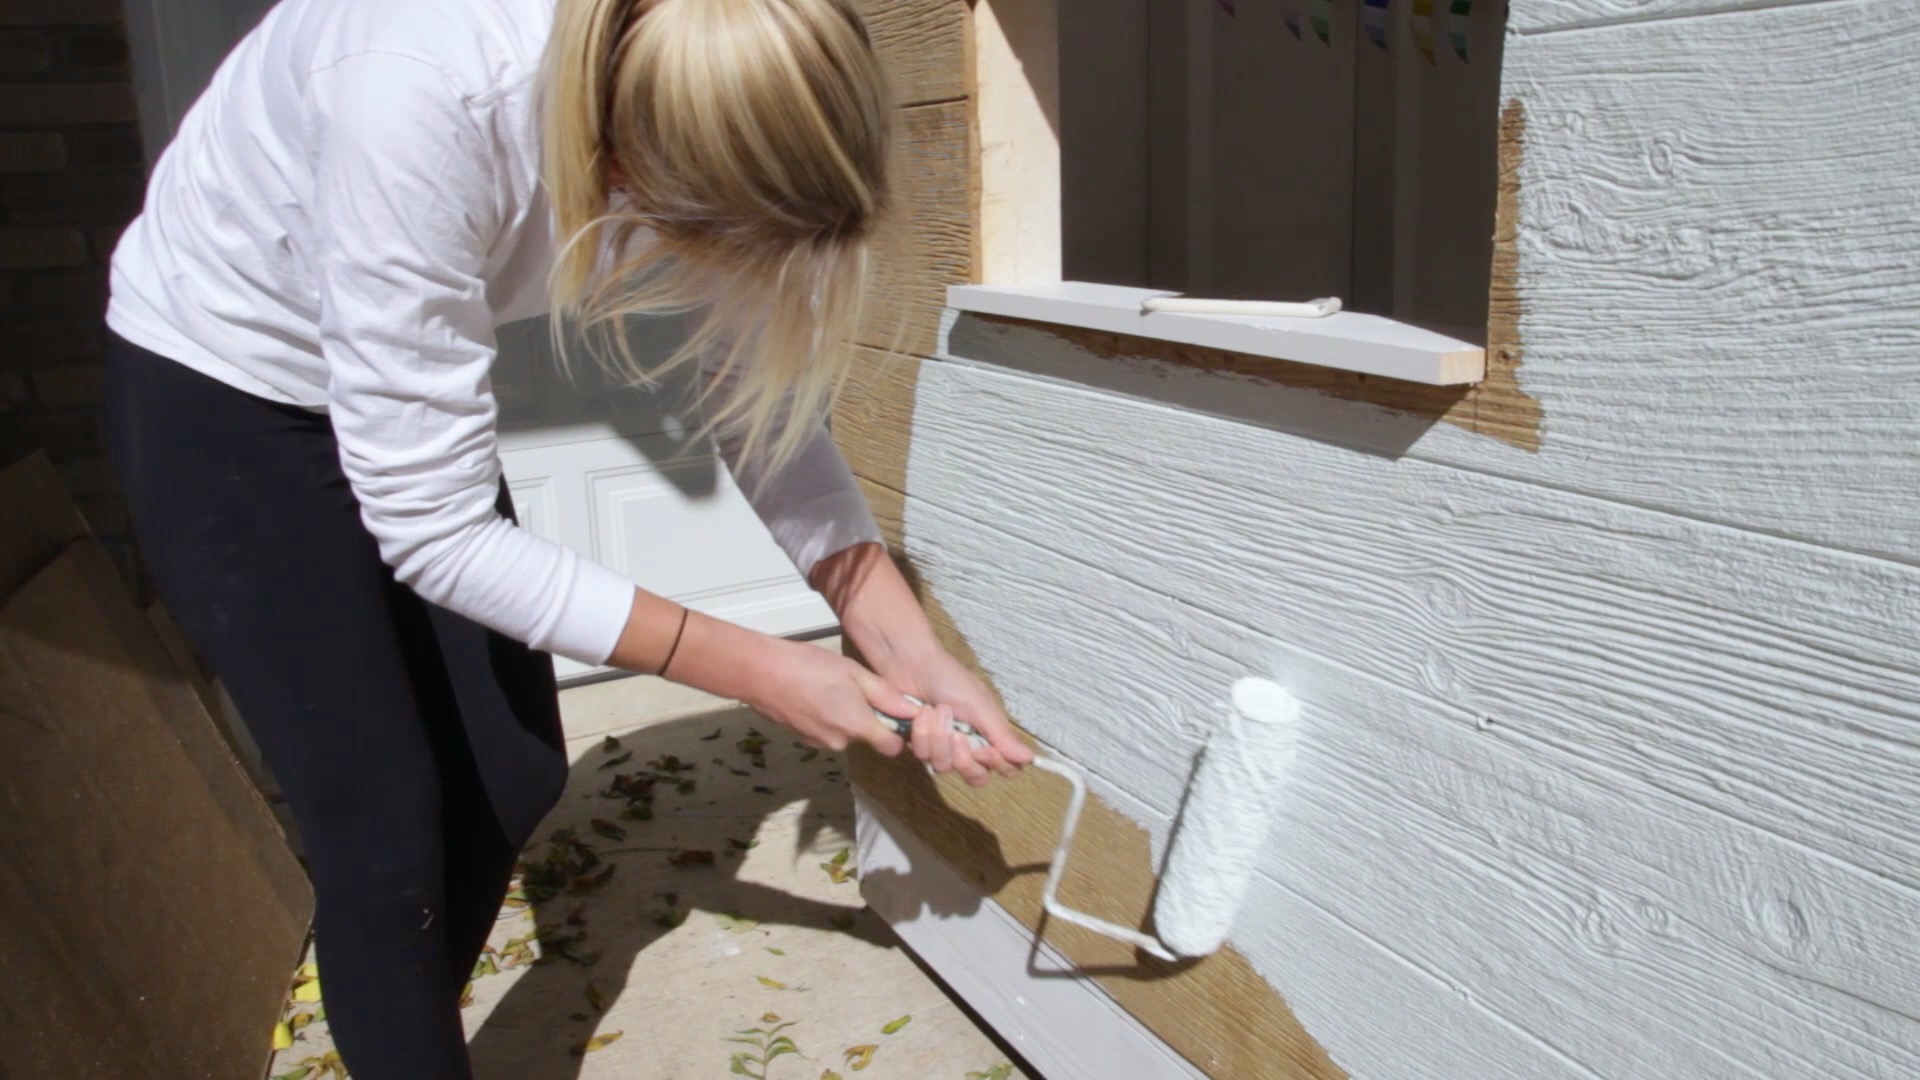
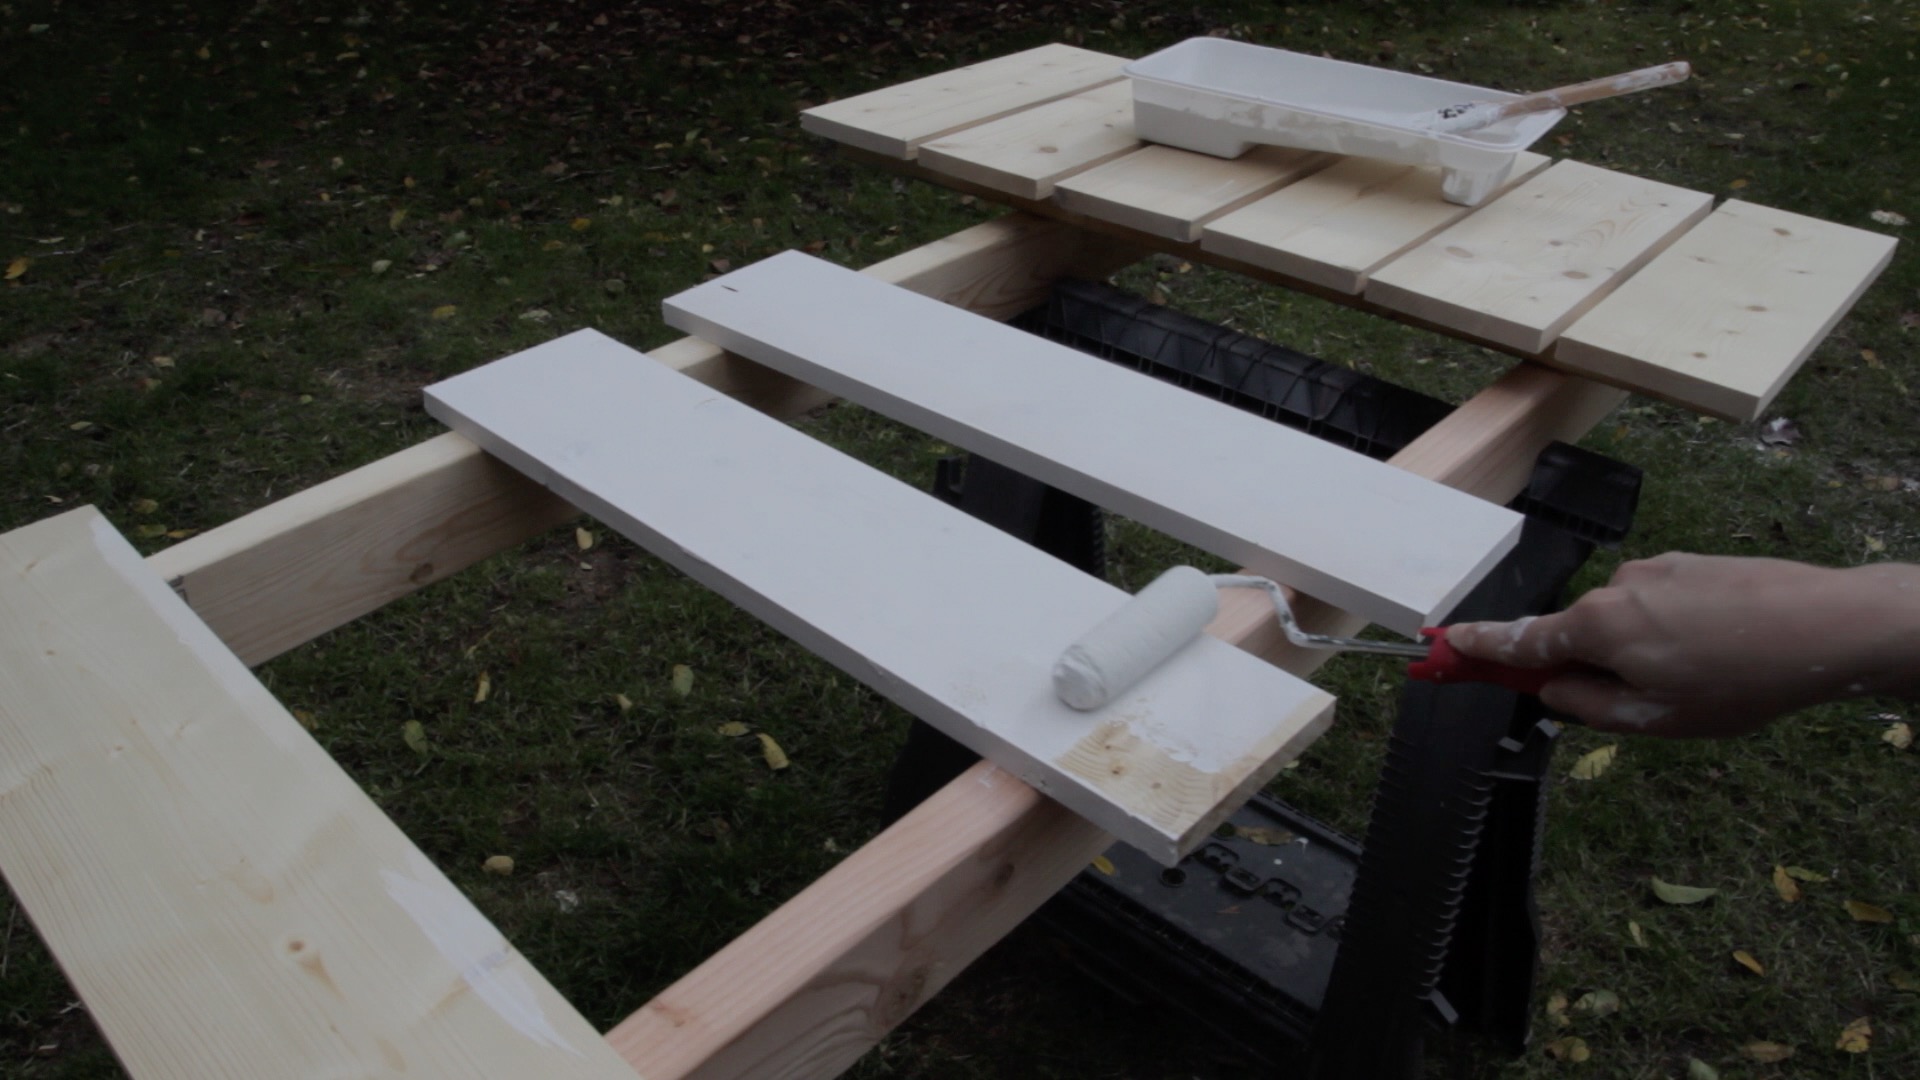
With the paint colors picked out it was time to get started painting. We started with the interior and floor paint first in which we painted with the Gypsum color. Then we painted the exterior with a nice subtle aqua color called Sea Pearl. Finally, we painted the Chalkboard and the flower boxes with the color Silver Strawberry.
Questions? Comments?
As always, if you have any questions don’t hesitate to comment below and especially don’t forget to post pictures of your finished products in the comments! ENJOY!
How much did this cost? Awesome job on this Jamison! We are SO doing this!!!
Thanks James! I estimate the cost to be around $800.
Great video, cool project. Would this work well as a tree house plan? It seems a little heavy. How would you lighten the load?
I think it would depend on the tree. It is fairly heavy, but I’m not sure where you could really cut out any material.
This turned out adorable! And she looks so happy to be in her new playhouse. Nicely done!
Thanks Brittany!
Awesome Build Guy’s!! Great Job.
Thanks!
Yup i love it too but when i saw the cost of materials …i wigged out…I did not imagine it would cost that much but hey what do i know…i love it none the less…it will make a lot of little girls happy out there…
Thanks Eva. Yea the price of playhouses are pretty staggering. For a small plastic one you may be able to get away with a few hundred for a wooden one that’s built to last and this size, you could be anywhere from a grand and up.
Great job! I love your plans, not too many steps and very straightfarward. What software do you use?
Love the playhouse! On my list to build once the spring comes 🙂 Any chance you’re going to detail out the inside build too?
I used the left over lumber from a construction site near my house. Took me 5 days and 40 hours do this job solo. My girls love it. I modified the roof right to 6′ due to HOA.
Thanks for your plan!
Hello hopefully you can help me out here. I’ve been wanting 5o build my daughter’s a play house for a while now and I came across this one you guys have and love the look of it. So I’m somewhat new to DIY and not to sure about products to buy and the cheapest route. I’ve got most things at decent price except the decking board which for some reason I can only find that measurement at home depot for the 16 for about 450 and is kind of pricy wanting to know if there might be a cheaper route on that, hell I might even be looking wrong but I’d greatly appreciate it if you can help me out
So I’m building this for my daughter for Christmas hopefully it get done by then but here’s my progress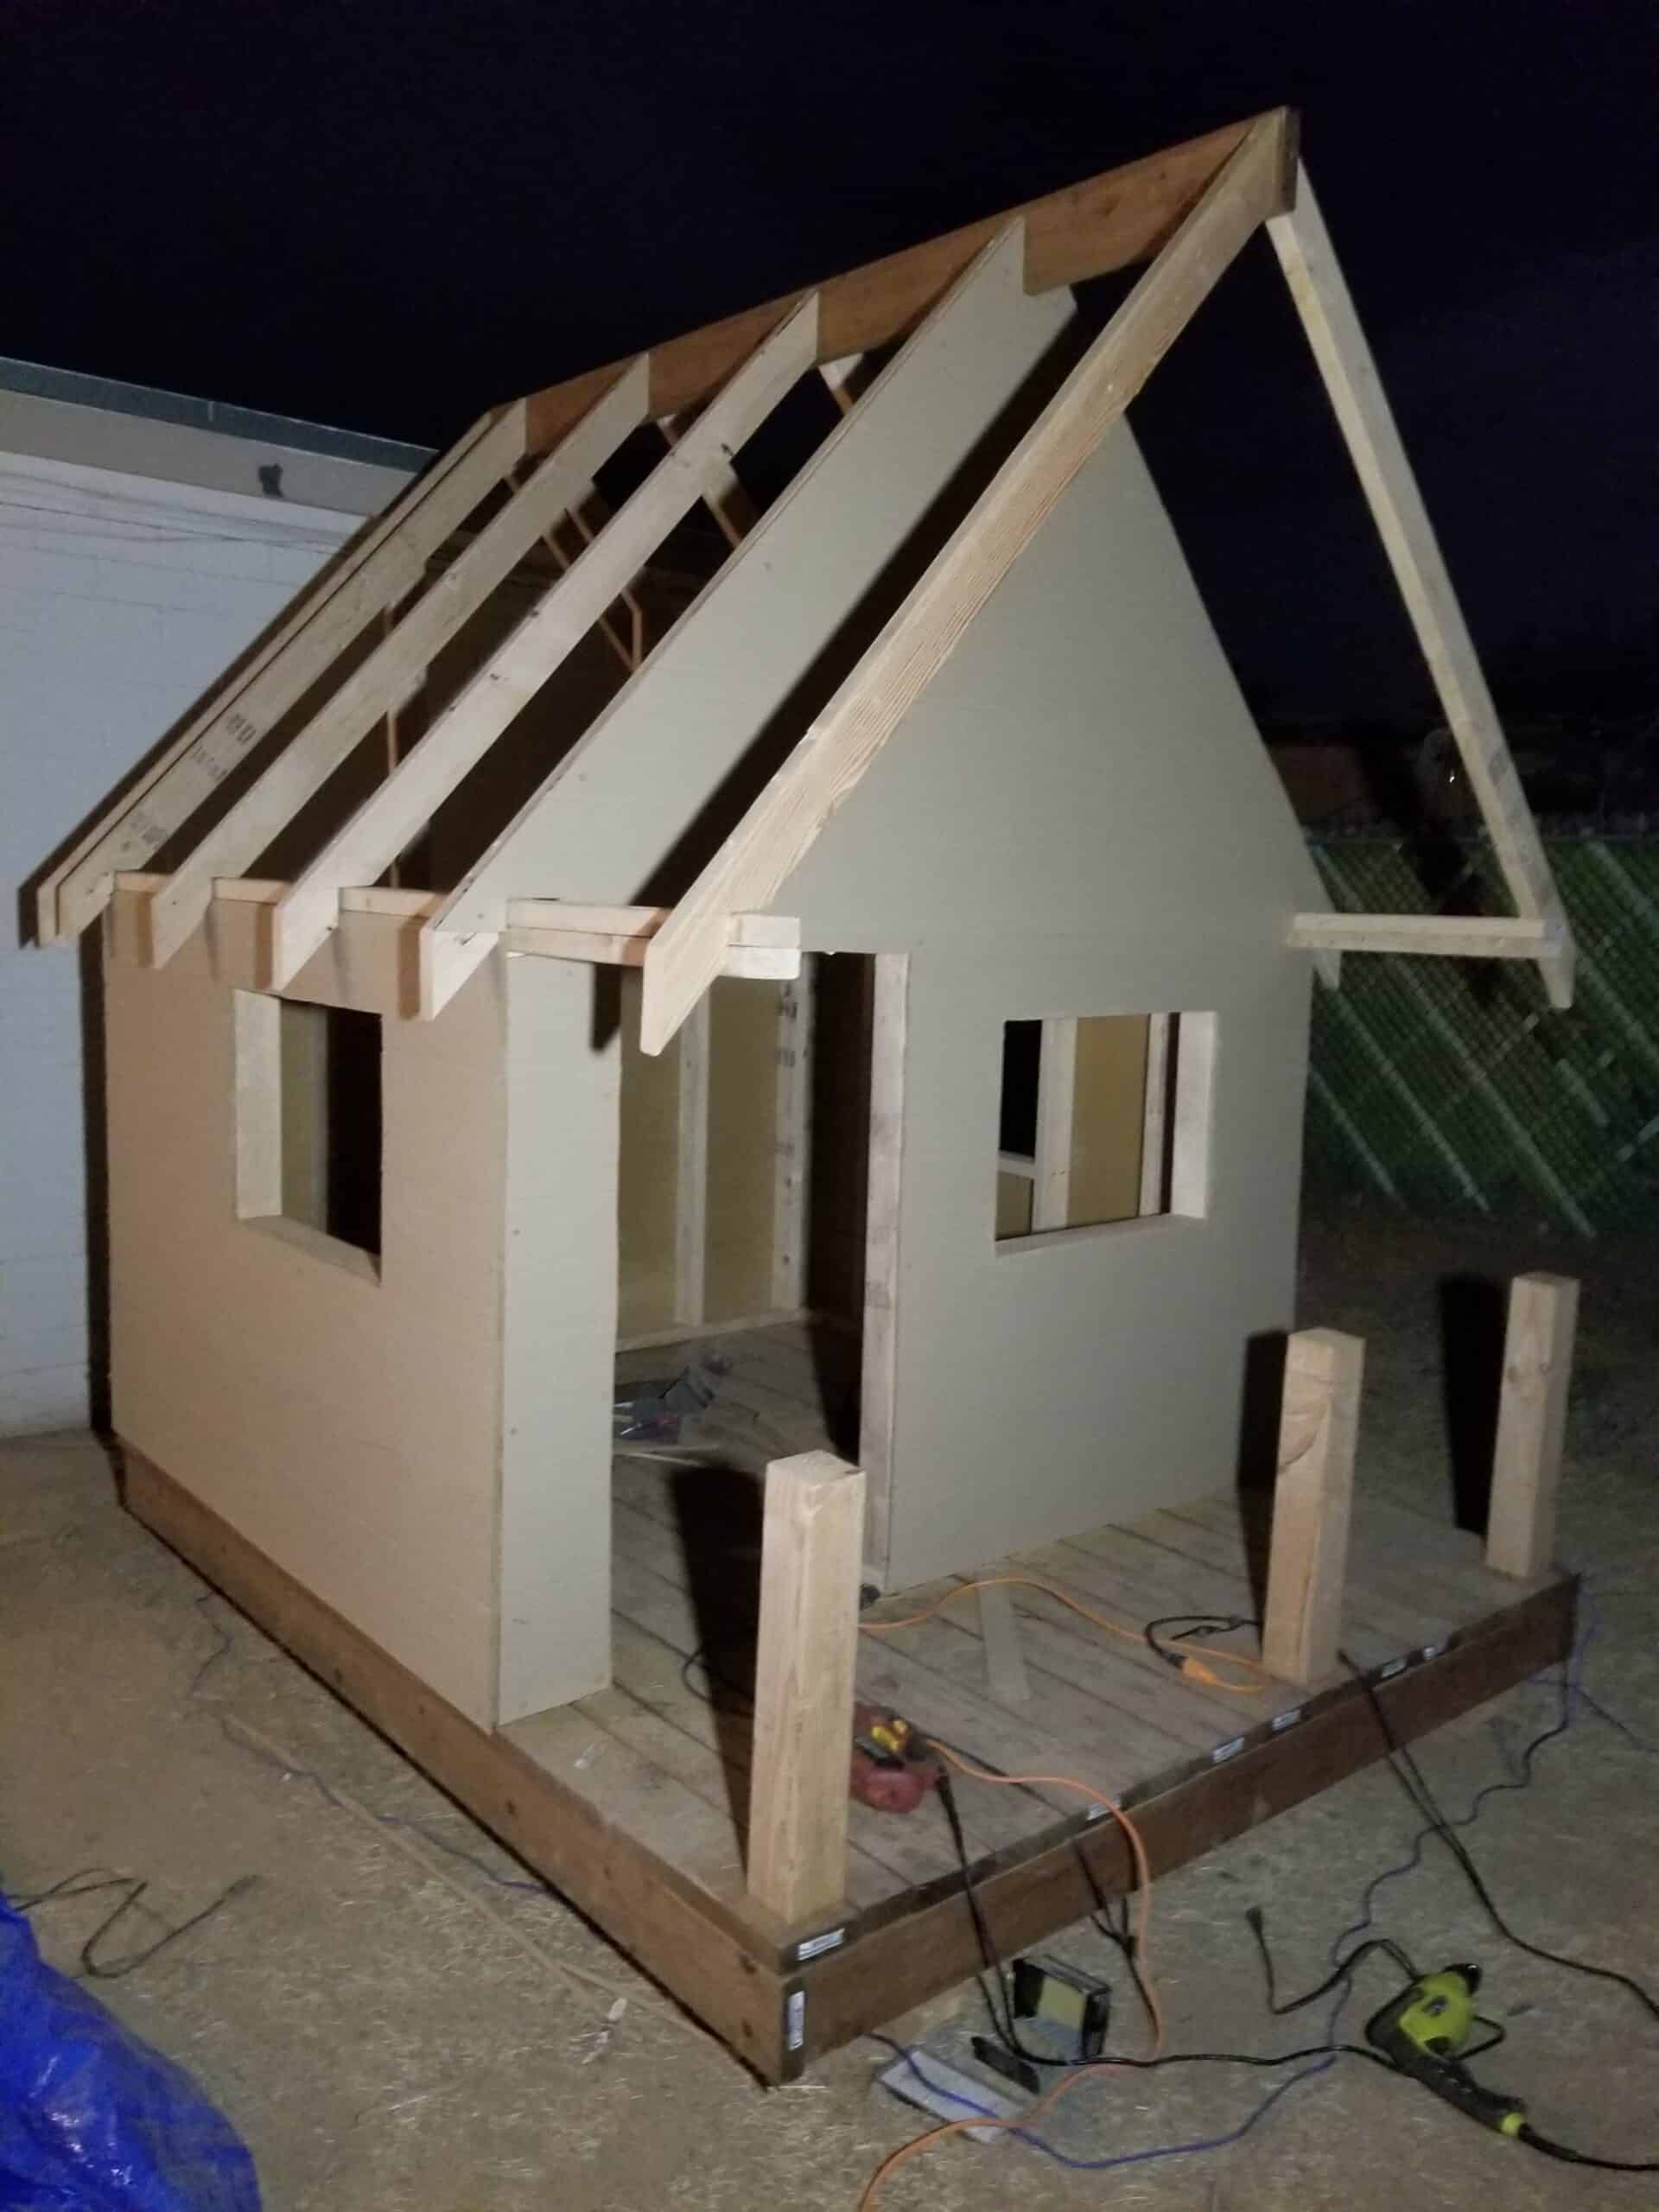
That is so cool! I’m sure she’ll be one happy girl! I’d love to see it finished so make to to post a pic when you do
Here it is just finished in time for christmas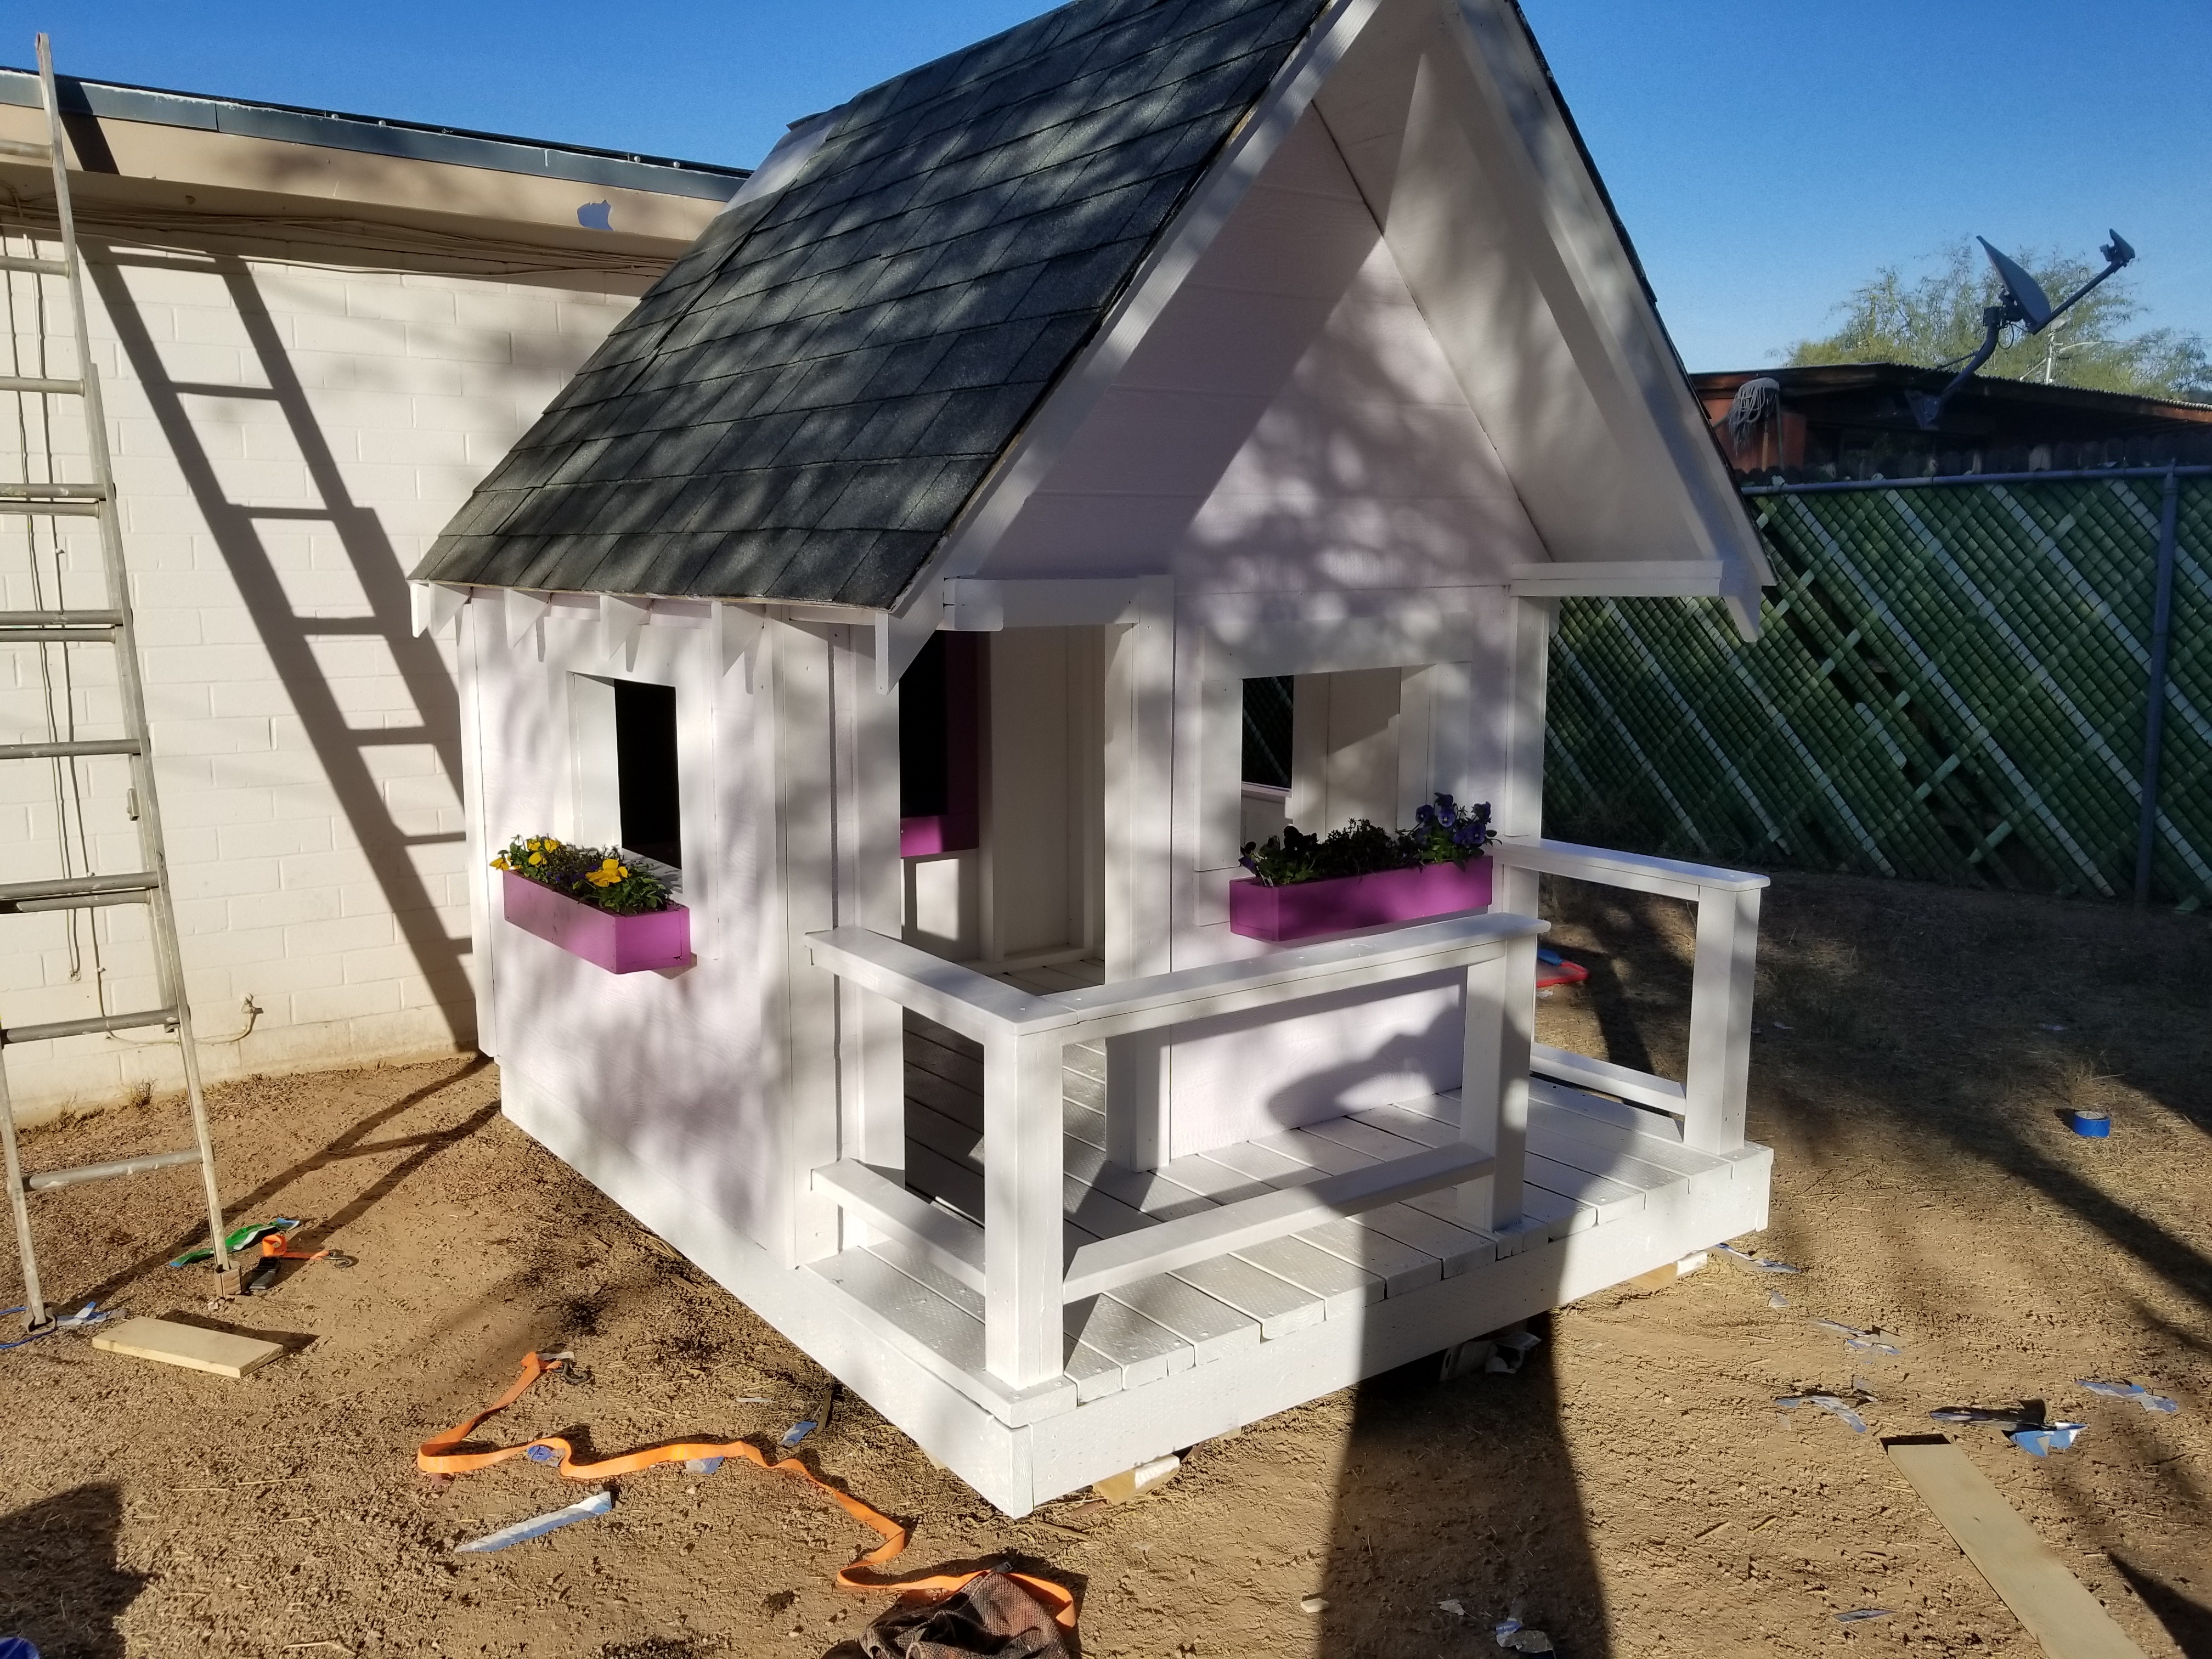
It looks so good!! I bet she was excited <3
So I am putting this on 4×4 posts 6 feet in the air, above a sandbox. Posts are in the ground with 18″ in concrete.
Any thoughts on issues with weight on top? So far I built it pretty well to to the design but a few inches narrower.
Looks like it works so far!
Great job…
Apparently you don’t have concerns from high winds… Is this just sitting on the ground or is it anchored (if anchored please describe)… Thanks… Again job well done…
Adding a slide to one end as well. Will post the final pic.
I am thinking the concrete, sandbox, and assist with the wind. But I don’t think I would want my kids in it during a severe thunderstorm.
Great job…Apparently you don’t have concerns from high winds… Is this just sitting on the ground or is it anchored (if anchored please describe)… Thanks… Again job well done… Just read further down… You anchored it… Thanks…
Question…what would be the weight of the playhouse completed?
What would be the weight of the Playhouse when completed
Hi and greetings from UK.
Would CLS TIMBER (T)38MM (W)63MM work instead of 2 in. x 4 in you have used. Mega thanks
Julian
Thank you so much for the plans, video and step by step instructions! We have just completed our playhouse and it looks great! The girls love it and it is just perfect for them to play in. Love from Holland, Sarah and Erwin Schuiling https://uploads.disquscdn.c…
I am building this for my girls. I have made the rafters as directed and it doesn’t fit. Anyone else have this issue. The angle at the ridge plate is off.
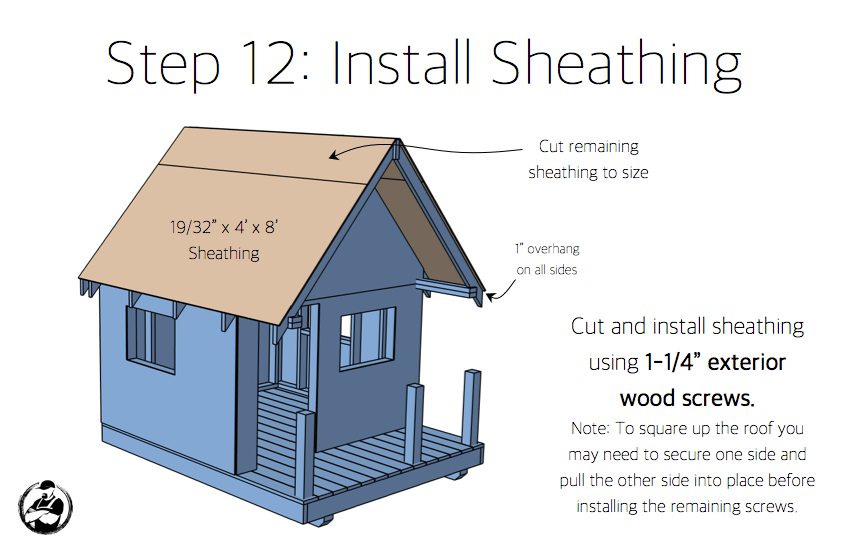
Did you have nails coming through the roof sheathing on the inside? I don’t want any nails coming through that my daughters could hit their heads or cut their hands on. Should I double up on the plywood?
Hi Jamison. Just want to thank you for all plans. After some mistakes and adaptation… it’s done! Including electric installation for lights and fan. My both daughter love it! Thank you from Brazil! https://uploads.disquscdn.c…
https://uploads.disquscdn.c… https://uploads.disquscdn.c…
Olá William. Também sou do Brasil e estou iniciando a construção dessa casinha. Estou com dificuldades em obter alguns materiais. O fechamento das paredes você fez com divisória de pinus? Qual a largura? O telhado você encontrou para vender onde? Qual o material? Obrigado.
Oi Lucas! Boa tarde. A lateral fiz com forro de Pinus. Se não me engano a largura padrão é de 9cm. Não é lá ideal mas é barato. Outra opção seria um produto da LP Brasil, o lP siding, mas um absorto o valor. Telhado o mesmo revendedor de LP Brasil vende, mas eu comprei na Leroy Merlin. Procure por telhado shingle. Tem varias modelos e cores. Qq coisa me mande um e-mail. williansgoncalves @hotmail.com
Lucas/Williams, tudo bem? Eu vou fazer para minha filha aqui no Brasil tb. Alguma outra dica importante de adaptação de material que vcs teriam para me passar? Obrigado.
Hi Jamison, Is it possible to make this wider or taller without worrying too much about major changes in the design?
I stuck with the general plans of the house, but I made some modifications to the dimensions to accommodate my needs. I decided not to make the porch, opting for more interior space. I also added a dutch door and a storage bench for the inside. We just needs some cushions for the seats and for her to decorate the inside the way she wants. My daughter loves it! Thanks for the plans Jamison!https://uploads.disquscdn.c… https://uploads.disquscdn.c… https://uploads.disquscdn.c… https://uploads.disquscdn.c…
That looks awesome! Thanks for sharing!
https://uploads.disquscdn.c…
https://uploads.disquscdn.c…
Excelente Álvaro. Parabens! Vc é brasileiro? Posso tirar uma dúvida? Com que material vc forrou as paredes? Abraço!
https://uploads.disquscdn.c… Hola yo soy de Chile yo use Osb Smart Panel https://www.sodimac.cl/sodimac-cl/product/238376/osb-smart-side-panel-ranurado-111-mm-122-x-244-cm
A situation has arisen since you completed this lovely playhouse. The issue of mosquito born illness.
Perhaps you could design, after compatible Screened windows and a screened door. She could spend many hours in her safe playhouse, without repeatedly dousing herself in chemical bug repellents or even forgetting to do so. The old fashioned screened windows hung on hooks above the windows should be sufficient. A sturdy screened door she can use while playing alone, would protect her from wildlife and unknown animals, as well.
Does anyone possibly have roundabout price of what this would cost me? Mommas building on a budget 🤣🤦♀️🤷♀️
What was the cost to build this?
Your plans were so easy to follow! We were able to use a lot of recycled decking boards and decided to switch the layout of the deck and added a steel roof. My daughter loves it. Thank you!!https://uploads.disquscdn.c…
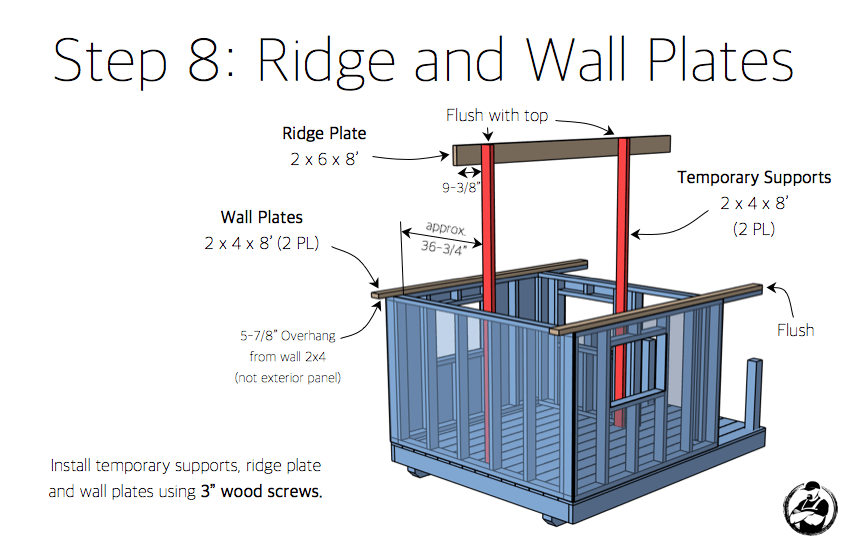
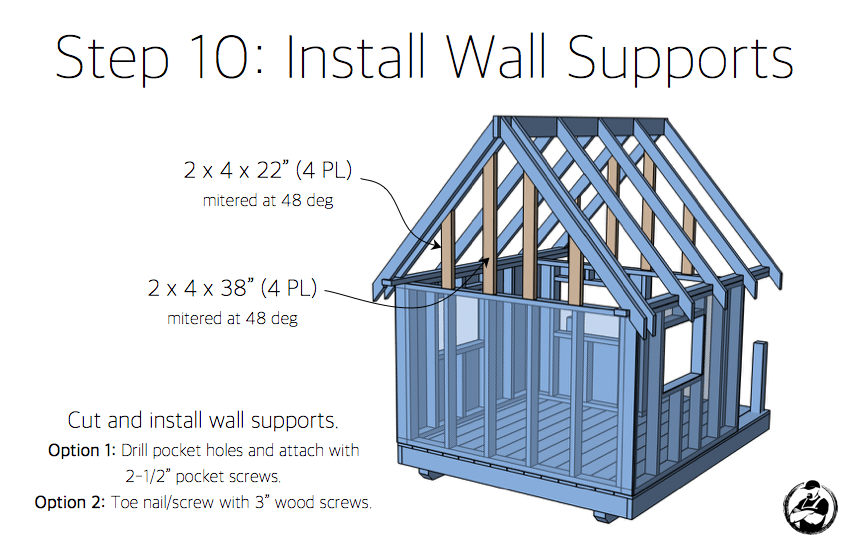
Hello friend, I am writing to you from Argentina. I am building the playhouse for my son and the project is really excellent. It is not clear to me the length of the temporary supports and the wall plates, could you tell me? because I don’t think they are 8 “. Thank you very much
Hi another one from Brazil, want to thank Jaminson for the plans, make some adptations as well, (my daughter want more windows) and had a good time with my family during the quarantine.
https://www.youtube.com/wat…
https://uploads.disquscdn.c…Almost done mine…. 2000.00 later, but it’s worth it, i’ve learnt a lot from it… thx Rogue.
https://uploads.disquscdn.c…
Used your plans to make this. Modified the dimensions a bit. Thank you for the starthttps://uploads.disquscdn.c…
Thank you so much for this video & the plans. I used this video as a guide to build a playhouse for my kids last Summer and they love it. I made a few alterations to mine. What an enjoyable project this was! https://uploads.disquscdn.c…
Hi!
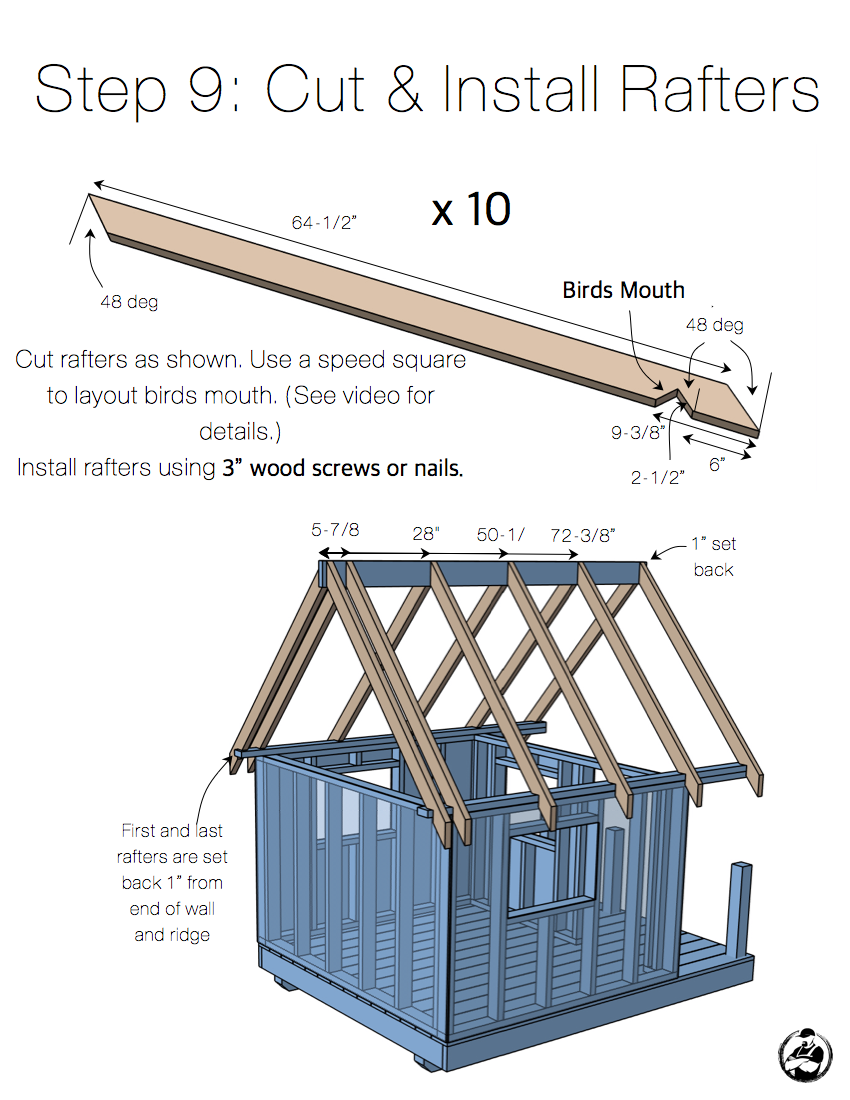
Attempting this build, and struggling with the rafters. Blueprints show the rafters being 64 1/2″ but is that measuring from long point to long point, (i.e. total length) or from long point to short point, as measuring along the top of the rafter from the ridge board to the top side of the tail cut?