
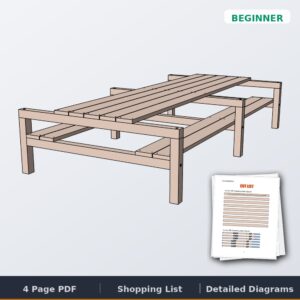
Small Parts Organizer
While our new workshop is under construction I wanted to take the time to come up with a small parts organizing solution. After receiving the Husky interlocking small parts organizers in a recent My Prospective Tool Review shipment, I knew I wanted to build a unit to house them while in the shop. I also wanted this unit to include some easily accessible storage bins for things that I use on a more regular basis like safety glasses, tape measures, pencils, etc. This was a fairly simple unit that I came up with and built from scrap plywood I had around the shop.
If you love this stuff as much as we do, you might want to consider following us on Instagram where we post sneak peeks and behind the scenes stuff in our stories. Also, did you know you can get tons of projects plans from all around the web when you follow us on Facebook and Pinterest!
Disclosure: This project was sponsored by Kreg Tool Company and DAP Products however the design and opinions are 100% my own.


Tools
Materials
- (6) Husky Small Parts Organizers
- (6) Stackable Storage Bins
- 1/4″ x 4′ x 4′ Plywood
- 3/4″ x 4′ x 4′ Plywood
- 1-1/4″ Kreg Pocket Screws (Coarse)
- Wood Glue
Note: The plywood are both half sheets. You may not be able to find this at all lumber yard which means you may need to purchase a full sheet and have them cut it in half for easier handling.
Disclosure: The links provided in the “materials” and “required tools” sections are affiliate links. If you would like to support our site and help keep our content free come find out more about how we can make money with no extra cost to you.
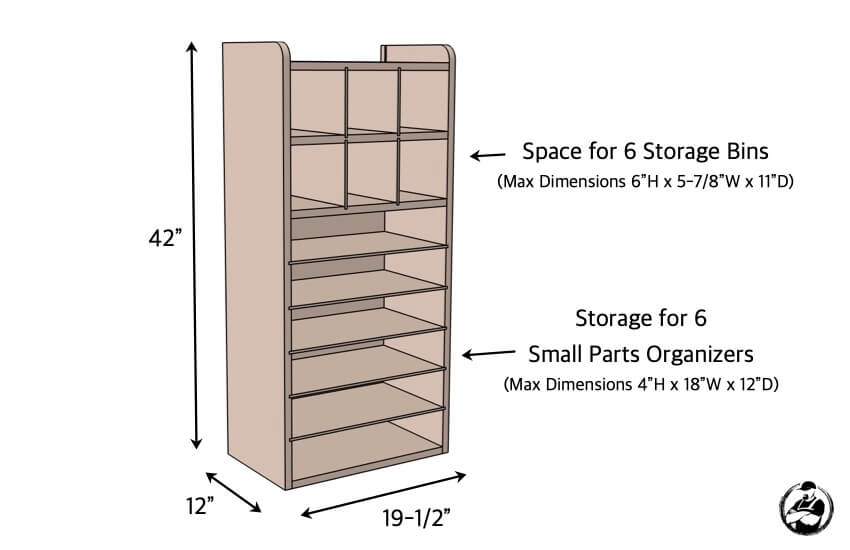
Overall Dimensions
Cut List

In this how-to you will see exactly how to build a small parts organizer that will house 6 Storage Bins, for easy access to regularly used items, and 6 Husky Small Parts Organizers for storing fasteners and other small parts.
Total Time: 1 day
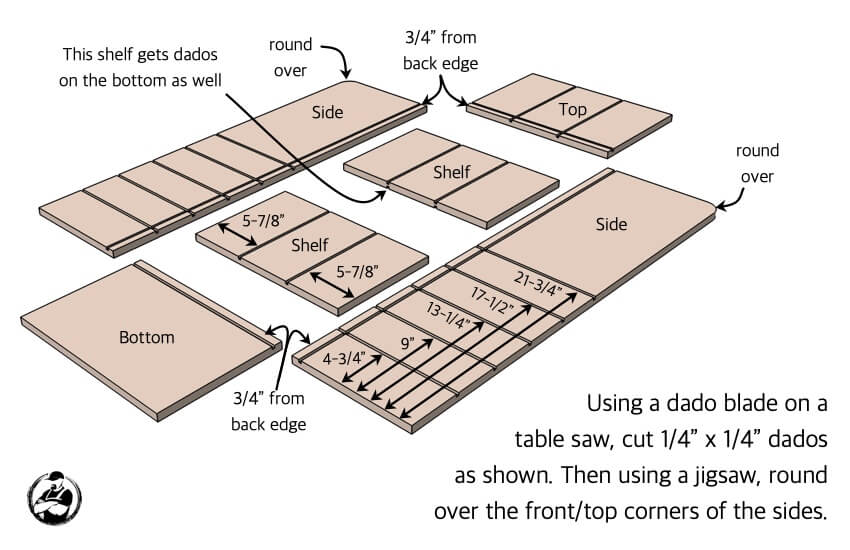
Cutting the Dados
After breaking down the plywood per the cut list, start by layout out all the 3/4″ thick parts as shown. Then, swap out the table saw blade for a blade(s) with a similar thickness to the 1/4″ plywood dividers. Then cut the dados per the diagram below.
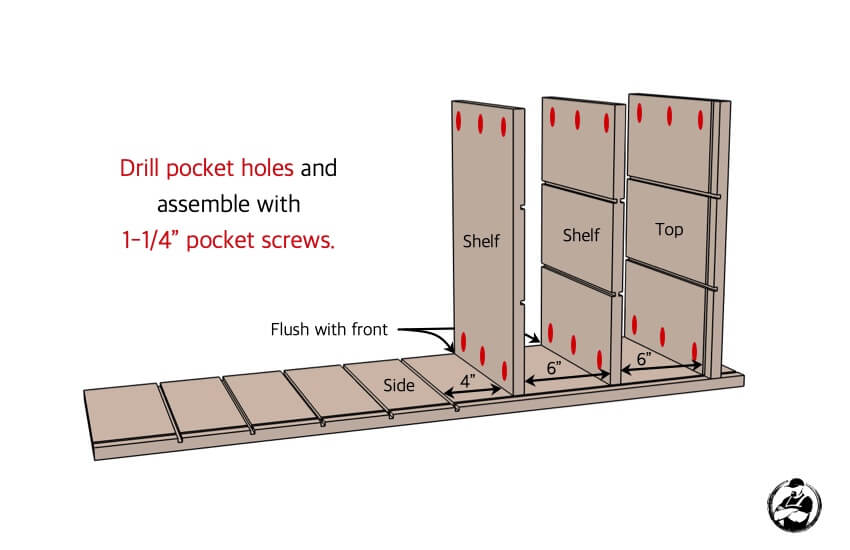
Install Top and Shelves
Per the diagram below, drill the pocket holes and attach the top and shelves to the side, as shown, with 1-1/4″ pocket hole screws.
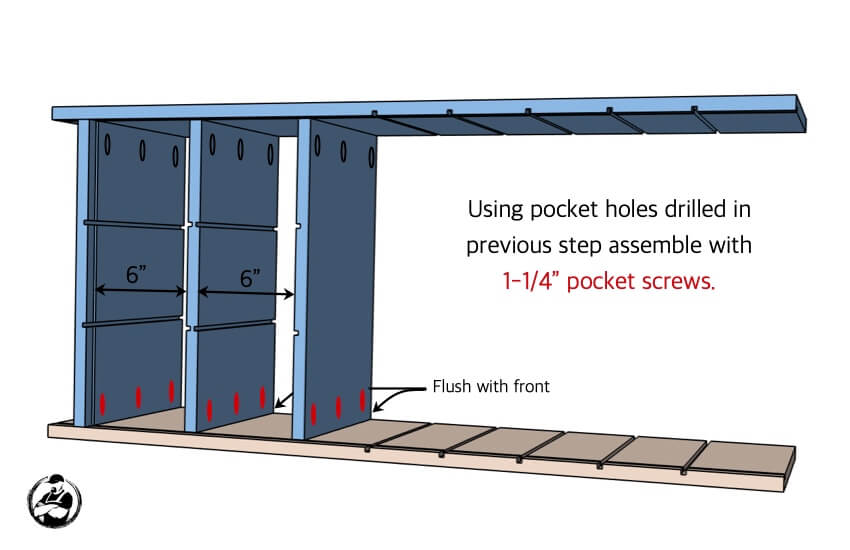
Attach the Other Side
Per the diagram below, use the pocket holes drilled in the last step to attach the other side with 1-1/4″ pocket hole screws.
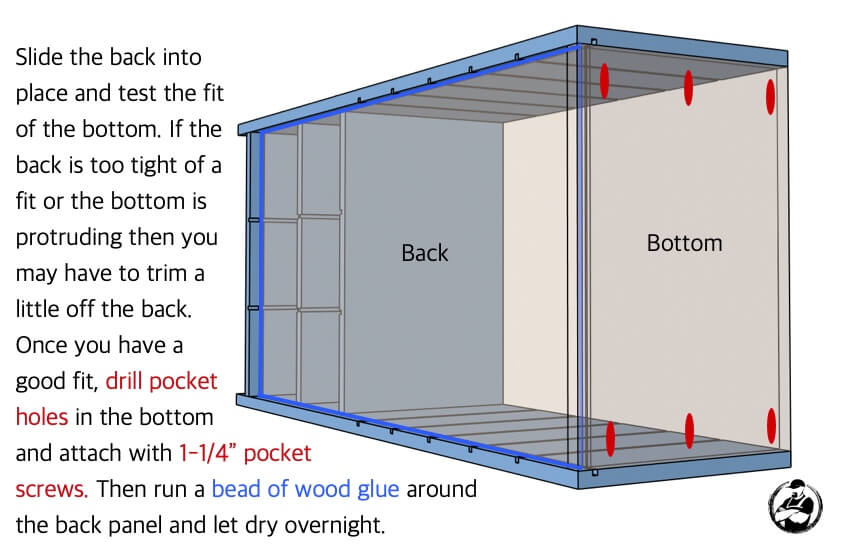
Installing the Back and Bottom
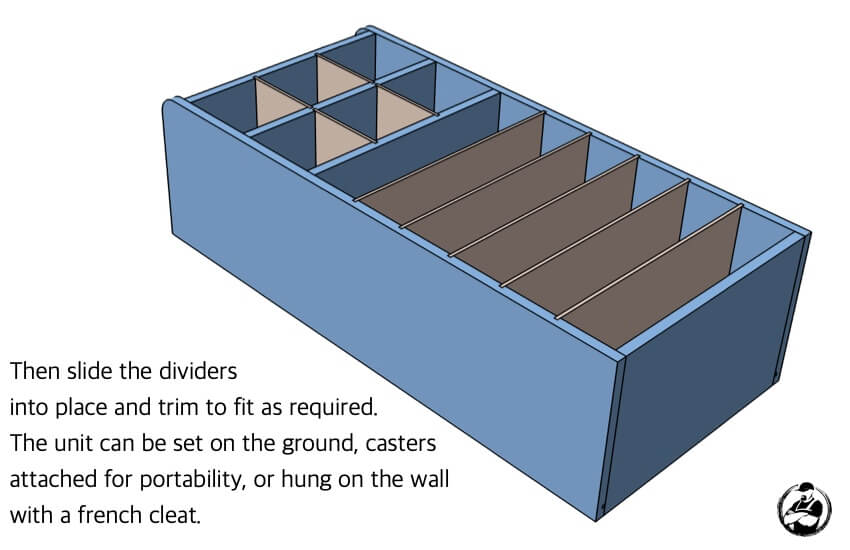
Inserting the Dividers
Questions? Comments?
As always, if you have any questions don’t hesitate to comment below and especially don’t forget to post pictures of your finished products in the comments! ENJOY!