

Wheelchair Accessible Picnic Table Plans (Free, ADA-Style)
Quick build A wheelchair accessible picnic table is a standard 8 ft A-frame with one change: the top runs 17-3/8″ past the frame on one end, with no bench across it, so a wheelchair rolls straight in under the table instead of parking at the corner. The top sits at 30″, inside the 28″ to 34″ range accessible dining surfaces use. It’s built from pressure-treated 2x lumber for about $130 in one Saturday. Free plans below; the printable PDF is $5. Documented by Jamison Rantz, October 2026.
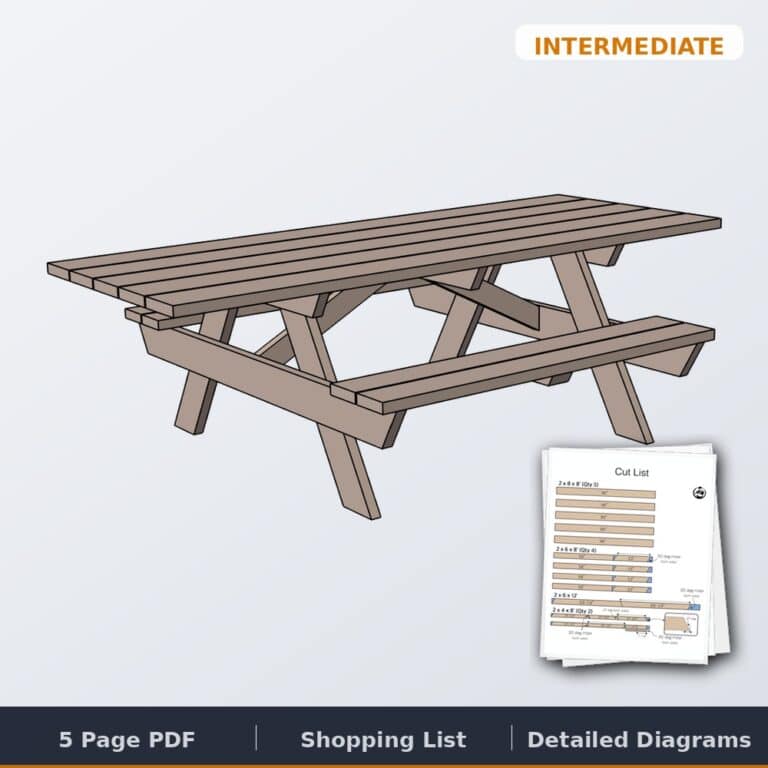
Want the ad-free, printable version?
Everything below in one organized, print-ready PDF: cut list, dimensions, step-by-step diagrams and shopping list. Perfect for the shop wall or your phone.
Every picnic table plan online is the same A-frame, and the person in the wheelchair ends up at the corner. This is that A-frame with one dimension moved, so everyone is actually at the table.
The plans exist because a reader in Michigan emailed asking for an accessible design he was building for a camp. We drew it, built one, and drove it to Camp Fish Tales in Pinconning, Michigan, where they run a wheelchair-accessible camp for people with disabilities. If the build speaks to you, go look at what they do.
Wheelchair Accessible Picnic Table Dimensions
The numbers that make an outdoor table usable from a wheelchair, from the federal accessibility standards for outdoor recreation areas (ABA 1011, which points to the ADA dining-surface rules in 902 and 306), next to this table:
This is a homemade table built to that pattern, not a certified product. If it’s going into a park, school or other public facility, check the finished table against the standards and your local requirements.
Source: U.S. Access Board, Outdoor Developed Areas (ABA 1011).
Building for a backyard instead of a camp? The outdoor table plans guide compares all of our outdoor tables on cost, time and seating. For a kid-height version, there’s the composite toddler picnic table.
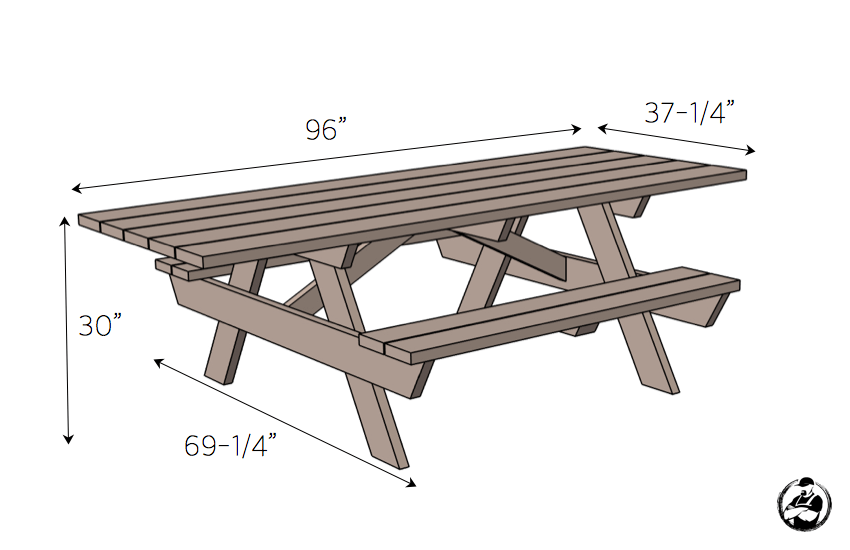
Dimensions
96″ long, 37-1/4″ wide, 30″ tall. The benches span 69-1/4″. The rest of the length is the roll-under end.
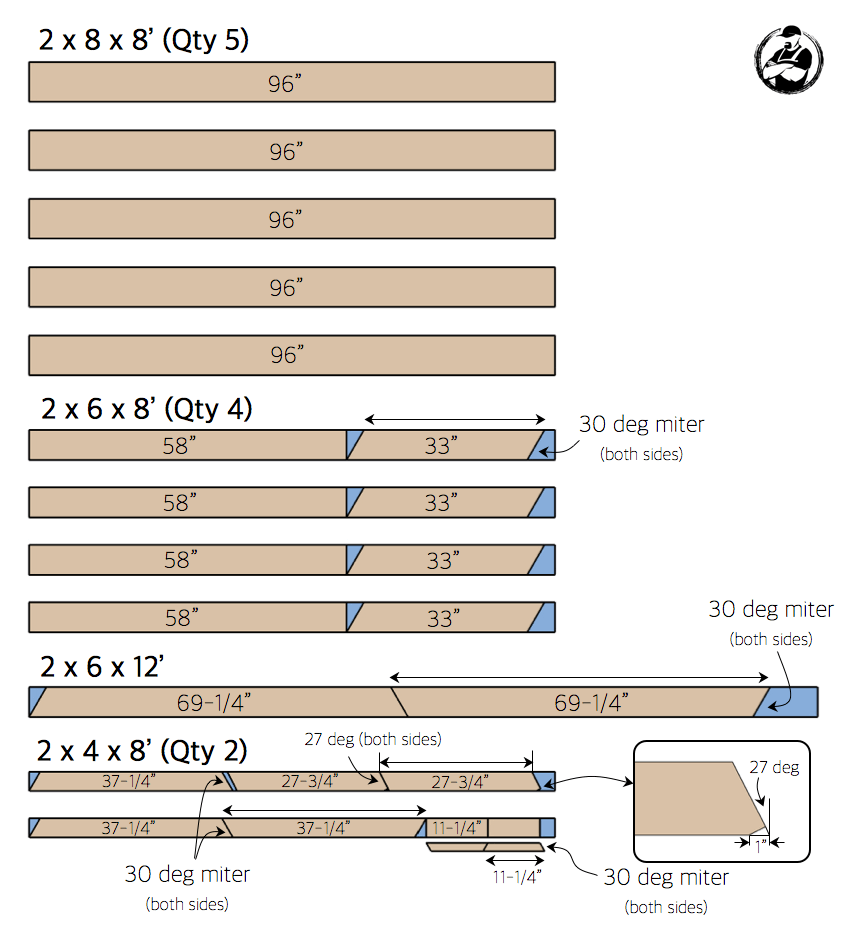
Cut List
Everything comes off five 2x8x8s, four 2x6x8s plus one 2x6x12, and two 2x4x8s. The only angled cuts are the 33″ legs (30 degrees, both ends) and the 27-3/4″ braces (27 degrees, both ends). Cut the tops last so you can pick the straightest boards for the surface people actually touch.
How to Build
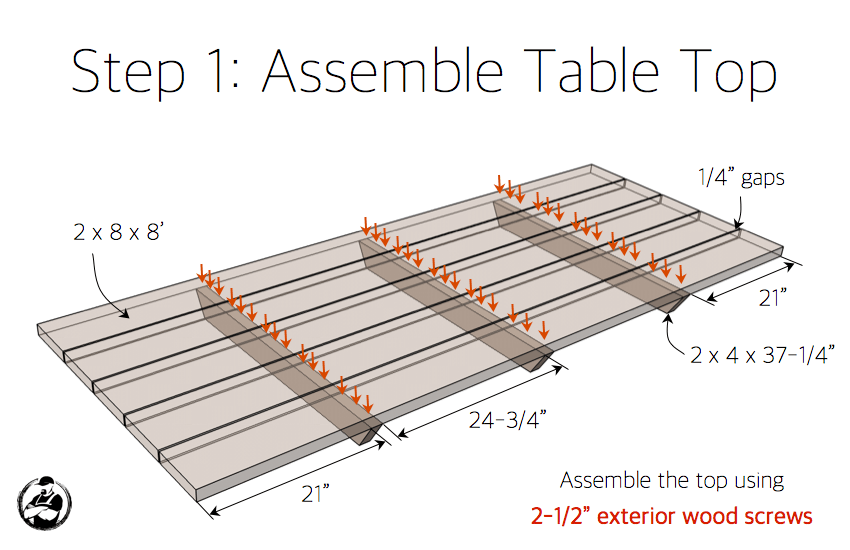
Assemble the tabletop
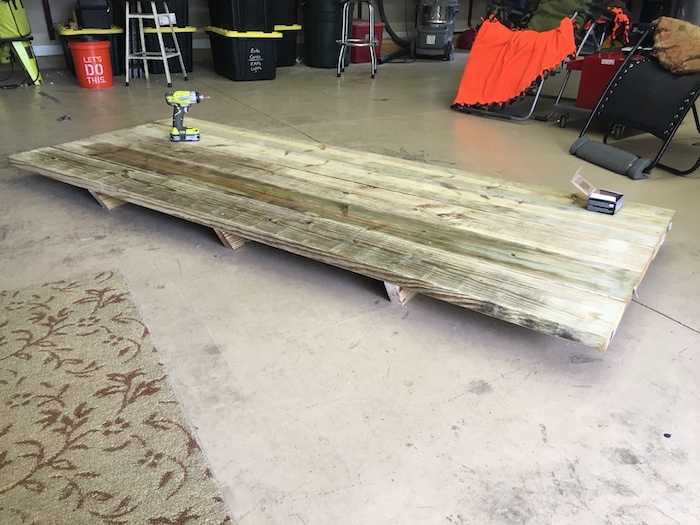
Lay the five 96″ 2x8s face down with 1/4″ gaps between them and tie them together with three 2×4 x 37-1/4″ cleats, one 21″ in from each end and one in the middle, using 2-1/2″ exterior screws. The gaps aren’t decoration: pressure-treated lumber arrives wet and shrinks, and the gaps give it room plus a place for rain and crumbs to go. Measure those end cleats carefully, because their position is what creates the roll-under overhang three steps from now.
Attach the legs
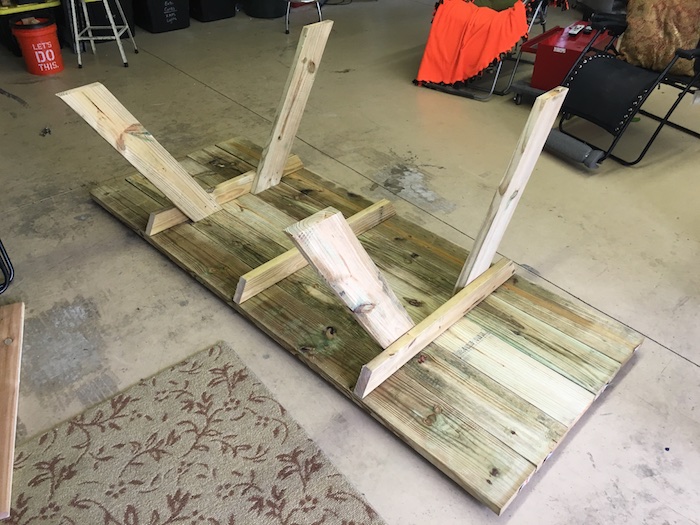
The four legs are 2x6s cut to 33″ with a 30 degree miter on both ends, screwed to the cleats flush with the outside edge. Screws hold fine for a backyard table. If this one is going to a park, a camp, or anywhere strangers will climb on it, use two 3/8″ x 3-1/2″ carriage bolts per leg instead, or counterbore a 1″ hole for the washer and nut and run 3″ bolts. Bolts are three dollars of insurance against the one joint that takes every bit of racking load.

Install the seat supports
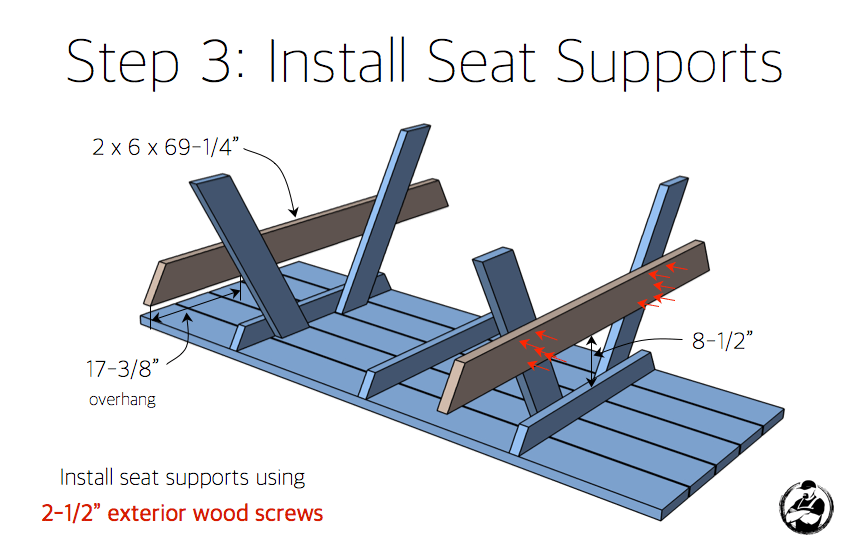
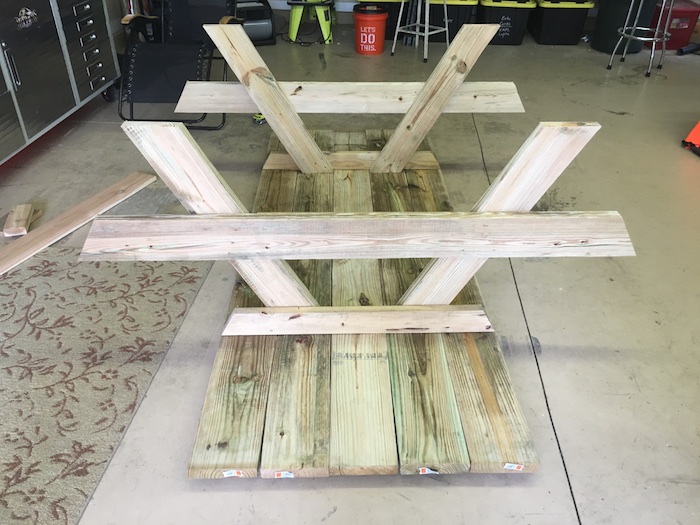
The seat supports are 2x6s at 69-1/4″, screwed across the legs 8-1/2″ down from the top cleats. This is the step that makes the table accessible: the tabletop overhangs the seat supports by 17-3/8″ on one end, and no bench crosses that end. Measure from the correct end before you drive anything. Getting it backwards means a table with a long useless tail and a wheelchair still stuck at the corner.
Install the braces
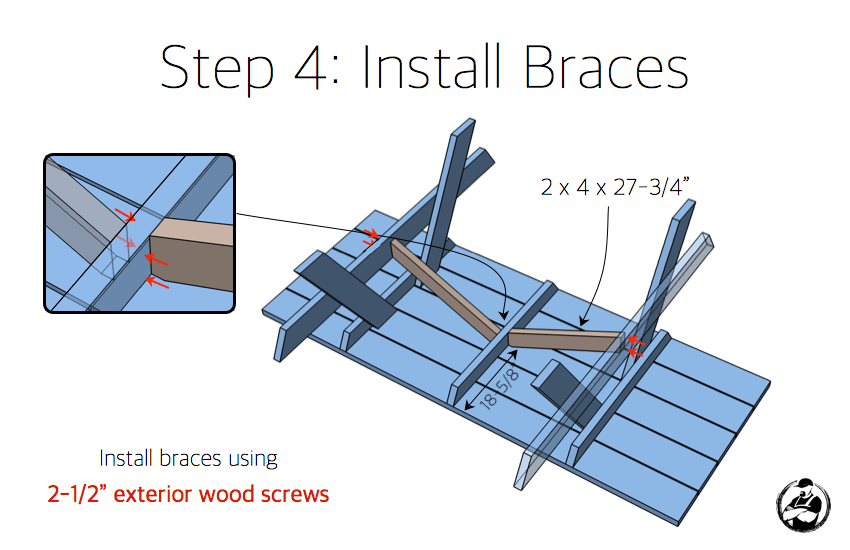
Two 2×4 braces at 27-3/4″, cut 27 degrees on both ends, run from the center cleat down to each seat support. They’re what stop the table from folding sideways when six people lean the same way. Dry-fit both before you drive screws, because a brace cut a hair long will lift the seat support and throw the bench out of level.
Assemble the benches
Each bench is two 2x6s at 58″ with a 1/4″ gap, joined underneath by 2×4 x 11-1/4″ cleats set 27-1/4″ in from each end. Keeping the cleats inboard leaves the bench ends clean to sit on and gives your shins somewhere to go. Same gap logic as the top.

Install the benches
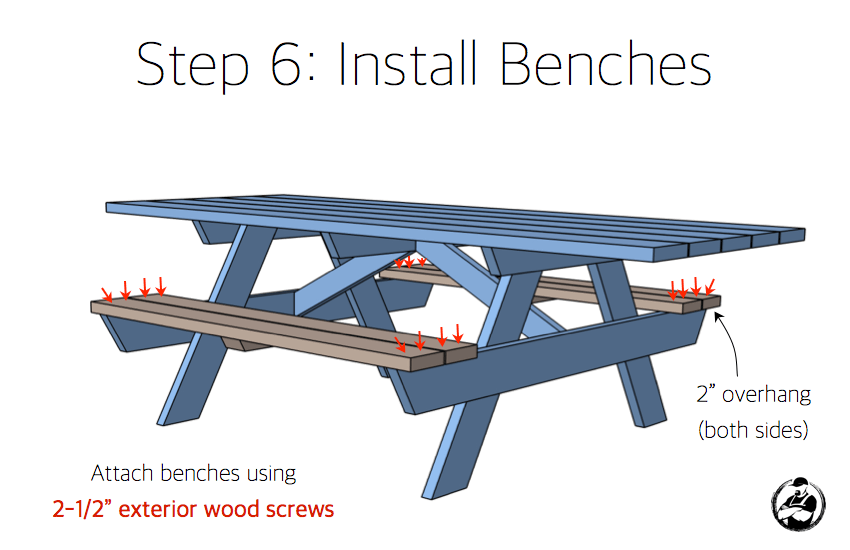
Set the bench assemblies on the seat supports with a 2″ overhang on both sides and screw down through the bench into the supports with 2-1/2″ exterior screws. Flip the table upright, break every edge with 80 grit, and run your hand along the bench tops looking for the splinter you’ll otherwise find with the back of your leg in July.
Final Result
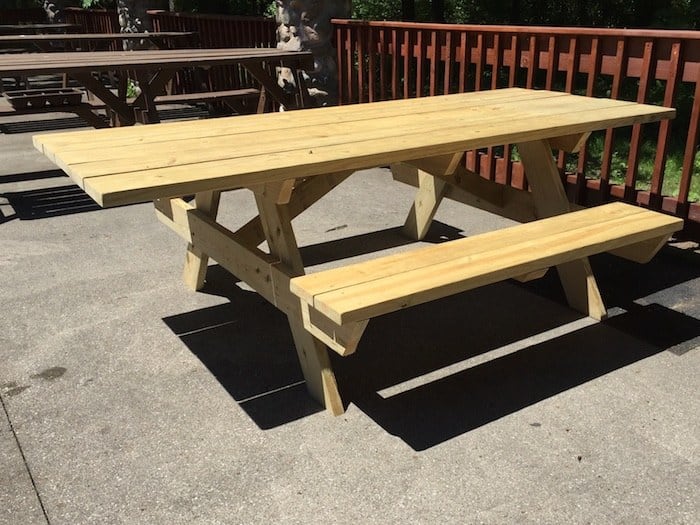
An eight-foot picnic table that seats a crowd on two benches and leaves one end open for a wheelchair to roll in and sit at the table with everyone else. Pressure-treated, screwed, sanded, and heavy enough that wind is not a factor. This one went to a camp in Michigan. Yours can go in a backyard.


FAQ
How much does it cost to build your own picnic table?
About $130 in pressure-treated lumber at October 2026 prices, plus a box of exterior screws: five 2x8x8s at $12.68 ($63.40), four 2x6x8s at $9.98 ($39.92), one 2x6x12 at $14.78 and two 2x4x8s at $4.48 ($8.96), for $127.06. Lumber prices move, so price the list at your yard before you go. Cedar roughly doubles it and buys you a table that looks better and needs more attention.
How many 2×6 do I need to build a picnic table?
For this table, five: four 8-footers and one 12-footer. Each 8-footer gives one 58″ bench board and one 33″ leg, which covers four legs and four bench boards. The 12-footer becomes the two 69-1/4″ seat supports. If you want a spare, grab one extra 8-footer: there’s always one board with a twist you don’t see until you’re cutting.
What kind of wood should I use for a picnic table?
Pressure-treated southern yellow pine is the honest default: cheapest, rated to sit on wet ground, and it’s what this plan calls for. Cedar if you’d rather skip the treatment chemicals and don’t mind paying for it. Whatever you pick, use ACQ-rated exterior screws or hot-dip galvanized, because the copper in modern treated lumber will eat plain steel fasteners from the inside out.
How can I build a cheap DIY picnic table?
Pressure-treated 2x stock, screws instead of carriage bolts, and skip the finish for the first season while the lumber dries out anyway. The real savings is at the rack: pull every board yourself, sight down the edge, and leave the twisted ones for somebody else. A cheap table built from bad boards is not cheap.
What are ADA picnic table dimensions?
The top of an accessible table sits 28″ to 34″ off the ground, with at least 27″ of knee clearance underneath, 30″ of width and 17″ of toe depth, plus a 30″ by 48″ wheelchair space at the table. This table is 30″ tall with a 17-3/8″ open end, built to that pattern. The full comparison is in the dimensions table above.
How many wheelchair spaces does a picnic table need?
Under the federal outdoor standards, one wheelchair space for each 24 linear feet of usable perimeter. In practice a table up to about 9 ft long needs one, which is what the open end on this 8 ft table gives you. Longer tables need two.
What makes a picnic table wheelchair accessible?
An open end with no bench across it, and enough clearance underneath to get knees under the surface. Here the top sits at 30″ and its underside is 28-1/2″, with the nearest cleat 21″ in from the open end, and the top overhangs the frame 17-3/8″ so a chair rolls in rather than parking sideways. For reference, ADA dining surfaces run 28″ to 34″ high with at least 27″ of knee clearance, 30″ wide and 19″ deep. This is a homemade table built to that pattern, not a certified product. If it’s going into a public facility, check it against the ADA standards and your local requirements before you build.
Your Move
Grab the cut list, pull five straight 2x8s, and give it a Saturday. Six steps, one power saw, no joinery beyond a miter and a screw. If you build one for a camp, a park, a church, or someone in your family who’s been eating at the corner of the table for years, post a picture in the comments. Those are the ones we like seeing most.
Be safe and happy building, Jamison
how are you keeping the ends of the top from wanting to curl or twist. As most pressure treated tables curl with large spans. Even with keeping your rings turned the proper way they still wanna curl most of the time.Great design just curious.. And thank you for the site its a great place to come for ideas even learned a few things too bwahahahaha
Thanks Michael. I’m glad you found our site and are enjoying it. On this particular table we did not add anything on the ends to prevent curling or twisting. However we did consider a long metal bracket to help with this issue.
Great plans –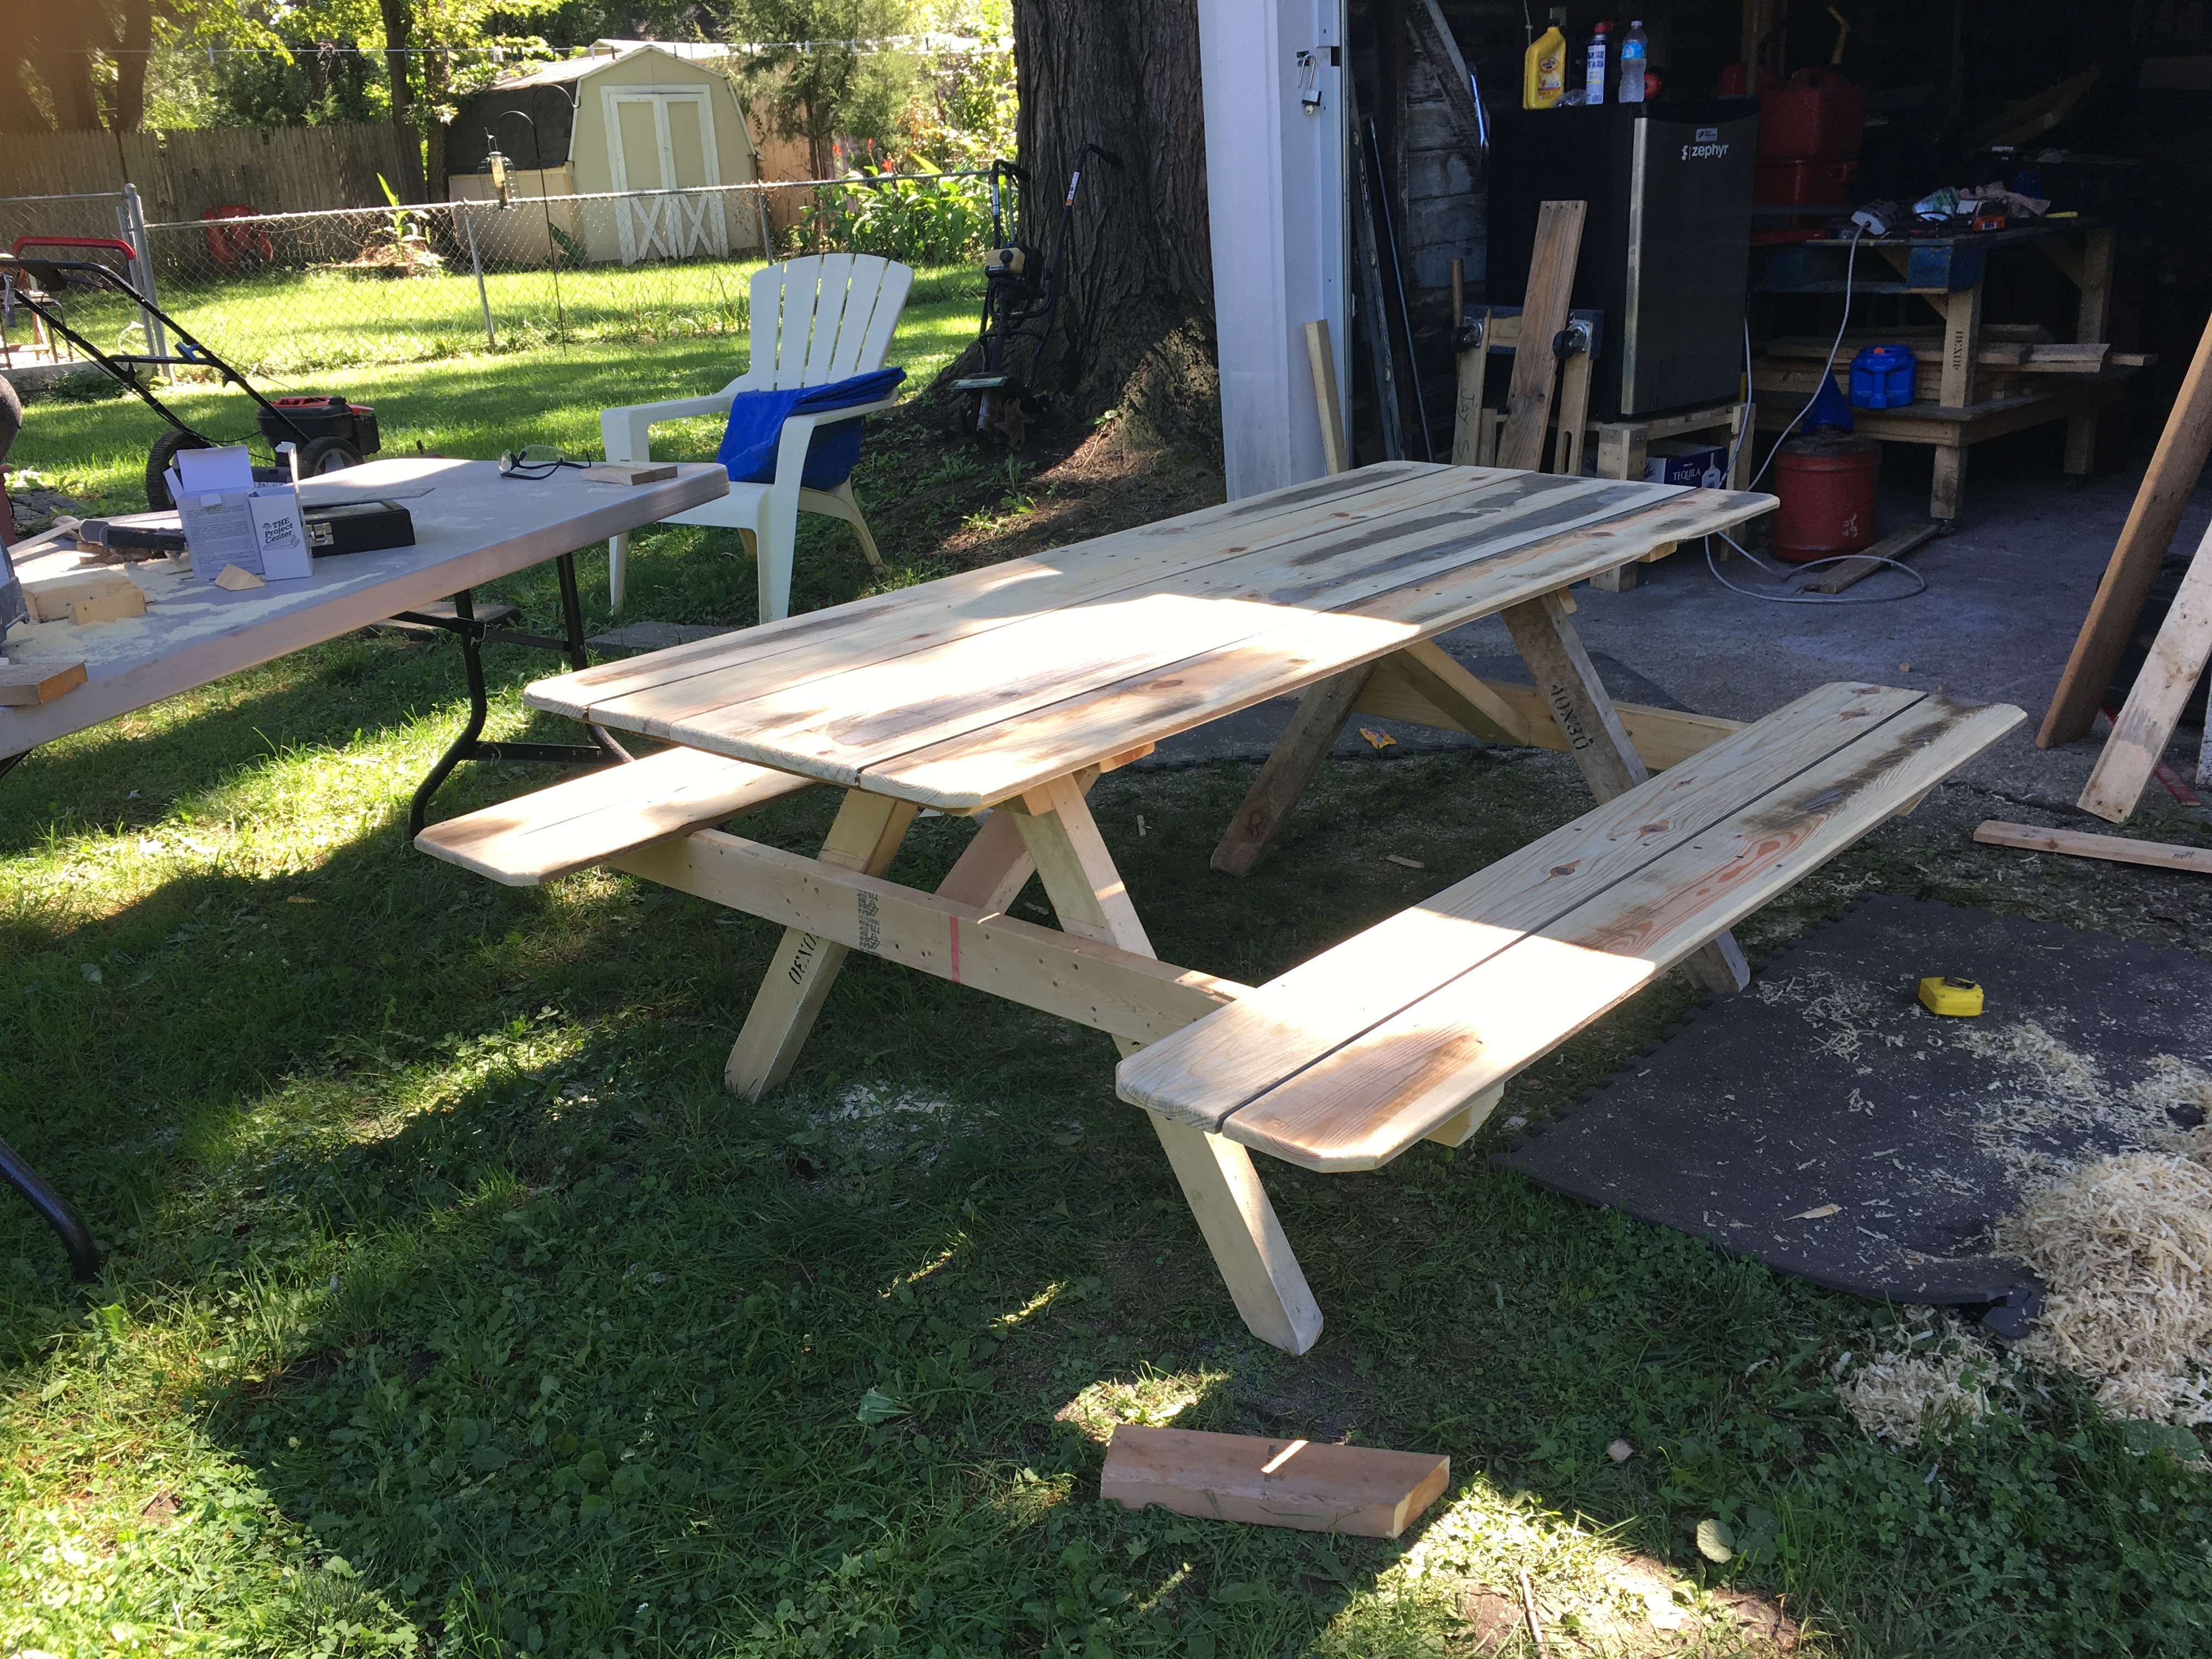
Done it for my Grand child Birthday –
Used the new one instead of the old 🙂
Many thanks.