

How to Build a Pergola (Free Plan Builder + My 2-Hour Build)
Quick build: How to build a pergola, in one sentence: four posts, beams, and a top. I challenged myself to build a 10×10 in one hour, solo, with one power tool, for under $1,000. I missed the hour (1:54:51 on the clock) but hit the budget: $869.47 all-in, sun shade included, using the Simpson Strong-Tie Sage bracket system and eight 4×4s. The free Pergola Builder below turns your dimensions into a custom plan sheet, cut list, and cost estimate. Documented by Jamison Rantz, July 2026.
Here is how the challenge came about: Simpson Strong-Tie told me somebody built this pergola in two hours. So naturally I decided I could do it in one, by myself, with a single drill. (Spoiler: the two-hour person knew something I did not.)
I built it as a surprise for my buddy Dave. I officiated his wedding, he travels for work, and his patio needed a grilling spot. So while he was away, his slab got a pergola.
The point survives the missed deadline: a pergola is a beginner-friendly build. It is the same connection repeated, and modern bracket systems do the thinking for you. This post covers how to size one, how to set the posts, the two ways I would build the frame, and what it actually costs, with a free tool that does the math so you do not have to.
How Much Does a Pergola Cost to Build?
My 10×10 came in at $869.47: $687.95 for the Sage hardware and sun shade, and $181.52 for eight cedar-tone 4×4s. (Standard pressure-treated posts would have brought it down to $814.19.) Here is the wider picture at mid-2026 prices:
Your size will differ, which is exactly why the Builder below exists.
Tools & Materials (My 10×10 Build)
The Pergola Builder: Your Size, Your Plan Sheet
Pick your size, posts, top style, and hardware, and the Builder draws your pergola to scale, writes the cut list and shopping list, and prices the whole thing. When it looks right, hit “Email me my plan sheet” and the plan lands in your inbox, free.
That sheet is the plan. There is no upsell hiding behind it.
Design your pergola — any size, posts in the ground or mounted to concrete, a traditional slatted top or a modern open top — and get the full shopping list, a custom cut list, and a realistic cost estimate. Imperial or metric. No sign-up needed to see your results.
Your pergola, to scale
Shopping list — for 10' × 10' × 8'
| Qty | Item | Get it |
|---|
Your custom cut list
| Part | Qty | Length | Material |
|---|
Beams sandwich the posts in pairs with two ½″ carriage bolts per post. Rafters sit on the beams with a hurricane tie at each crossing; slats screw down to the rafters. On pergolas longer than 8′, the 2×2 slats are spliced — every joint lands on a rafter, and you stagger the joints between neighboring slats so no seam lines up. Cut rafter tails to your favorite profile before hanging.
📩 Email me my pergola plan sheet
Get this cut list, shopping list, and cost estimate for 10' × 10' × 8' sent to your inbox — free.
The hardware that holds it together
Common questions
How much does it cost to build a pergola yourself?
A 12×16 pressure-treated pergola — the most popular size — runs roughly $900–$1,500 in lumber, concrete, and hardware at mid-2026 prices for a traditional slatted top, depending on whether you run the black Simpson Outdoor Accents connectors or the Amazon versions. A 10×10 comes in a few hundred less, and a bracket-built open top can land well under that. Use the calculator above for your exact size, hardware, and prices.
What size posts do I need for a pergola?
6×6 posts are the safe call for almost everything — they carry the load with margin and look right under a big top. 4×4s work on smaller footprints (around 10×10 and under) and are the native size for bracket systems like Toja Grid. The calculator lets you price both.
How deep should pergola posts go in the ground?
Below your local frost line — typically 36–48″ in the northern U.S. Rather than filling the hole with concrete, set each post on a 4″ concrete footing pad ("cookie") at the bottom of the hole and backfill around the post with gravel or dirt, tamped in lifts — one 80-lb bag covers the pads for two or three posts. If you're mounting to an existing slab, use standoff post bases with concrete anchors instead.
How far apart should pergola rafters be?
16″ on center is the standard that looks right and supports the top slats; go 12″ for a fuller look or a sun-shade top, 24″ for an airier one. Top slats typically run 12″ apart — tighten them to 4–6″ for real shade.
Note: This is general planning guidance using rule-of-thumb spans. A pergola is a structure — verify spans, footing depth, wind/snow loads, and setbacks against your local building code before you build. Lumber figures use actual (not nominal) dimensions; confirm quantities before purchasing.
A free tool from Rogue Engineer. Be safe and happy building.
Prefer it on its own page? Open the full pergola calculator → — same tool, easy to send to whoever’s holding the other end of the tape.
Sizing Your Pergola
A few rules of thumb keep a pergola from looking spindly or sagging by year three. The Builder enforces all of these automatically:
- Posts: 6×6 is the safe call for almost everything; 4×4 works around 10×10 and under, and it is the native size for bracket systems. I used 4×4s, partly because I cannot wrestle 10-foot 6×6s alone, and honestly, it looks just fine. (Simpson makes the 6×6 hardware if you want the beefier look.)
- Post spacing: keep it under about 14 feet (10 feet on a 4×4 bracket build). Longer than that, you add a middle post. The bracket systems make a three-way T connector for exactly this.
- Beams: doubled 2×8s up to 10 ft of post spacing, doubled 2×10s to 12 ft, 2×12s to 14 ft. On a bracket build, the beams match the post stock and fit between the posts.
- Rafters: 2×6 to 8 ft of span, 2×8 to 12 ft, 2×10 to 16 ft. 16″ on center looks right; 12″ reads fuller.
- Height: learn from me. Mine ended up tall enough that I ran out of ladder, twice. 8 feet to the underside of the beams is plenty. The Builder defaults there.
Footings: In the Ground, or On Concrete
On concrete (what I did): Dave’s patio pad was, in my own words on camera, “like perfect for this.” Standoff post bases anchor to the slab and lift the post off the concrete so it never wicks water. Sage bases and the Amazon versions include their anchor screws; the black Outdoor Accents bases need one concrete screw anchor each.
Fair warning from the video: drilling sixteen anchor holes with one hammer drill, on the wrong speed setting, ate my first 40 minutes. Use an impact driver. Check your drill settings. Do not be me.
In-ground (no slab? my default): dig below your local frost line, typically 36 to 48 inches up north, and drop a 4″ concrete pad (a “cookie”) in the bottom of each hole. The post stands on the cookie; backfill around it with gravel or dirt, tamped in lifts. No tube forms, no 20-bag pour. One 80-lb bag of concrete makes cookies for two or three posts.
Either way: this is structural. Check your local frost depth and building code before you dig.
How to Build a Pergola: My 10×10, Step by Step (Bracket Method)
The Simpson Sage System: posts run to the top, a bracket slips over each post top (little tabs seat it in place, and a bottom tab keeps the 4×4 up off the concrete), and beam segments, cut from the same stock as your posts, drop in between on all four sides. No angle cuts. No drilling through posts. Every kit comes with its screws: galvanized steel with a black powder coat that shrugs off the elements.
Lay Out the Top Frame on the Ground and Square It
Diagonals equal means square. Lay the top frame out on the pad, connect the corners, and measure corner to corner both ways. Then mark the post base locations straight off the assembled frame. (Video: 0:40)
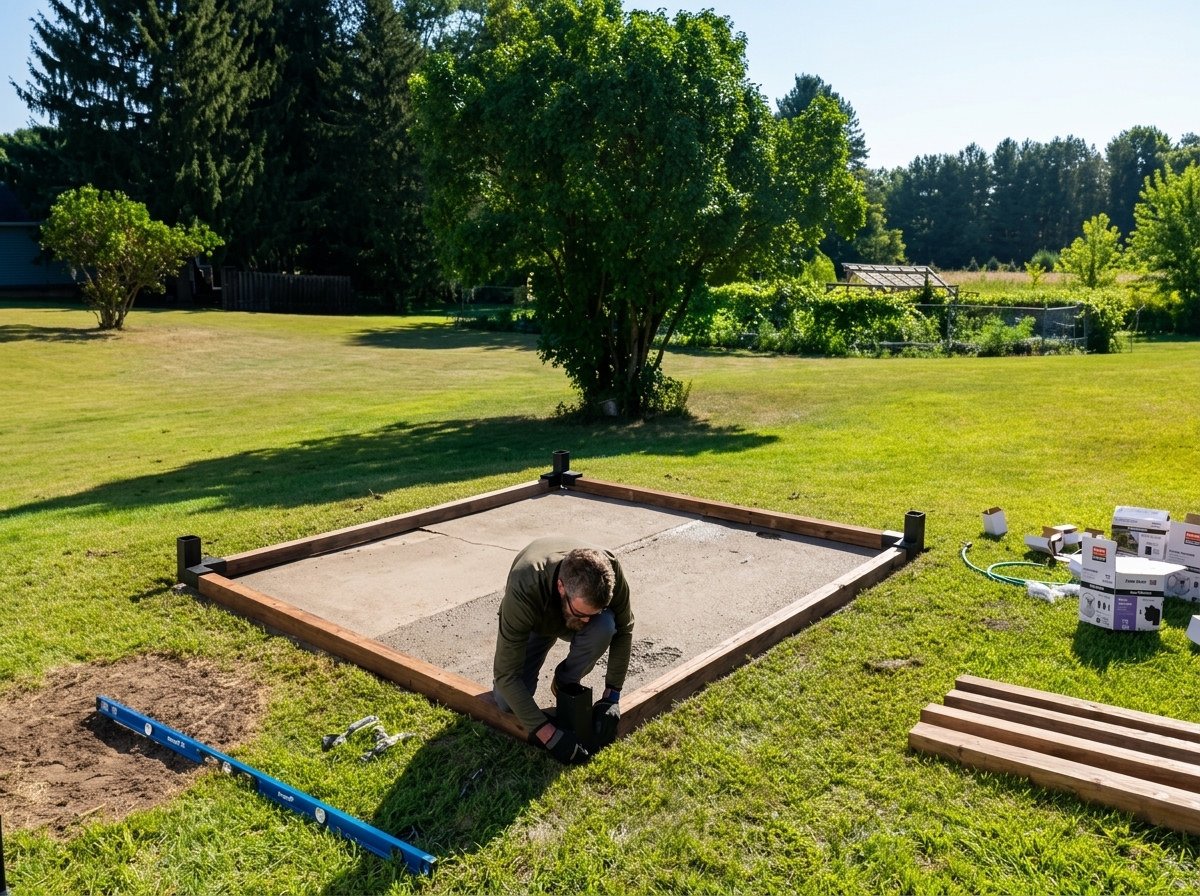
Anchor the Post Bases
Two screws first to stabilize each base, then drill the rest of the anchor holes. This is the slow part, and the reason my one-tool rule was a bad rule. (Video: 4:00)
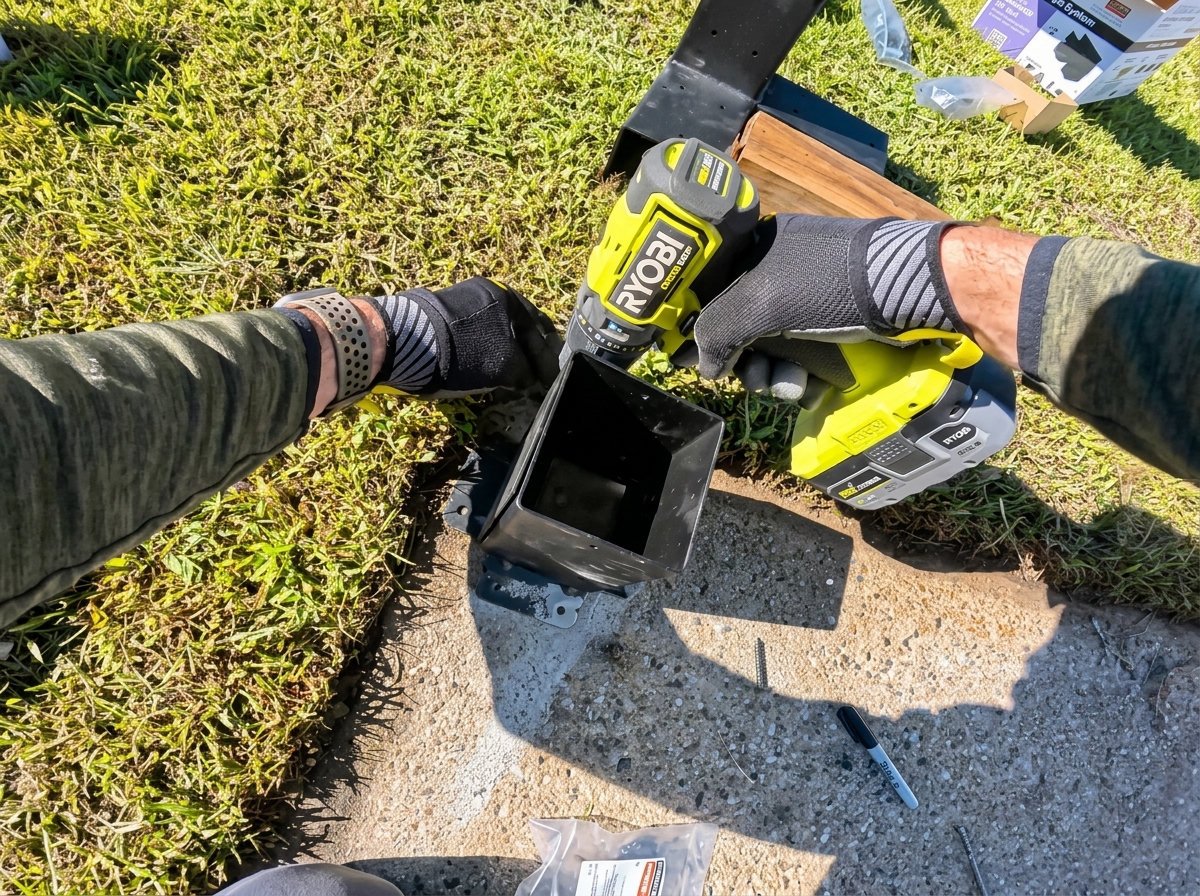
Slide the Brackets On and Stand the Posts
Slide the corner brackets onto the posts, stand each post up, and let the tabs hold everything while you plumb it. A second set of hands here would cut the build time roughly in half. (Video: 7:33)
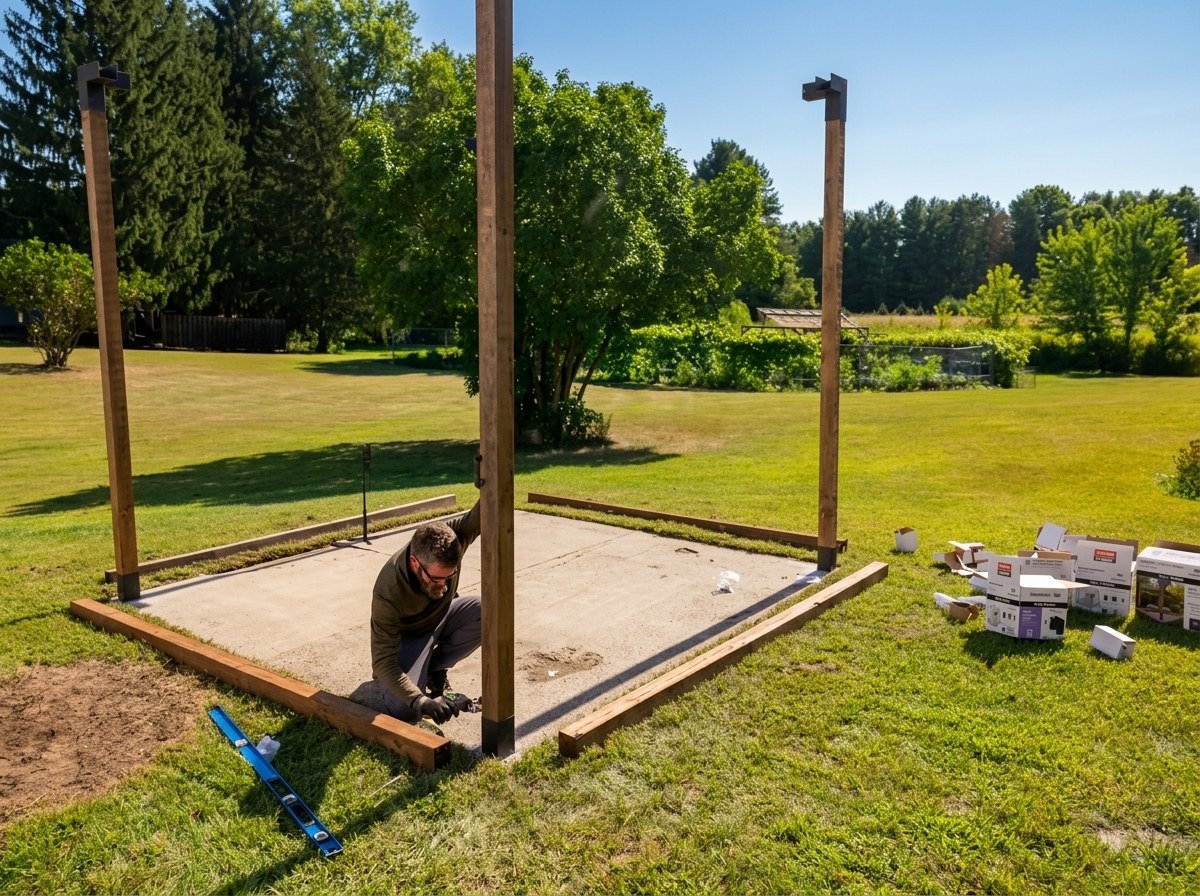
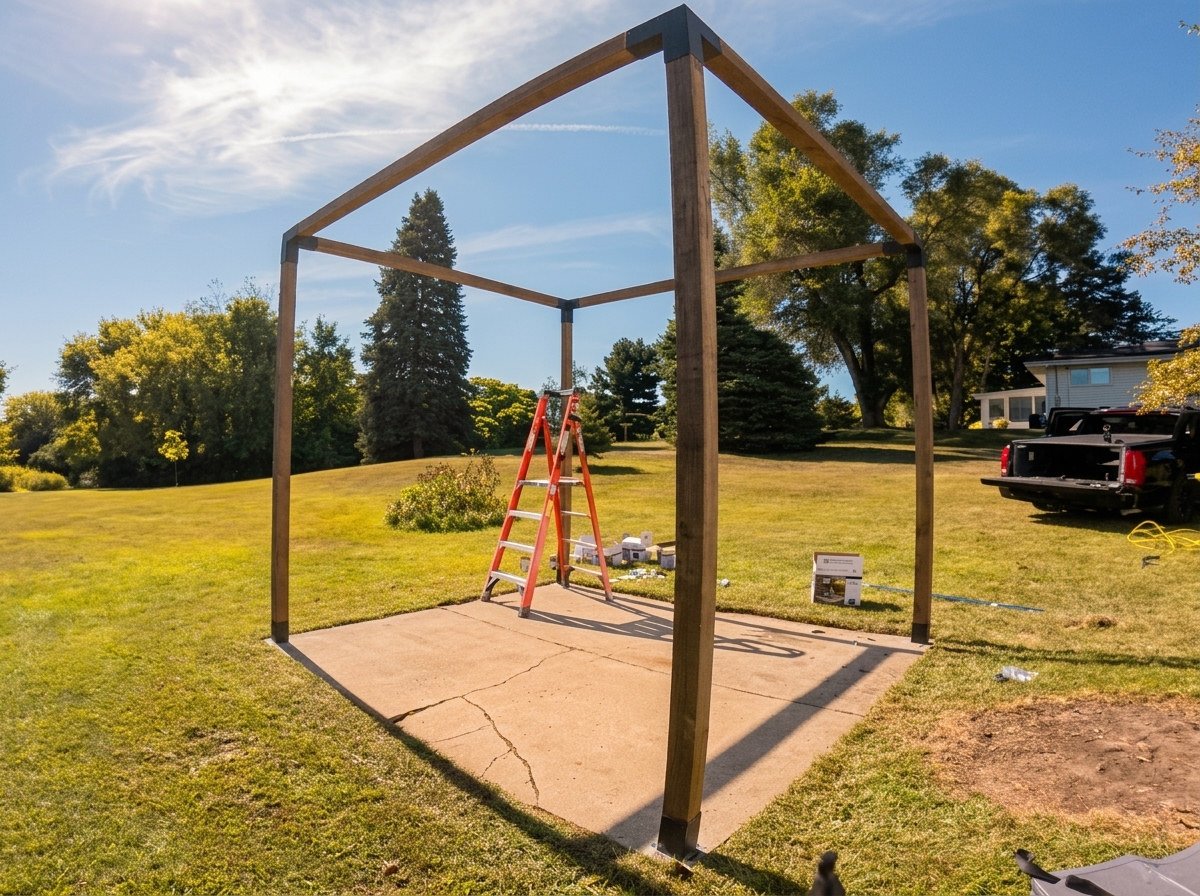
Drop the Beams In and Screw Everything Home
Drop the beams into the brackets and screw everything home. There are a lot of screws. This is when I really missed my impact gun. (Video: 12:40)
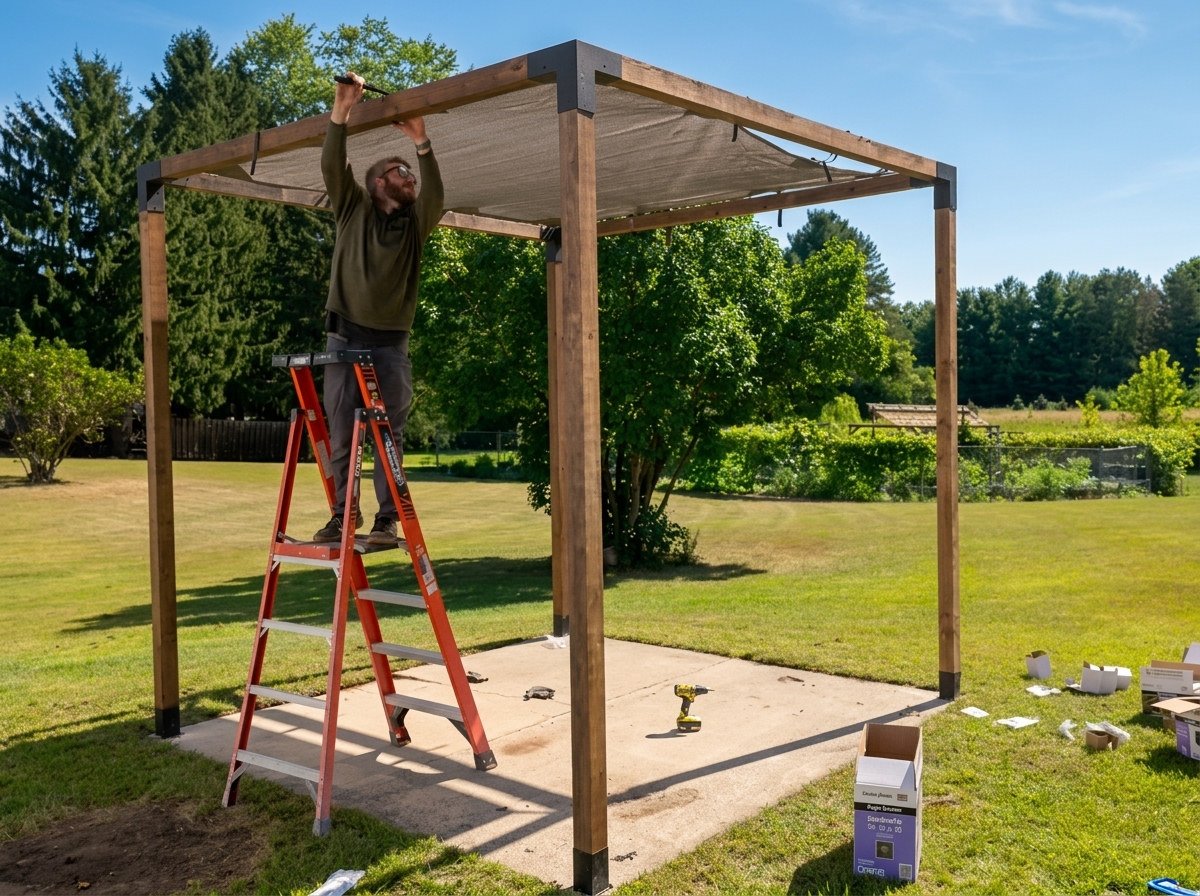
Clip On the Sun Shade
Clip on the sun shade. Lay the shade out on the ground before the top goes up to figure out your attach points, then it clips on and off in minutes. In Michigan, it comes down before the snow. (Video: 14:53)
Build Option 2: The Traditional Top
The full classic stack: doubled beams sandwiching the posts, rafters across, a 2×2 slat layer on top, knee braces for swagger. More cuts, more hardware, and that layered top is what most people picture when they say pergola.
- Beam-to-post: a post deck joist tie at every connection (6×6 version).
- Rafter-to-beam: a steel angle at each crossing, in place of hurricane ties.
- Knee braces: one brace bracket per brace at the bottom; the top runs through the beams.
- Slats: screwed to the rafters, spliced over a rafter on long runs, joints staggered.
On hardware: Simpson’s Outdoor Accents is the black decorative connector line, where the bolts and ties become part of the look. The Amazon versions (angles, brace brackets) are knockoffs at about a third of the price, which probably means the R&D and quality are not equal. You have been warned.
Shade: I’ll Just Say It
This was my first pergola, and I will admit what I said on camera: I never understood the classic slat top. At the hottest point of the day, the sun goes straight through the slats. Maybe it is the look, and the look is legitimate, but I would not build one without real shade of some sort.
A standard slat top (12″ spacing) gives you roughly 20% shade. The honest answer is fabric. On my build that meant the SST Sage clip-on sun shade (made for the system, 8×8 and 10×10, gray or tan, $133.58 as of this writing): clips on in minutes, comes down for winter. For any other size, a breathable HDPE shade panel laid over the top and secured through its edge grommets with stainless screws or bungees runs about $45 for a 10×10 at ~90% UV block. The Builder sizes it for you and adds it to the list.
The Finished Space: What We Added Around It
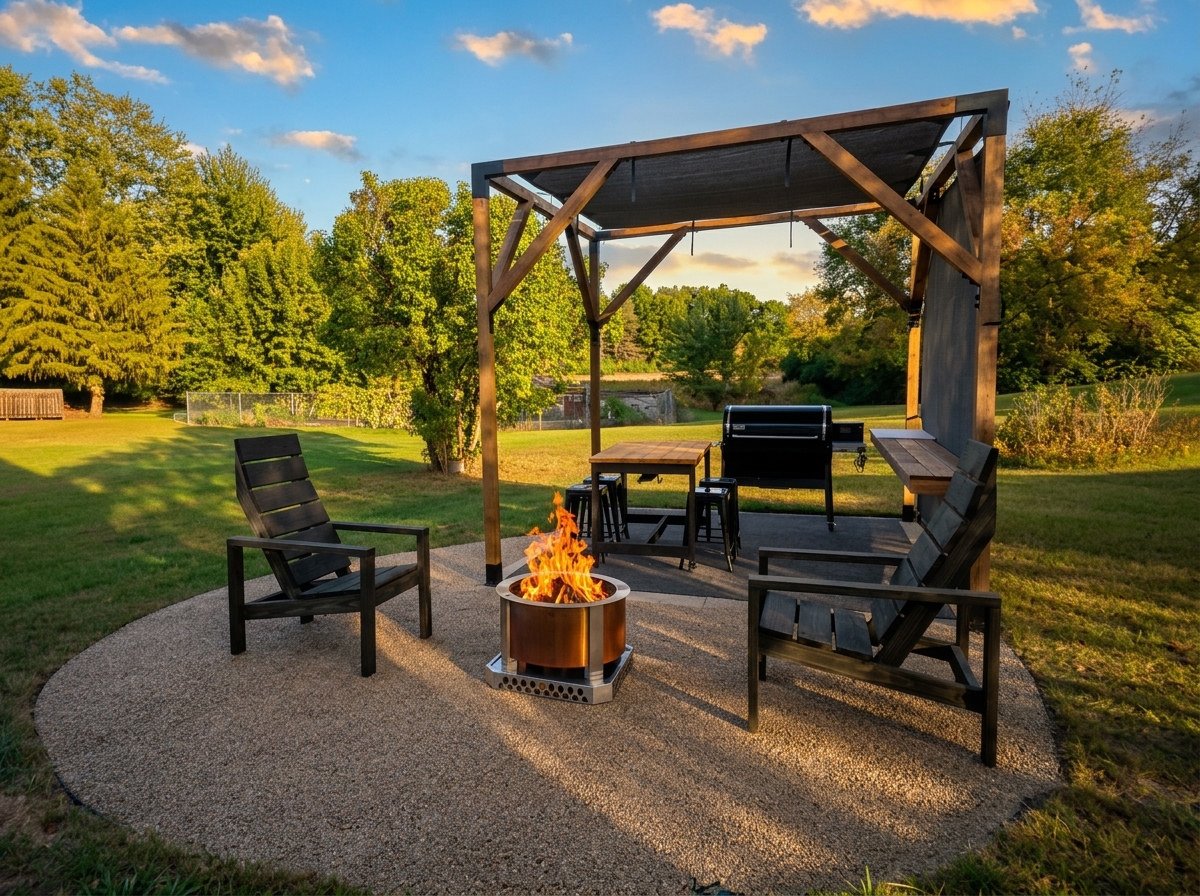
The pergola went up in an afternoon. What turned it into the place everyone ends up is what we added around it. A pea gravel patio circles out from the slab, with a Breeo smokeless fire pit in the middle and its grill attachment for cooking over the fire. The chairs are our Easy Comfort Outdoor Chair plan, and that dining table by the grill is actually our Grill Cart — it rolls the pellet grill around, doubles as the dining table, and the stools store right inside it. A custom bar top runs down the right side.
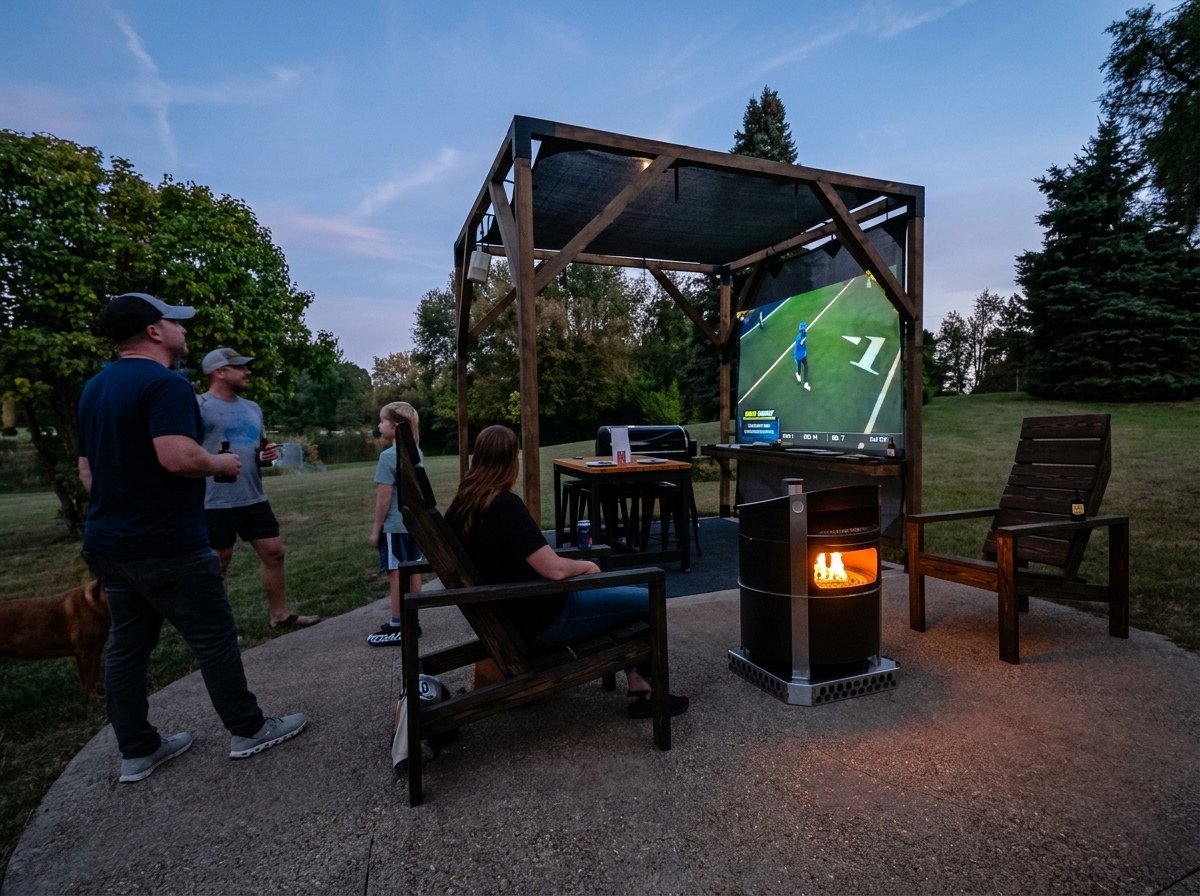
That right side got a second Sage 10×10 shade hung vertically — it blocks the low evening sun over the bar, and after dark it earns its keep twice: a battery-powered projector throws movies and Sunday football straight onto it. No screen to buy, no cords to run.
FAQ
How much does it cost to build a pergola yourself?
My 10×10 was $869.47 including the sun shade. Broadly: a 12×16 runs $900 to $1,500 for a traditional top depending on hardware, and a bracket-built open top can land under $400. Use the Builder above for your exact numbers.
How long does it take to build a pergola?
I did a 10×10 solo, with one drill, in just under 2 hours. Budget at least two hours with a bracket system; two people with an impact driver would genuinely cut it in half. A traditional top is a weekend.
What size posts do I need for a pergola?
6×6 for almost everything. 4×4 works at about 10×10 and under, and it is what the bracket kits are made for. It is what I used.
How deep should pergola posts go in the ground?
Below your frost line, typically 36 to 48 inches in the north, standing on a 4-inch concrete pad with the hole backfilled and tamped. Mounting to an existing slab? Standoff bases and anchors instead — no digging, no footings. That is my build: straight onto Dave’s patio.
Your Move
That is how to build a pergola — now make it yours. Scroll back up, put your numbers in the Builder, and email yourself the plan sheet. That is the whole plan: free, sized to your yard, with every part linked. Dave’s pergola already has the furniture to match — you saw it in the photos above — and if that is your next step, the outdoor furniture plans and outdoor structure plans are where I would start. Then send me a photo when it is up.
What are we going to build next?
Be safe and happy building.
— Jamison
Products used in this build (affiliate links)
- Sage corner brackets: 4×4 · 6×6
- Sage Middle T connector: 4×4 · 6×6
- Sage post bases: 4×4 · 6×6
- SST Sage sun shade (8×8 / 10×10, gray or tan)
- Concealed joist hangers: 2×4 · 2×6
- Outdoor Accents post bases: 4×4 · 6×6
- OA post deck joist ties: 4×4 · 6×6
- OA knee-brace brackets: 4×4 · 6×6
- OA steel angles · OA connector screws
- Amazon versions: post bases · corners · T connectors · joist hangers · deck joist ties · knee brackets · steel angles · HDPE sun shade (all sizes)
- 80-lb concrete · concrete screw anchors
- Lumber: Lowe’s · Home Depot

