
Ultimate Workstation
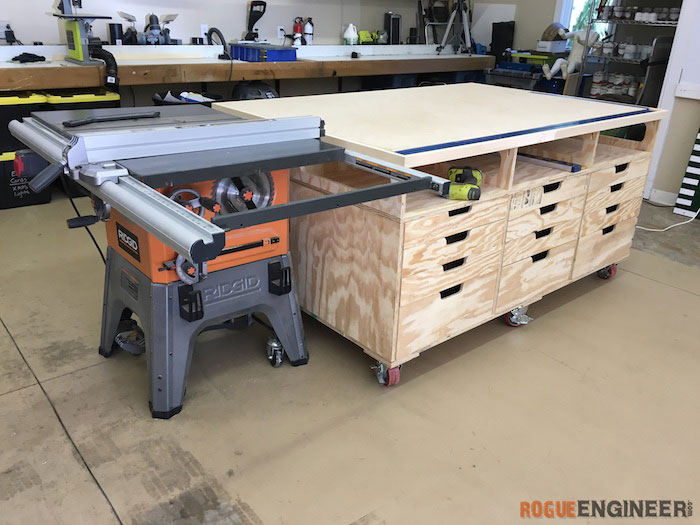
Every workshop needs a good workstation. Over the past years I have built a few, like the portable workbench and the easy workbench but now after much planing I decided to build the ultimate workstation. I gathered some inspiration from the Paulk workbench, the DIY workbench by Jen Woodhouse, and just my personal needs. I wanted to make this an outfeed table for my table saw as well as a clamping/assembly workstation.
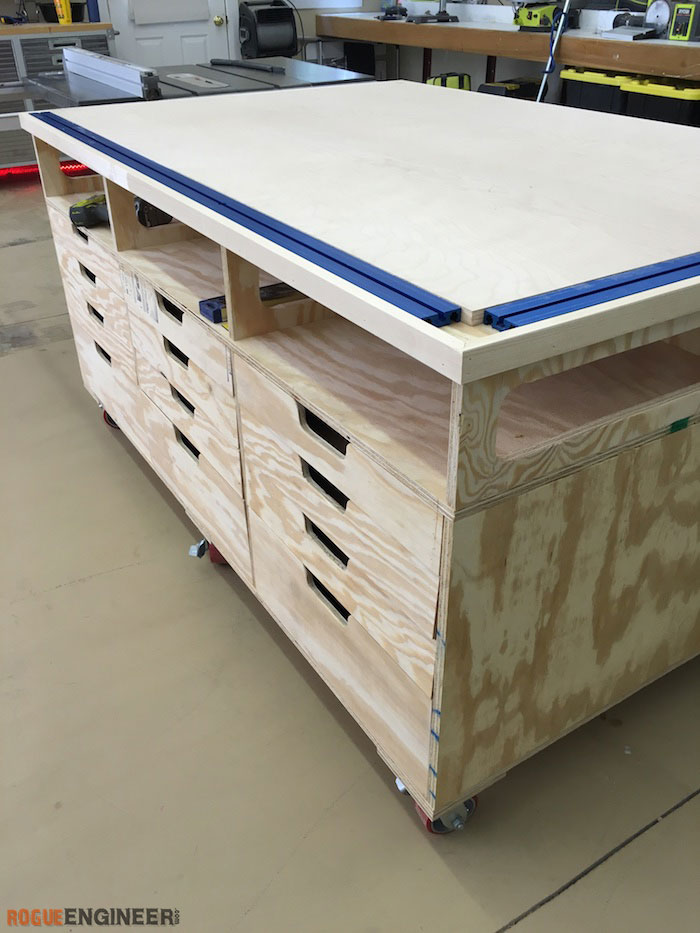
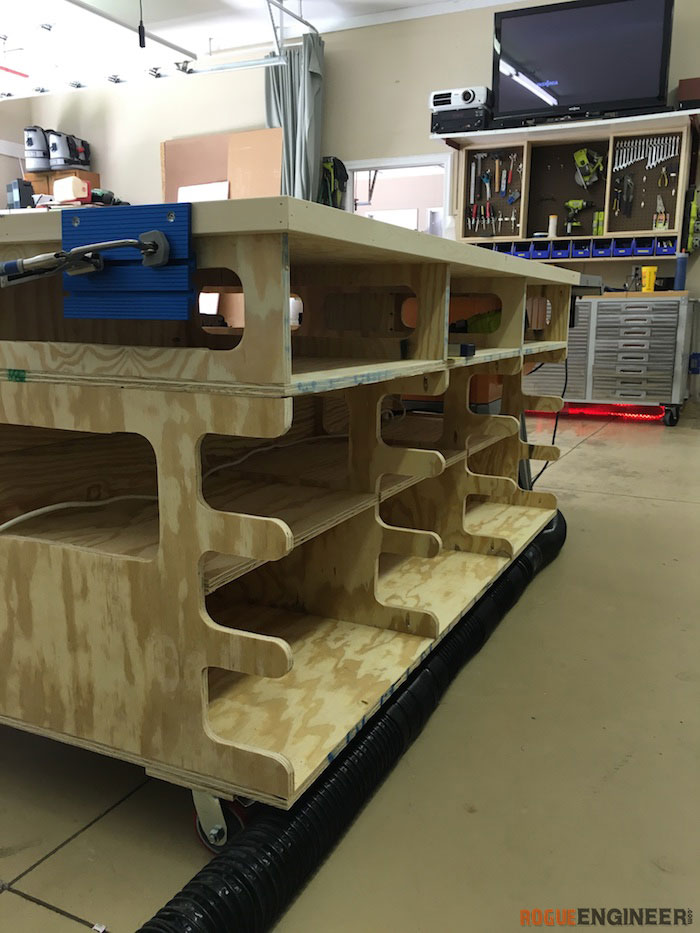
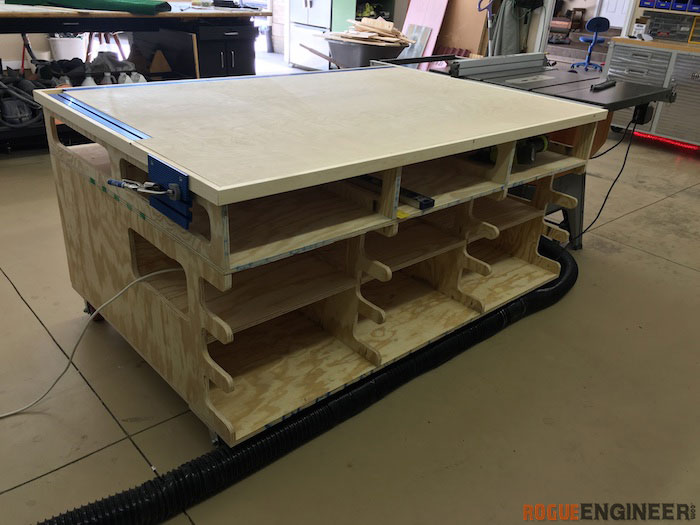
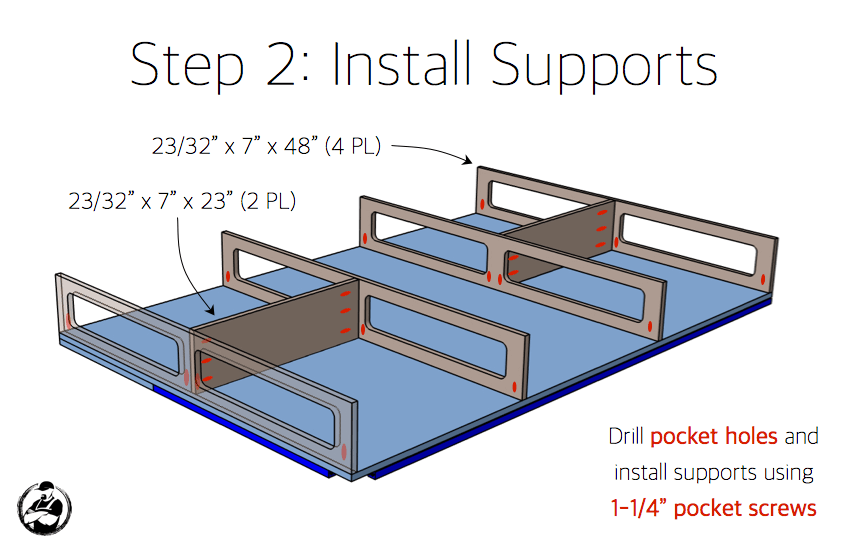
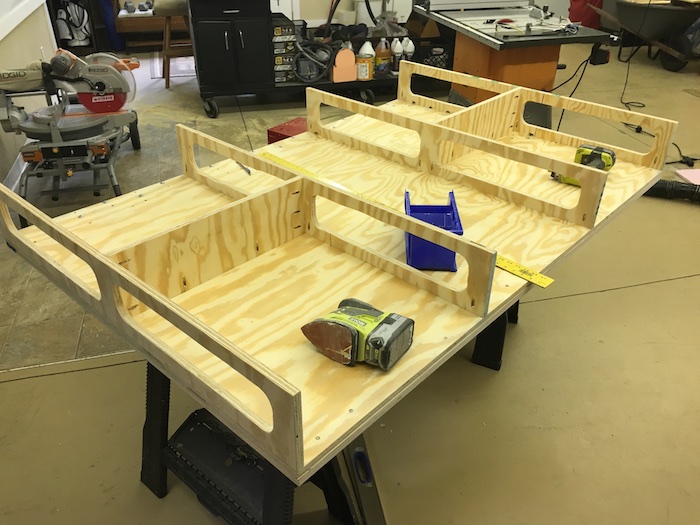
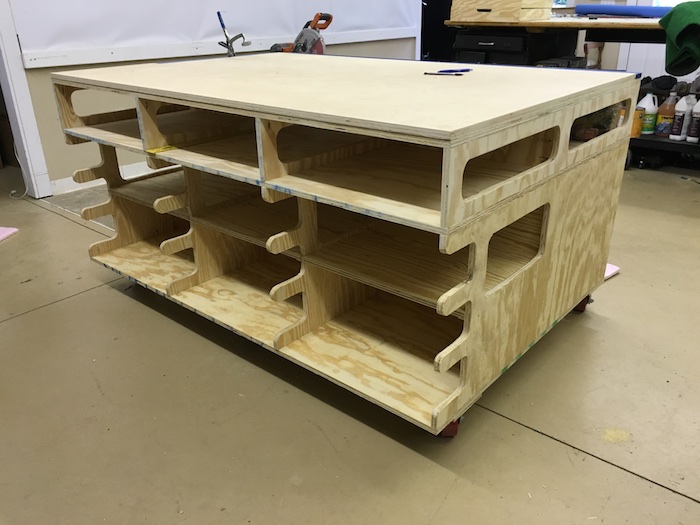
The 7″ open space below the top is open all the way around to allow you to keep the junk off the work surface. There is a pass through in the middle for a convenient place to store 4′ long objects such as levels, rulers, etc. The ribs are open to allow access all the way around and allow for storage of longer goods if necessary.

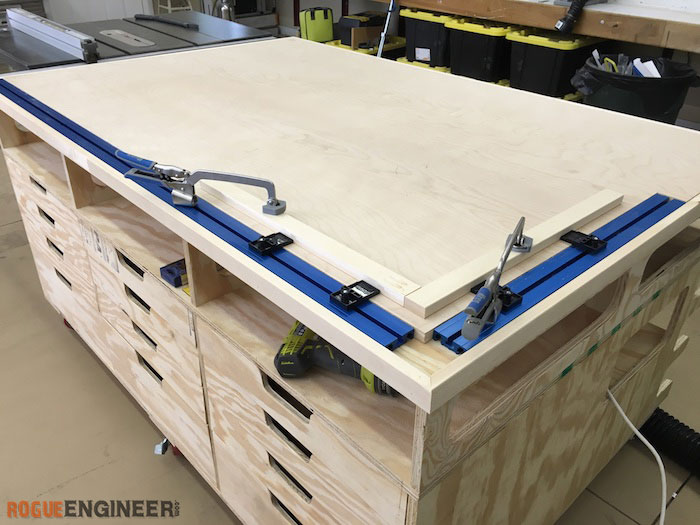
The Kreg Universal Clamp Trak™ Kit is amazing for clamping things to the work surface. With the clamp block set and the automaxx bench clamps these things are sure to get a workout.
One side of the workstation has open storage for larger items and removable shelving. The teeth on the side of the workstation were created to act as a small lumber rack for your project lumber.
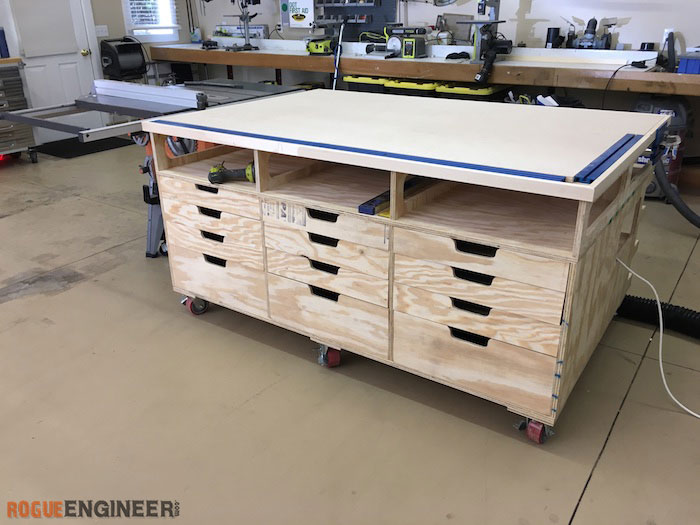
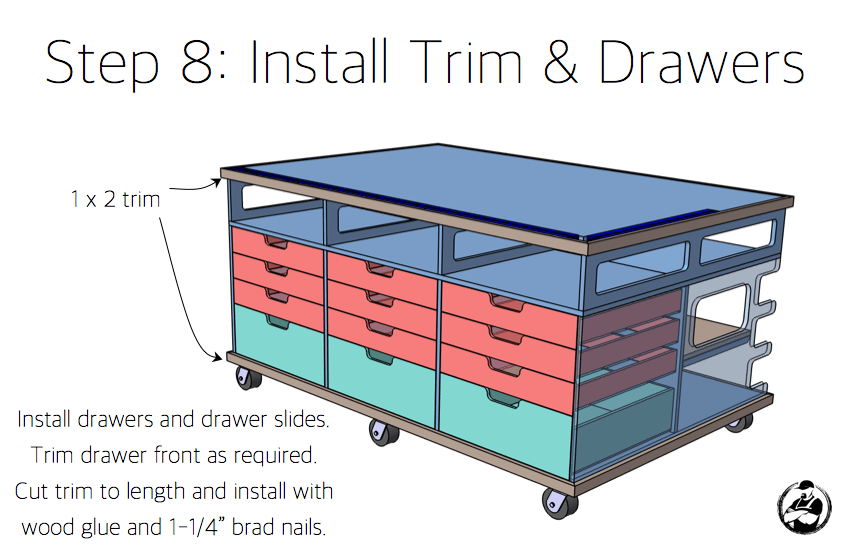
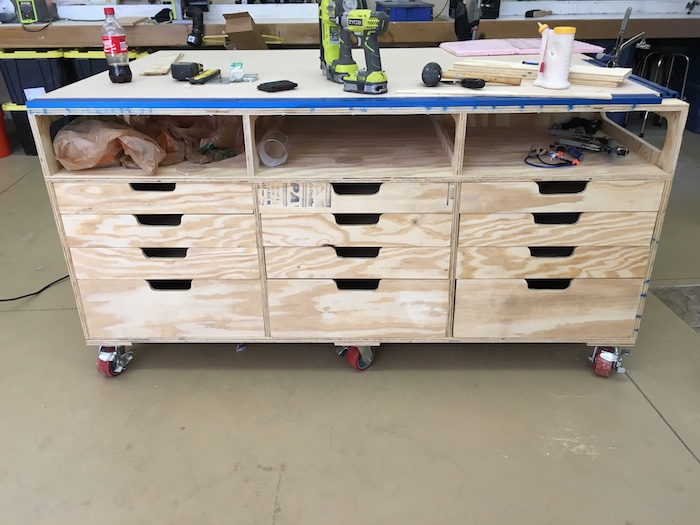
I’ve also incorporated lots of drawers for smaller item storage and 3 deeper drawers for those larger items. Storage is something you can never have enough of. This thing is a beast and quite heavy but the six 4″ casters from Grizzy make it seem very maneuverable when it needs to be.
For sneak peeks of our upcoming projects be sure to follow me on Facebook and Instagram. Also, follow me on Pinterest to get tons of projects plans from all around the web!
Required Tools
Materials
- Qty 1 – Kreg Universal Clamp Trak™ Kit – 27″ & 69″
- Accessories Optional:
- Qty 1 – 3/4″ x 48″ x 96″ Plywood
- Qty 1 – 11/32” x 4’ x 8’
- Qty 1 – 11/32” x 4’ x 4’
- Qty 1 – 15/32” x 4’ x 8’
- Qty 1 – 15/32” x 2’ x 4’
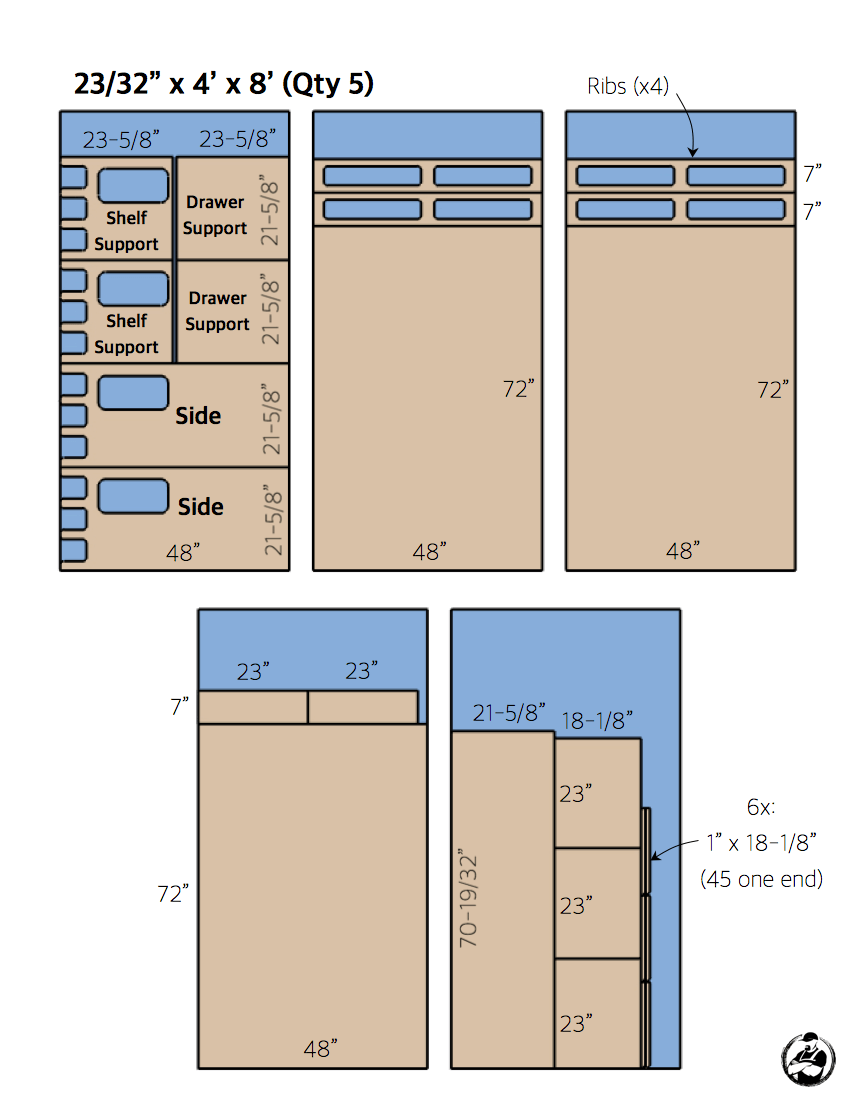
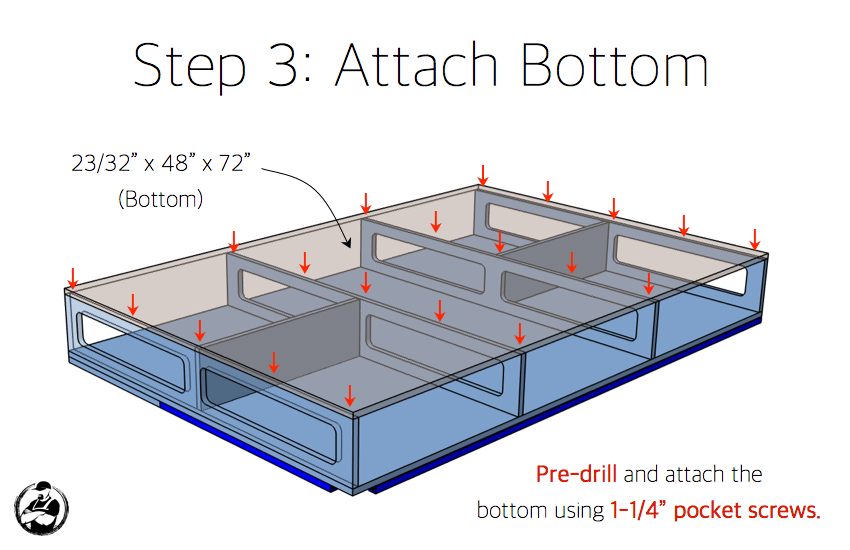
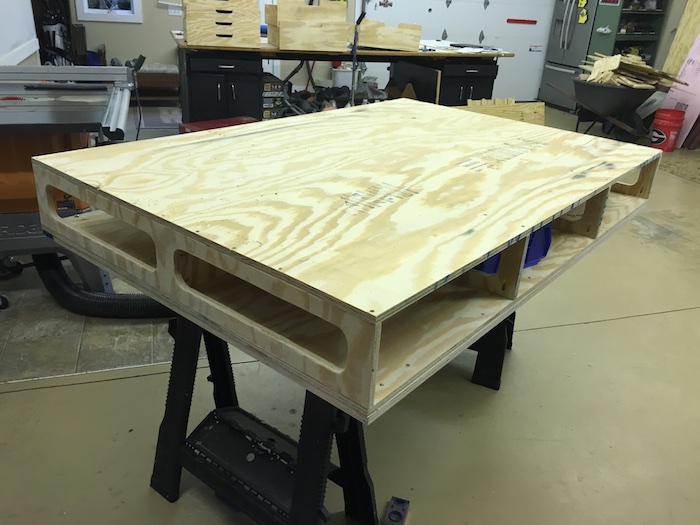
- Qty 5 – 23/32” x 4’ x 8’
- Qty 8 – 1 x 2 x 8’
- Qty 6 – 4” Casters
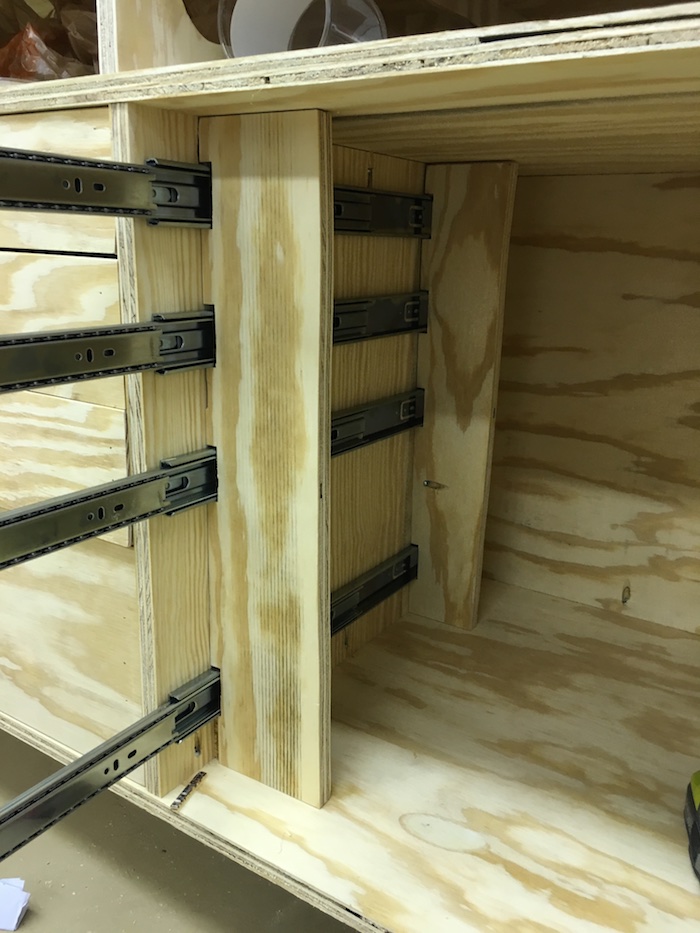
- Qty 12 – 22” Drawer Slides (pair)
- Qty 8 – 1 x 2 x 8′
- 1-1/4″ Kreg Pocket Screws (Coarse)
- 1-1/4″ Brad Nails
- 1-1/4″ Wood Screws
- Wood Glue
Disclosure: The links provided in the “materials” and “required tools” sections are affiliate links. If you would like to support our site and help keep our content free come find out more about how we can make money with no extra cost to you.
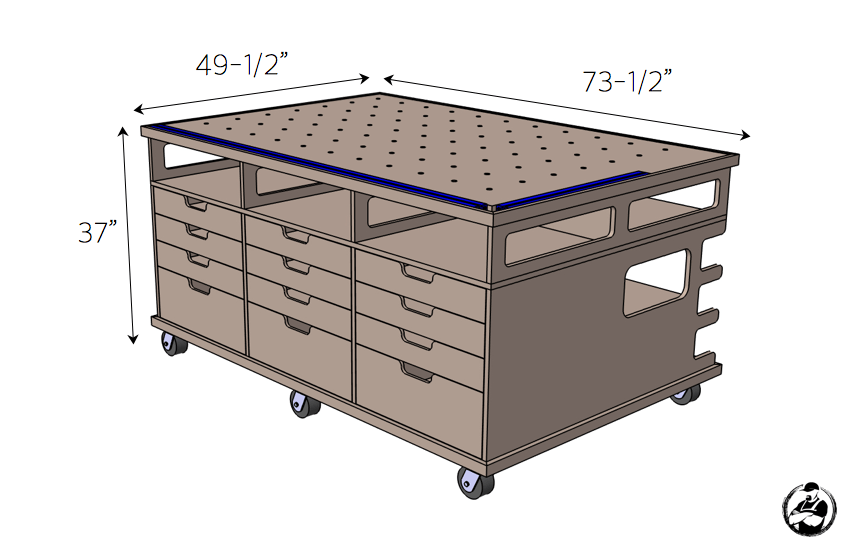
Dimensions
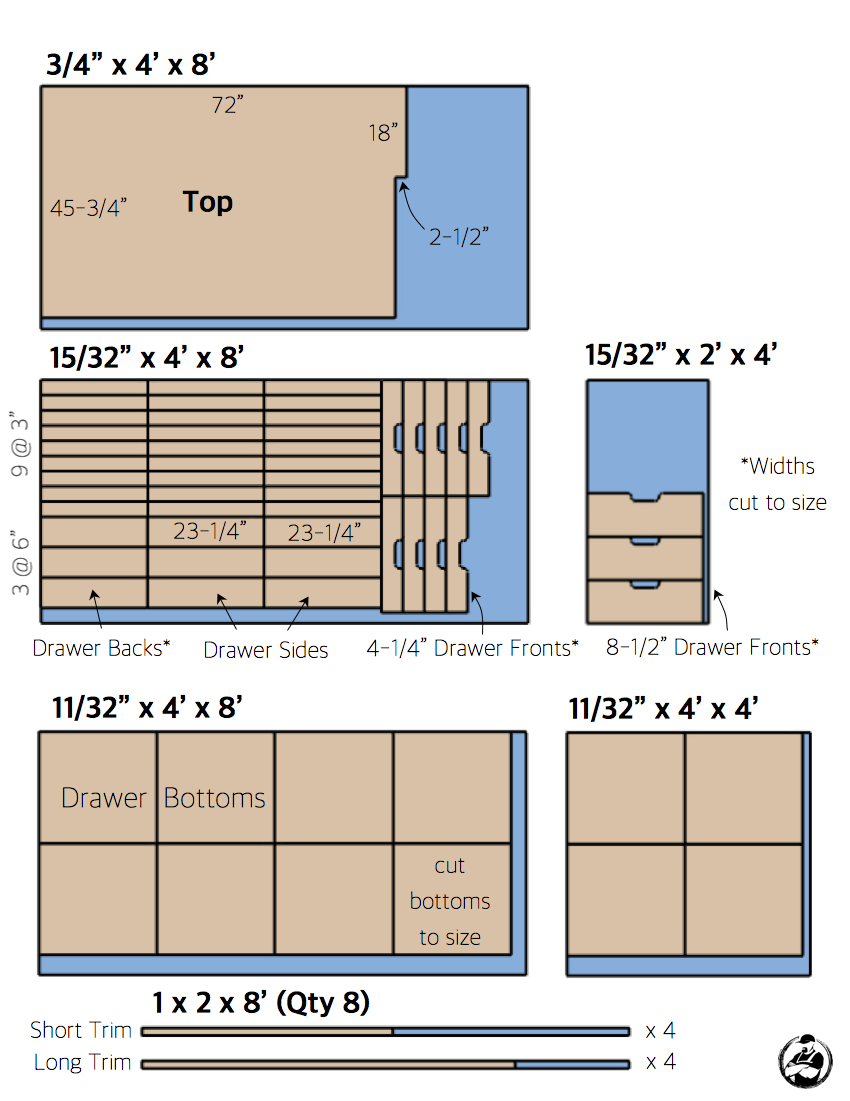
Cut List

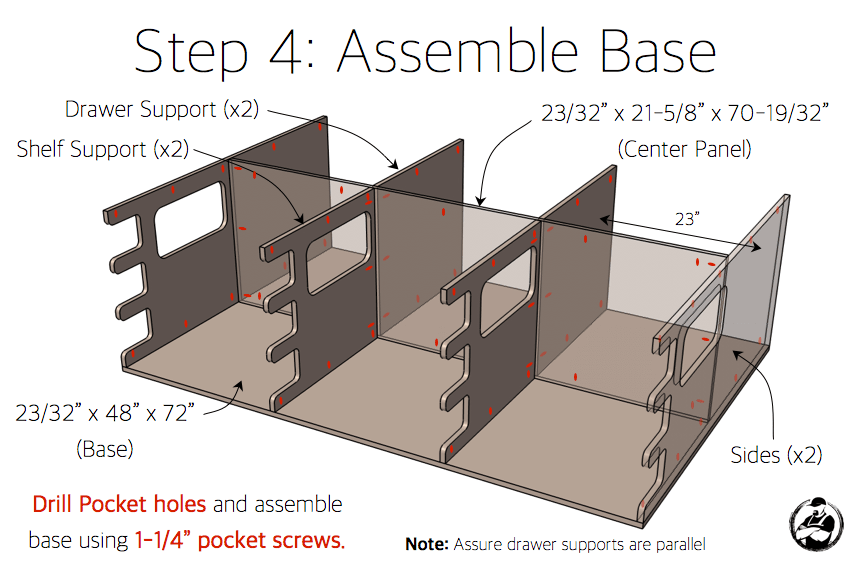
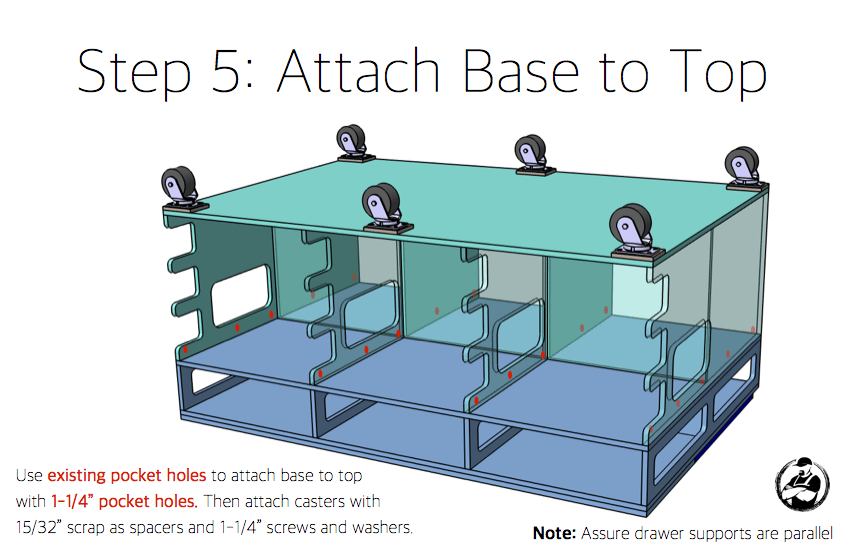
How to build the Ultimate Workstation
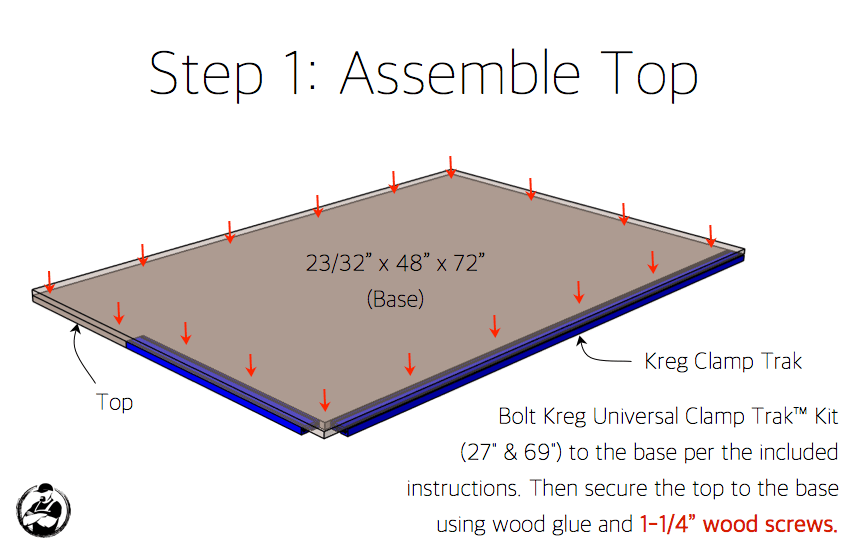
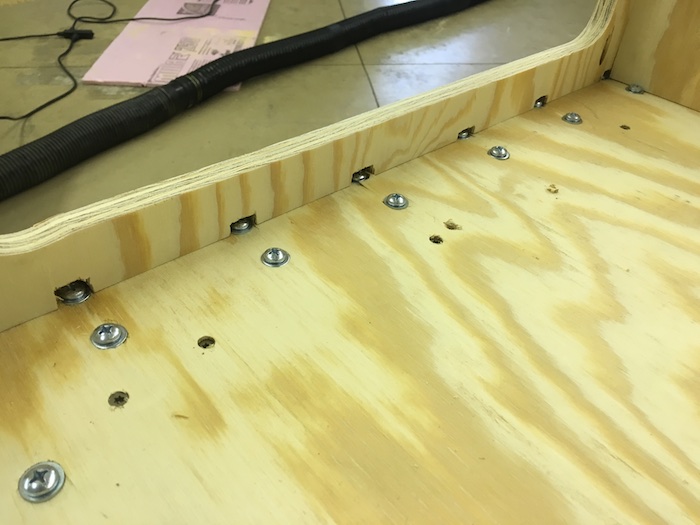
You may need to notch out your plywood to accept the bolt heads from the Kreg clamp traks.

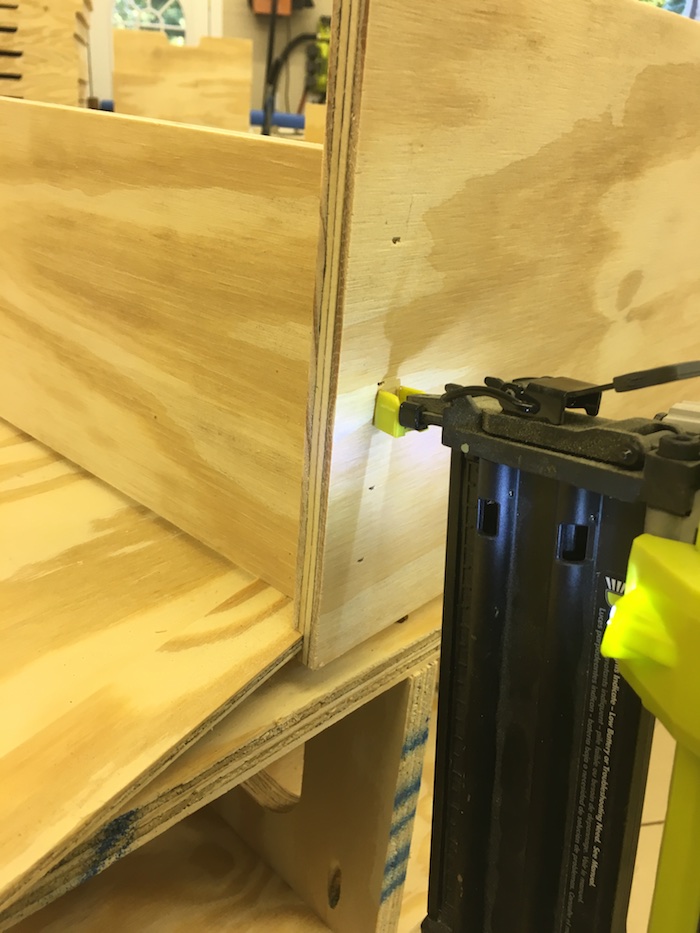
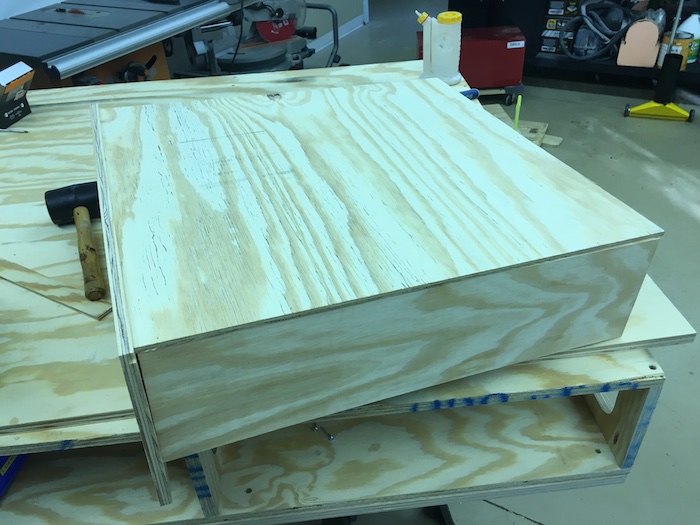
After the first set of drawers I cut out some jigs to speed up the process.

I opted not to do this right now. The more I thought about it the more I saw screws and whatnot falling through those holes. I figured I’d try it out for a while and if I wanted to drill them I could. Not so easy the other way around.
Questions? Comments?
As always, if you have any questions don’t hesitate to comment below and especially don’t forget to post pictures of your finished products in the comments! ENJOY!
I wish I would have seen this 4 months ago when I built mine. Your’s incorporates more of what I need in a bench then the one I built, well mostly built to be honest, it’s still not completed, though I’ve been using it daily….too many “Honey Do” projects lined up. I think I’ll incorporate some of this design into my table saw station for my small job site contractors saw; to make it work more like a full-on table saw. I love your designs, have been an avid admirer since the beginning. Thank you for all that you do! ?
Thanks man. I appreciate it. Trust me I get how the “honey do” list piles up!
Question about the drawer slides…
Your list says 22 inch but it links to 24 inch. Which is it, 22 or 24? I have almost all my materials to make this epic work bench! Thanks for the plans!!
Art Nagan
The link goes to an ebay item where you can select the size you want. Select 22″ from the drop down. Good luck on the build!
Perhaps I should have looked into that first! Lol. Sorry to bother with a stupid question!
Where would the best location be for a router table insert?
I really enjoy your site. Did any of your followers ever consider splitting this down the middle somehow, so it fits thru the doors and into the house? Wondering if anyone did any modified plans to accomplish this. I would appreciate your thoughts, thanks. Did I say I like your site, good job
Purchased the clamp track after I made all my cuts. It looks like the plans say to cut the notch 2 1/2″ for the shorter track in the benchtop. But the track itself is only 2 1/4″ wide. So I have 1/4″ gap between table top and clamp track right now. Wondering if this is a mistake in the plans or if there’s something else I’m missing? Either way, planning to rip 1/4″ from scrap of the benchtop to fill the gap if that space isn’t compensated for anything else…
Same issue with mine
Jamison, in one of the pictures, I can see a curtain you can pull around your garage door. Where’d you get it? I’ve been searching for something like that?
My father in law owns an interior design business and had it made.
Question: What diameter are the corners of the open spaces in the ribs, sides, and supports? Or did you just eyeball it?
I’m wondering if the small rail should go on the left or the right. You have put it on the right, does that goes if we are left handed or right?
In the materials list you have a sponsored link to the following:
Qty 1 – Kreg Universal Clamp Trak™ Kit – 27″ & 69″
When I try to connect through the link to help you get compensation I get:
“The link you clicked on has expired. We apologize for any inconvenience.”
Thanks for the heads up! The link you are looking for is: http://amzn.to/2fAbf4e
I’ve updated the post with the proper link
What software did you use for the cut list print outs and diagrams. Looks like a good program I could use.