

Turn a Chest Freezer into a Kegerator – Keezer Build
Quick answer: A keezer is a chest freezer converted into a kegerator: a temperature controller override holds beer-serving temps, and a wood collar raised on the hinge line gives the taps somewhere to live without drilling the freezer itself. Ours runs multiple kegs with a tap tower on a stained collar — a weekend build at around $400+ depending on your tap hardware. Full walkthrough with video below. Documented by Jamison Rantz.
At the end of a long day, a cold beer sure does taste good, and with our new house and garage, we’ve had many social gatherings (before quarantine). Having a kegerator has been something I’ve been wanting for a while now but I wanted something that could hold a variety of kegged beers. Commercial keg coolers with tap systems get pricey pretty quickly so I decided to convert an old chest freezer (donated from a friend) into a kegerator, otherwise known as a Keezer. These are perfect for home brewers and beer enthusiasts.
Time to Complete
1 Wknd
Estimated Cost
$400+
Skill Level
Intermediate
If you love this stuff as much as we do, you might want to consider following us on Instagram where we post sneak peeks and behind the scenes stuff in our stories. Also, did you know you can get tons of projects plans from all around the web when you follow us on Facebook and Pinterest!
Tools
Materials
- Metal Primer
- Appliance Paint or Enamel Paint
- 1x6x8 Boards (amount depends on freezer size)
- (4) L-brackets (optional)
- 90 deg clips
- 3/4″ wood screws
- Spray Polyurethane or Shellac
- Wood Glue
- Draft Plumbing
Disclosure: The links provided in the “materials” and “required tools” sections are affiliate links. If you would like to support our site and help keep our content free come find out more about how we can make money with no extra cost to you.
In this tutorial I will show you how to turn a old chest freezer into a kegerator, also known as a keezer. The main concern with altering any type of refrigeration appliance is that there are refrigerant lines running through the sides of the appliance. Without knowing where the lines are, drilling a hole through the side is a bad idea. This build utilizes a design that been around for a while where you construct a collar and place it between the top and base unit. This allows for a place install the draft beer faucets.
Total Time: 2 days
Prep the Chest Freezer for Paint
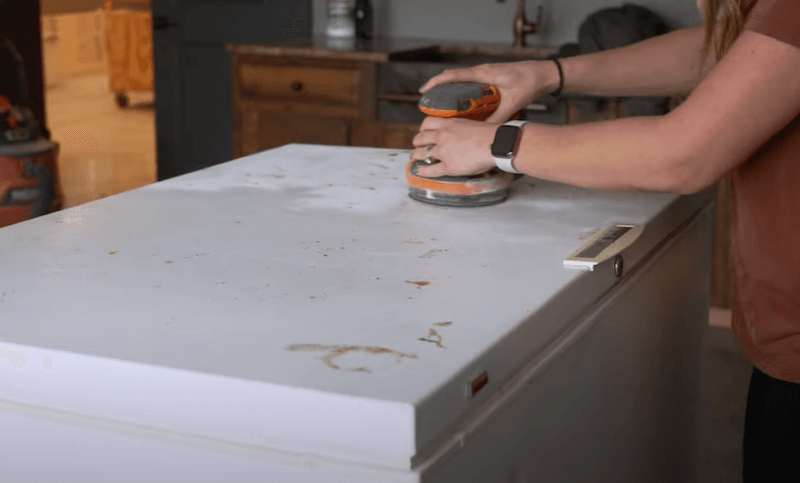
To get ready for paint you’ll need to sand down any rust spots and imperfections.
If you care what the back of this looks like then you may want to go ahead and remove the lid (step 4). I didn’t think about the fact that the hinge mounting location would be changing, due to the collar, and hence the surface under the hinge needed to be painted (as seen in step 4)
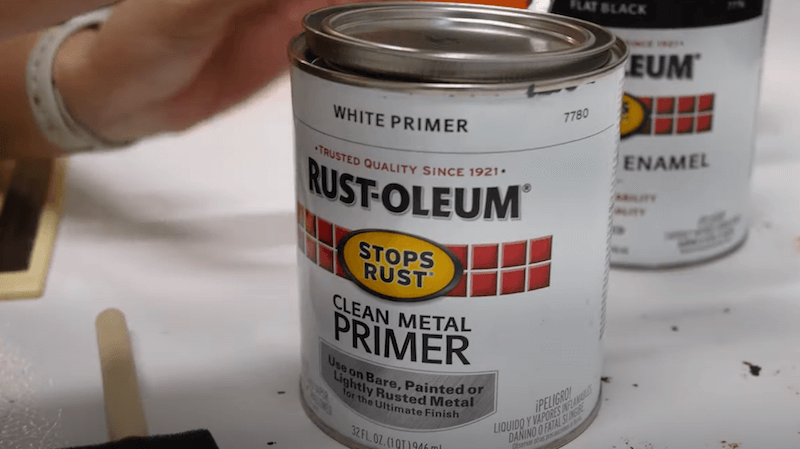
Primer and Paint
Starting off with a clean metal primer is a good idea to make sure you have good adhesion to the surface.
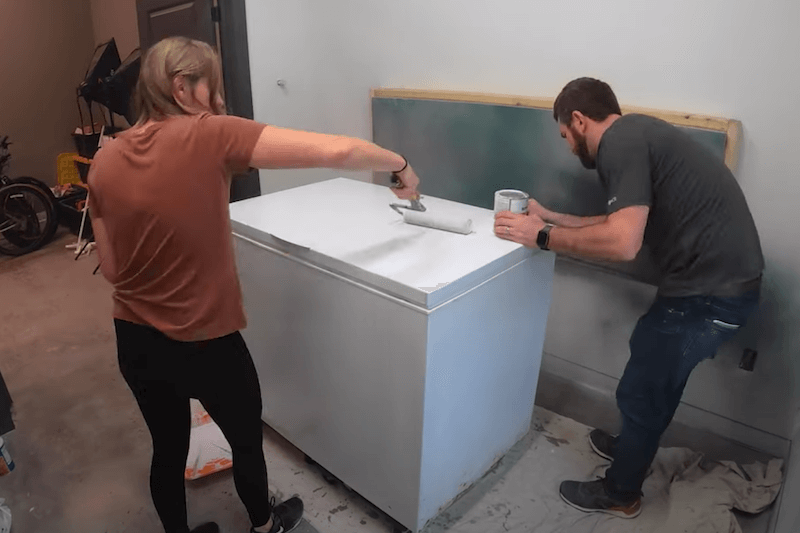
The primer can be applied with a foam roller and brush.
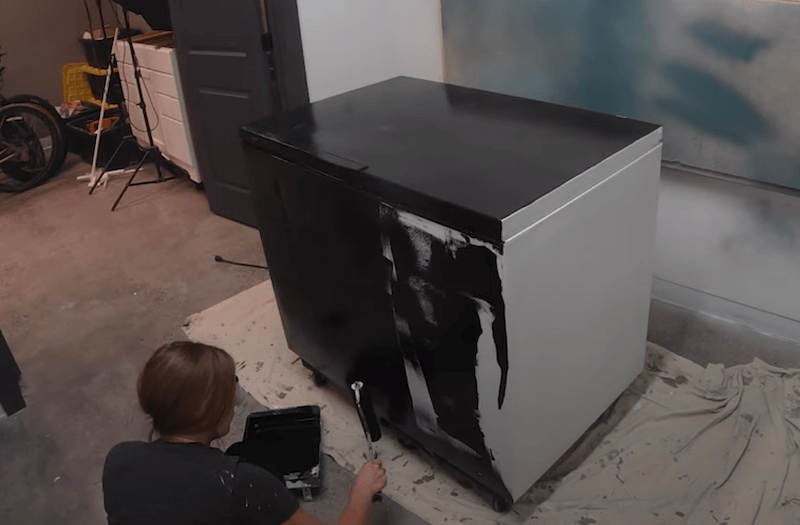
Once the primer dries completely, you can apply two coats of appliance paint. We went with enamel paint because we wanted a flat black color instead of gloss.
Building the Collar
The color is pretty simple to build. Measure the outside width and depth of the freezer and assemble a box to match those dimensions. I used 5-1/2″ plywood pieces and a pocket hole jig to screw from the inside. All joints should have wood glue applied to them.
However, you could simplify this by just buying solid wood 1×6 boards (actual width is 5-1/2″). Most likely, you can even get these cut down at the store if you know your dimensions when you go. Front and back boards should be full length and the sides will be the depth of the freezer minus the thickness of the front and back boards (3/4″ x 2).
If you don’t have a pocket hole jig you could also assemble with L-brackets on the inside corners and 3/4″ wood screws.
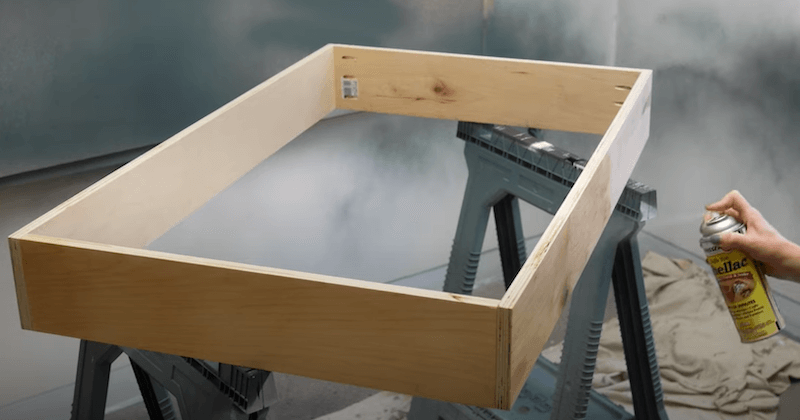
Since mine was raw plywood I wrapped it with a peel and stick walnut veneer. Keep in mind, I made mine like this because I had these things laying around. Solid wood with mitered corners or not would work just as well.
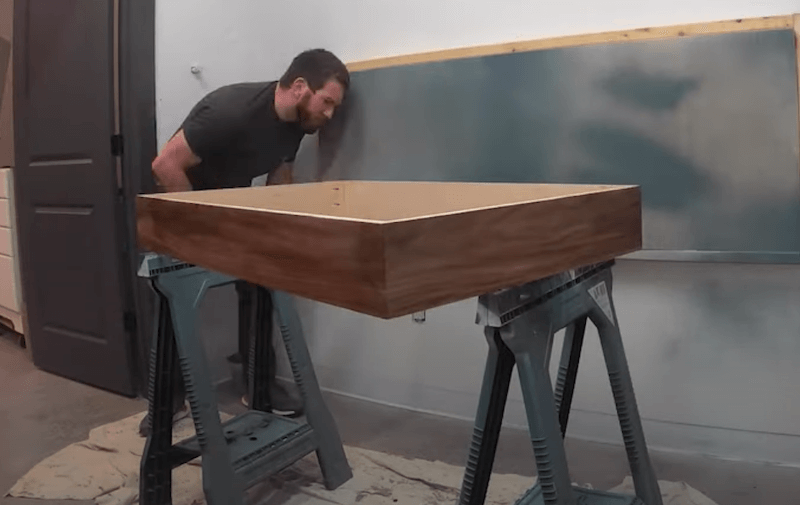
Seal the wooden collar with a spray shellac or polyurethane to protect it from moisture.
Removing the Top
The hinge for the top is spring loaded. That being said, when und screwing the hinge make sure to have some pressure applied to prevent it from flying up. It’s not a huge amount of force but it does have a little spring to it.
You can also now see my mistake in not removing the lid when painting. Since the hinge will get mounted to the collar later this white patch will need to get sanded and painted.
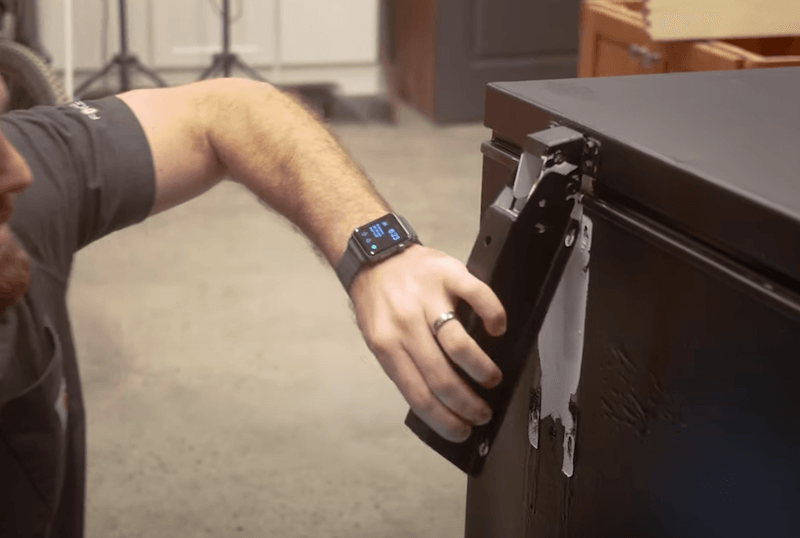
Attaching the Collar
To make sure the collar doesn’t shift around I used small 90 deg angle clips and 3/4″ screws to attach it to the chest freezer. The outside of the collar should be flush with the outside of the freezer, then locate and pre-drill into the chest freezer and attach.
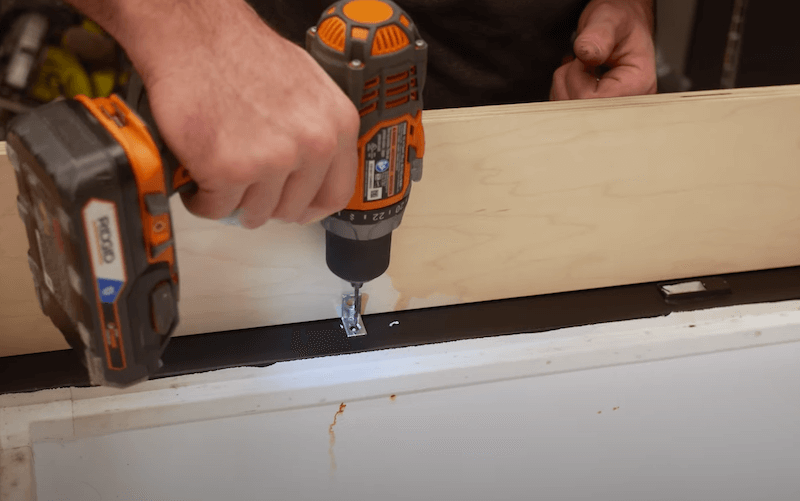
Applying Silicone
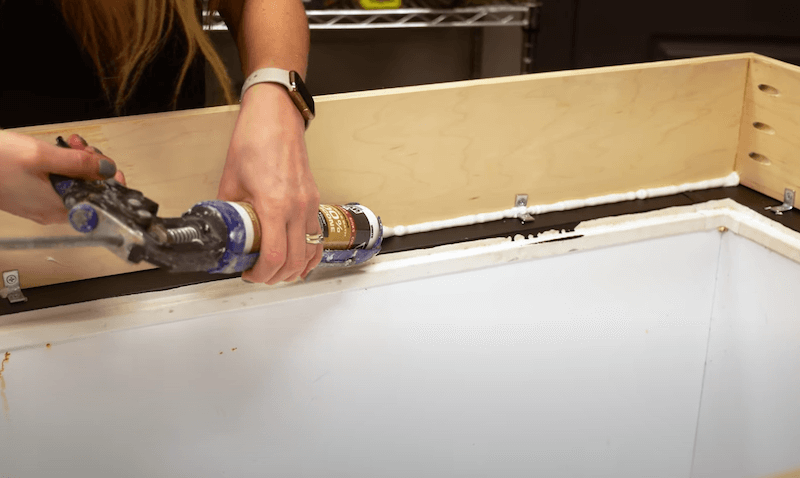
Fill the joint between the bottom of the collar and the freezer with 100% silicone. This will help bond the collar to the freezer and prevent any air movement under the collar.
Insulate the Collar
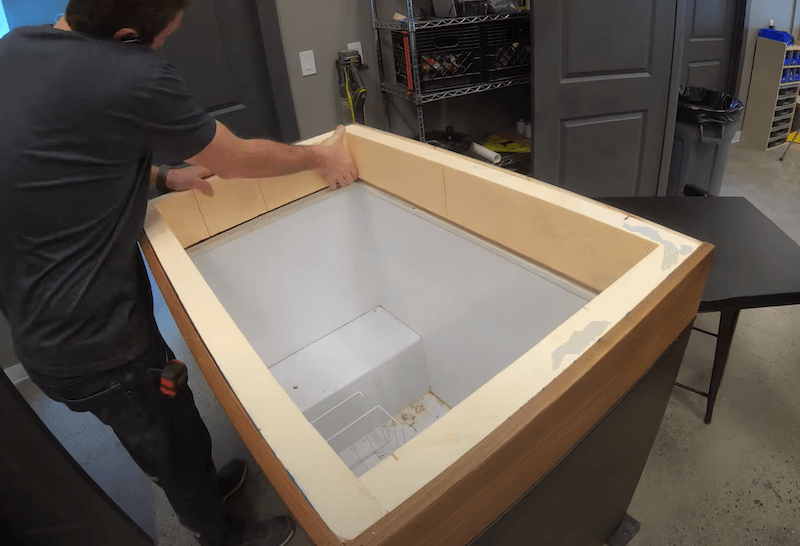
Cut 2″ thick rigid foam insulation strips to fit inside the collar. This should be a tight fit and can be adhered to to collar with 100% silicone. The foam can be cut with a long knife, hand saw, or powered saws.
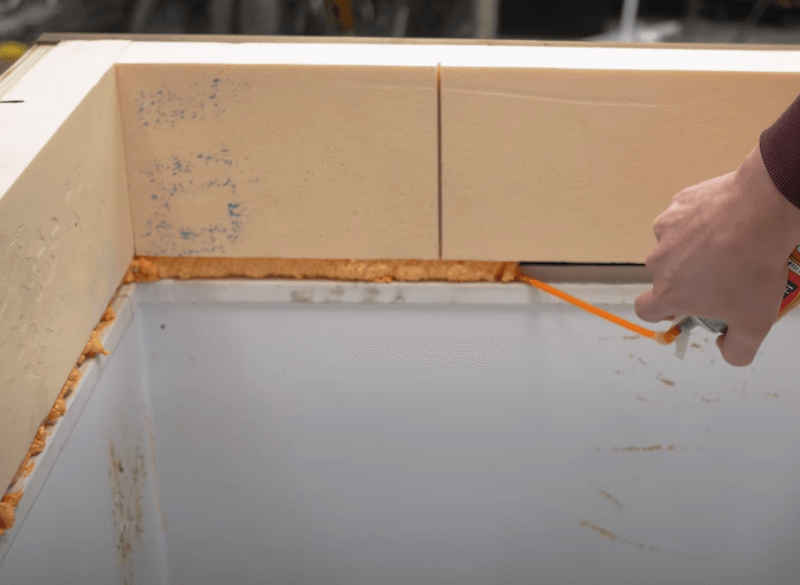
Fill the gap below the foam with spray foam.
Attach the Lid
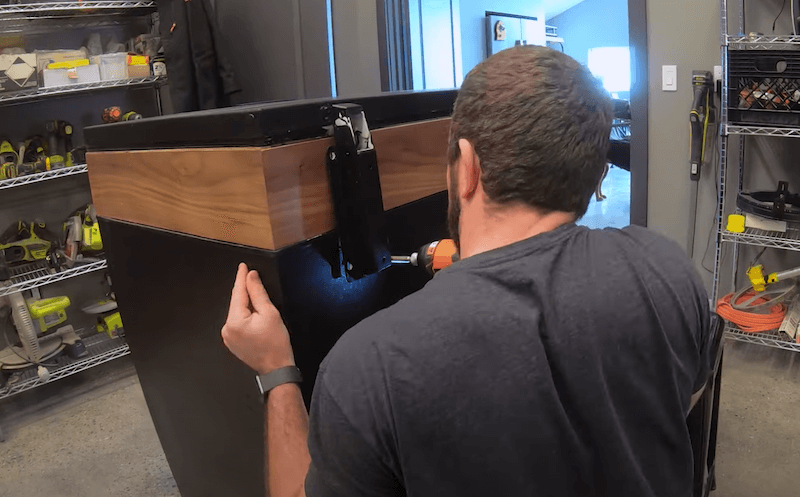
Rest the freezer lid on top of the collar and attach the hinge to the collar and the freezer. My hinge mounting holes work out such that the lower hinge holes aligned with existing, higher, holes in the freezer. If that’s not the case for you then pre-drill a small hole in the freezer before screwing in place.
Installing Shanks in the Collar
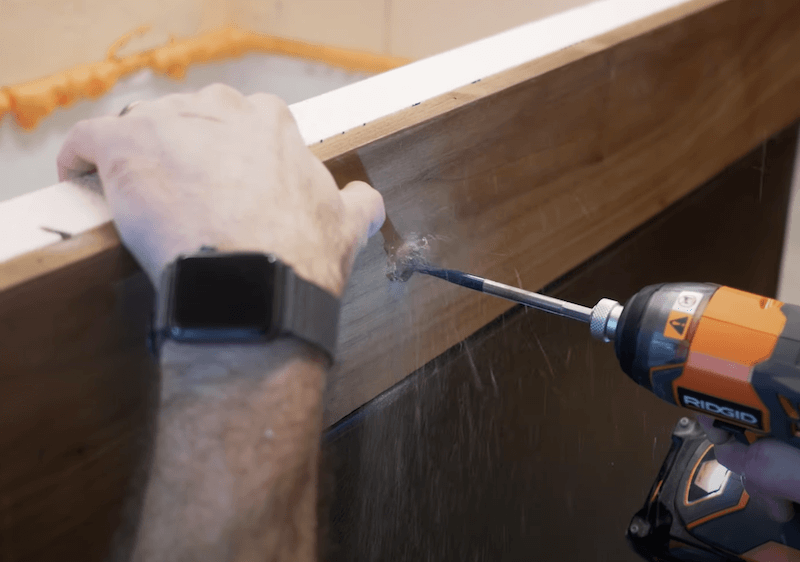
I positioned my shanks to the left side of the keezer. This way, when loading kegs into the cooler the taps wouldn’t be in the way. Typical bar spacing is 3″ on center but I went with 6″ to make sure I had plenty of room for larger tap handles. Mark your prefered hole locations and drill a 7/8″ hole at each.
Note: If you plan to use a hanging drip tray like this then I believe the spacing needs to be 3″
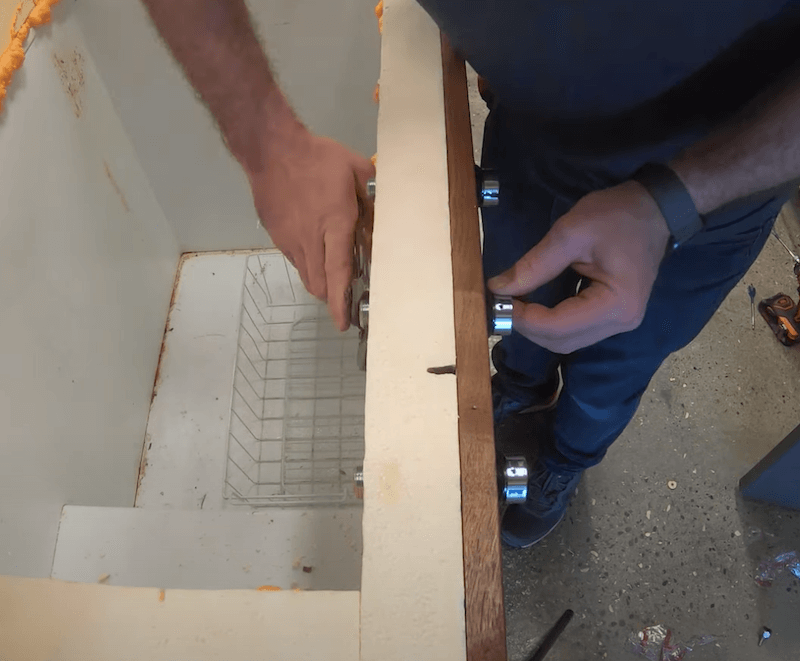
Remove the foam required to tighten down the nut and install the 4″ beer shanks at each hole location.
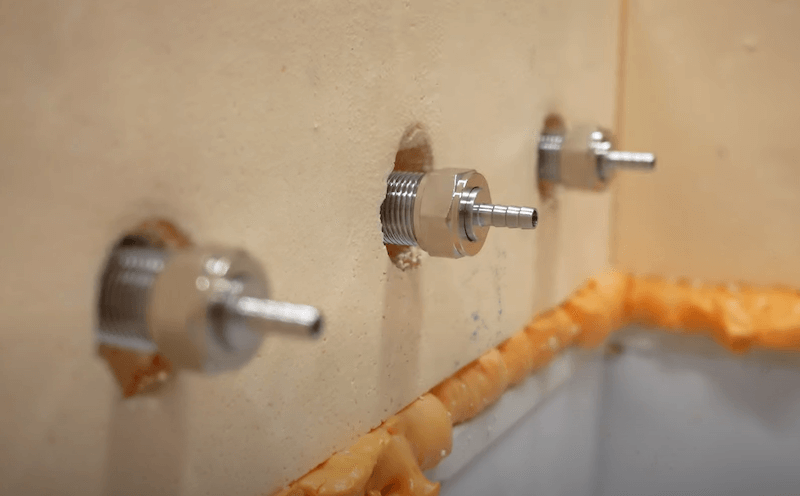
Mine didn’t come with integrated barbed connections so I installed those tailpieces here.
The Faucets
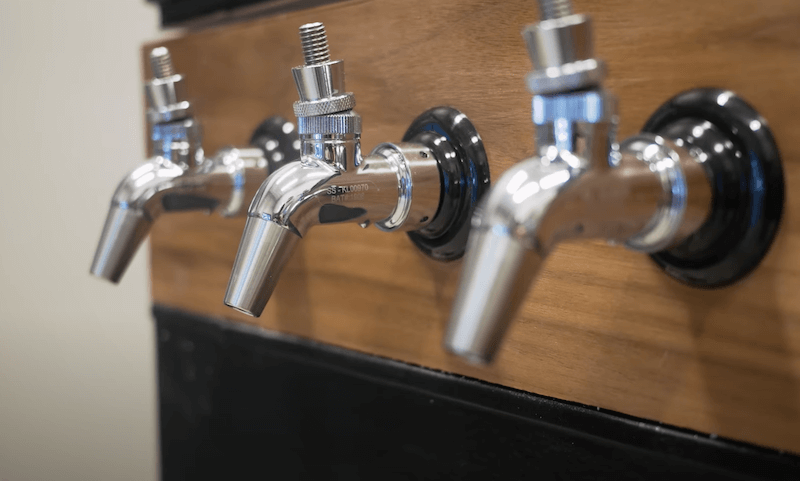
There are different levels of beer faucets. For the cheaper option I recommend a standard stainless steel beer faucet but if you want to upgrade like I did, then go with a forward sealing faucet from Intertap. The forward sealing feature is a more sanitary option and reduces chances of beer drying up inside the faucet.
The faucets screw onto the shank and can be tightened down with a beer wrench.
Plumbing the Beer and CO2 Lines
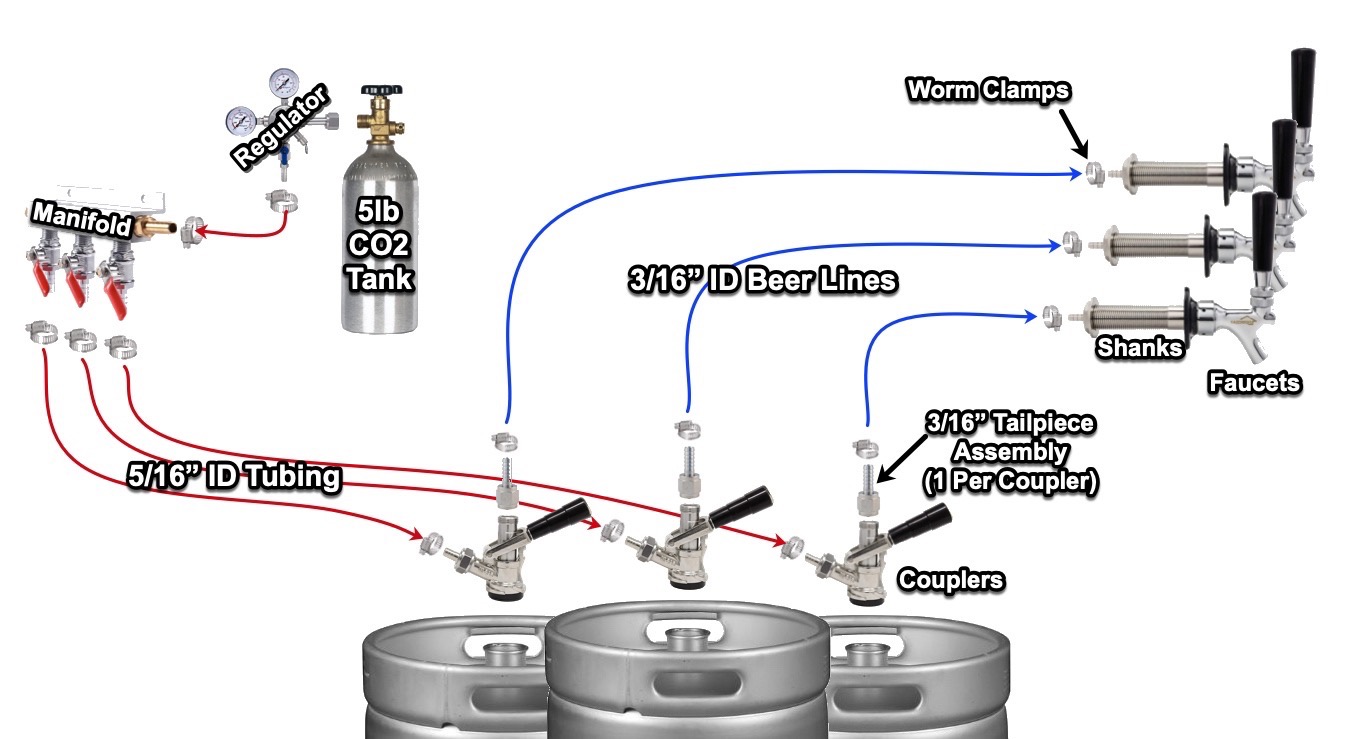
The connection of these lines is fairly straightforward. Below I have attached links to the parts and a plumbing diagram of the system.
– CO2 Tank ($65)
– Worm Clamps ($11)
– 5/16″ CO2 Lines ($13)
– Regulator ($47)
– CO2 Manifold ($26)
– Keg Couplers ($26 x 3)
– 3/16″ Tailpiece Assemblies ($7 x 3)
– 3/16″ Beer Line ($9)
– Shanks ($22 x 3)
– Faucet
– Basic faucet ($21 x 3)
– Upgraded Faucet ($38 x 3)
– Tap Handles
– Basic black plastic ($5 x 3)
– Chalkboard tap handle ($23+ x 3)
– Custom wooden tap handles ($100+ x 3)
Total cost of plumbing system only = $414+ (depending on upgrades)
I do realize this is a pretty big investment but I do believe that a properly maintained system will hold its value and could always be resold for near the same amount or potentially more in some cases.
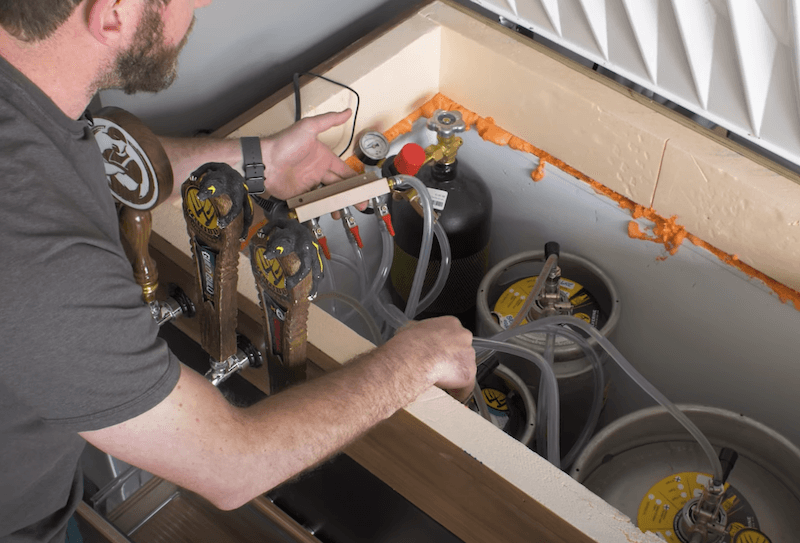
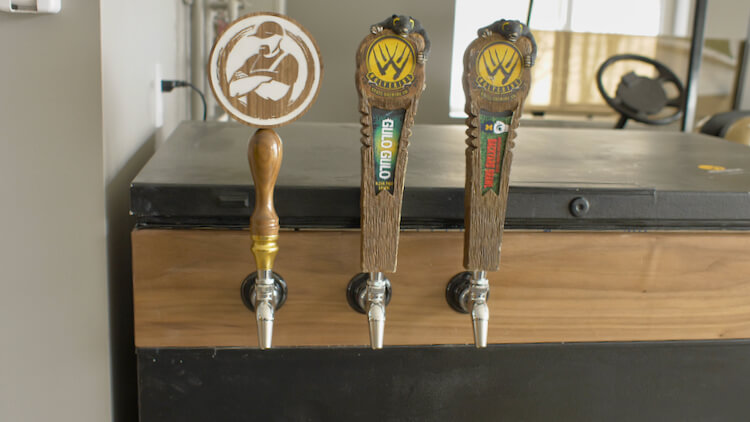
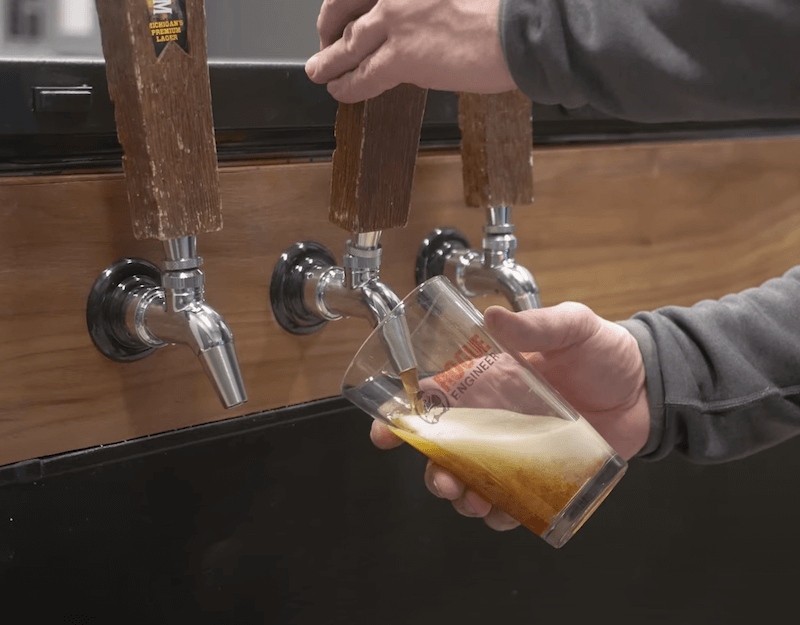
Big props to our favorite Michigan brewery in Ann Arbor, Wolverine State Brewing Company and Steele WoodWorks for making us this amazing custom tap handle! Thank you both!
Managing the Freezer Temperature
How can you make a kegerator out of a freezer? Won’t the beer freeze? Luckily we are able to manage the temperature inside the freezer with a Digital Temperature Controller. This works like a timer where it turns of or on the appliance at a set time, except it uses a temperature probe to monitor the interior temperature of the freezer. When it gets above a certain temperature it kicks on and stays on until the temperature reaches the lower limit, then it turns off. I set my controller to 34 degrees with a cooling differential of 3 degrees. That keeps the freezer between 31 and 37 degrees.
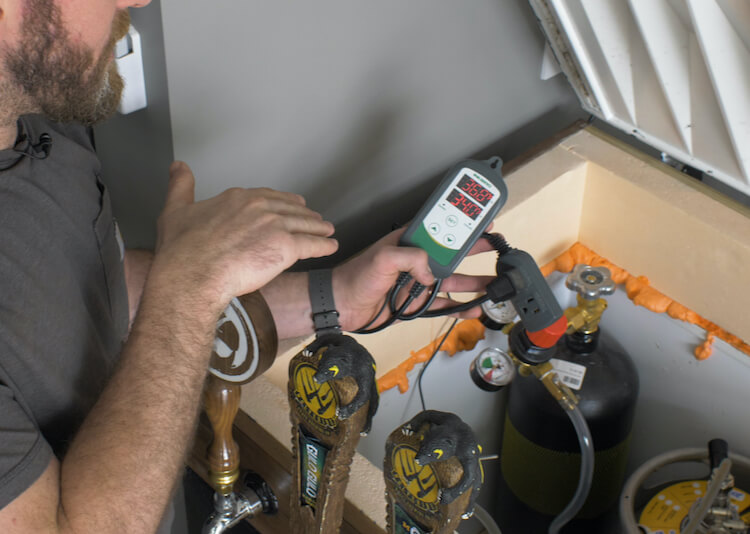
Some people add a fan to help circulate the air to keep it even. I didn’t and haven’t noticed any issues as of yet.
Setting the Pressure
The ideal CO2 pressure for most lagers and ales is between 10-12 psi. The pressure should be high enough to propel the beer at a good rate but not too high that there is a lot of foam created during the pour.
Note: When the taps sit for a while and warm up to room temperature, the first pour will create a lot of foam. This is because the cold beer is flowing through a warm tap, creating foam. After that first 1/2 beer or so the tap is now cooled and will pour perfect beer.
Installing a Drip Tray
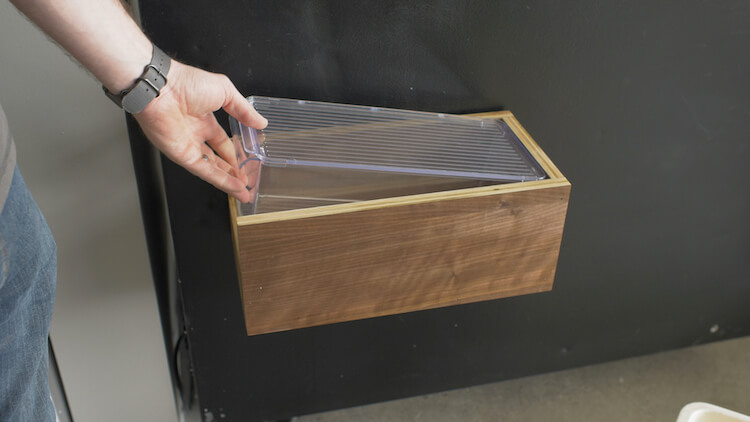
For the first couple weeks we survived with a small trash can under the faucets to catch the dripping faucets which is inevitable. I would have loved to include a hanging drip tray with drain but my faucets were spaced further apart and they are pretty expensive. I decided to use a plastic freezer bin and build a plywood box to support it which I then added really strong magnets to the stick it to the front of the freezer. It works and looks okay but I may make a switch at some point. This is the one aspect that I’m not totally happy with on this build and would love to see what everyone else comes up with so make sure to post pictures in the comments!
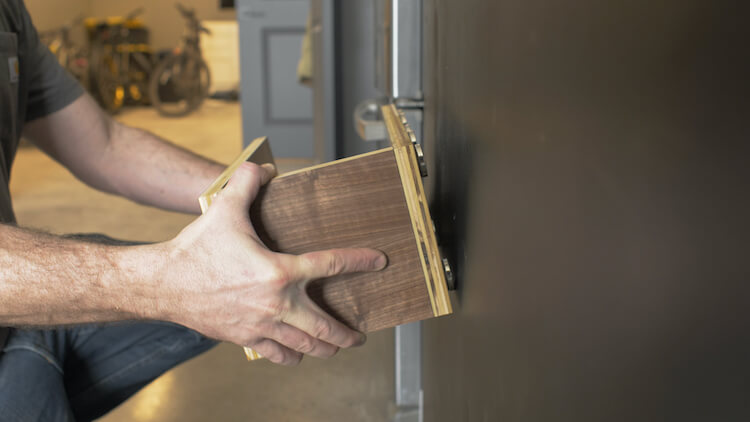
Unfortunately, the freezer bin that I used is no longer available on Amazon. I started out by drilling holes in the top but quickly decided to remove the top all together.
That completes the build and, as you can imagine, it has been a welcomed addition to the Rogue HQ! Enjoy!
Keezer questions, answered
Why build a keezer instead of buying a kegerator?
Capacity and cost. Commercial multi-tap keg coolers get expensive fast, while a used chest freezer — ours was donated by a friend — holds several kegs and converts for the price of the tap hardware. Chest freezers also seal better than most fridge conversions.
Why do you need a collar on a keezer?
The wood collar between the freezer body and lid gives you a place to mount taps and run lines WITHOUT drilling through the freezer walls — which would risk hitting refrigerant lines and voids any chance of it ever being a freezer again.
How does a freezer keep beer at serving temperature?
An external temperature controller: the freezer plugs into it, its probe reads the interior, and it cycles power to hold your setpoint (usually 36–40°F) instead of freezing temps. No modification to the freezer itself.
How many kegs fit in a chest freezer keezer?
Depends on the freezer footprint and keg format — the compressor hump is the constraint. Measure your freezer floor against keg diameters (cornies are ~9″, sixtels ~9.25″, half barrels ~16″) before committing to a tap count.
So, here i am, sitting in a “real feel” morning of 84 and humid right after a workout and then good old Rogue Engineer enters…
Man would I give anything to be sampling that Michigan beer, drawn from that very very cool custom tap handle.
Sitting, laughing and having a cold beer talking about diy projects that have gone awry (mine—not yours—would be a perfect day). Thanks for your posts, thanks for always making me hold Michigan close and hope you and your family is doing well.
Have a beer for me in NY…scratch that, have a beer to salute all those people in essential services, checkouts, delivery routes and of course law and order and our tireless health professionals.
Cheers!
—Andy in the Land of Mount Kisco
—A.N.
—A.N.
Hi. I am looking to build a keezer for my sons wedding. I was wondering if you could provide the size/dimensions of the freezer you started with. This would be helpful in figuring out what size i need for the 3 kegs. It looks like a 10 Cu Ft freezer.
thanks
Rick
PS: Love your site and your work. Your posts and info have helped me immensely.
what size is your freezer?
Thanks Jamison, great build.
Please add your digital temp regulator to your build list. They don’t cost much, but it would be helpful to folks.
Thanks again.