

How to Build a Floating Deck
Quick answer: A floating deck is a freestanding deck that isn’t attached to the house. Ours sits on deck blocks over tamped paver base — no frost footings — framed with doubled 2×10 beams and 2×8 joists, and decked in 5/4 cedar with hidden fasteners (Kreg deck jig) for a completely screwless surface. Freestanding and under 36″ off the ground, it needed no permit in our county — check your local code. Full step-by-step below. Built and documented by Jamison Rantz.
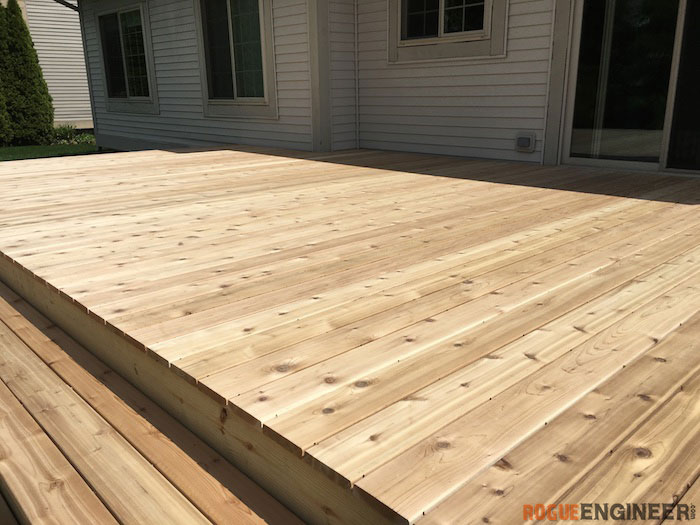
The main reason we moved to Michigan was to be closer to family. Which of course means more projects get added to the “to do” list. We love to build but even more we love to help out family, so when my brother-in-law asked me to help out on a deck build I jumped right in! We designed this deck to be a freestanding deck — in his county a deck attached to the building becomes taxable. To avoid this we decided a floating deck would be the best option. We wanted to keep the design simple and clean, so with the help of our friends over at Kreg Tool Company, we used the deck jig and let the wood do all the talking.
Note: this is by no means the only way to build a deck — it’s the way we chose based on our needs. Attaching to the house instead? That’s a different animal (ledger board, frost footings, and almost always a permit) — we cover it in our attached deck build.
Size your deck
Every deck is a different footprint, so instead of guessing at lumber, punch yours in: the calculator spits out the beam and post layout, deck-block count, joists, decking boards, and fasteners — using the exact spacing rules from this build (and the attached version, if you flip the toggle).
Deck Material Calculator
Punch in your deck size and get the full framing spec: beams, posts, joists, deck blocks or footings, decking boards, fasteners, and a complete shopping list — for a floating or attached build.
Your deck
Your deck spec
| Item | Spec | Amount |
|---|
Your deck, to scale
📩 Email me my deck spec
Get this exact framing spec and shopping list for your 20 ft × 12 ft deck sent to your inbox, with the build guide — free.
Deck sizing FAQ
Floating or attached — which should I pick?
Floating skips the ledger, the frost footings, and (in many areas) the permit — but keep it under ~30″ above grade. Attached is a structural addition: expect a permit, footing inspections, and a code guardrail. The calculator specs both from the matching build guide.
Why does it default to 16″ joist spacing?
Nearly every composite decking product requires 16″ OC or tighter. Wood decking allows 24″, but framing at 16″ now is a few boards and hangers — cheap insurance if you ever want a composite re-deck without sistering in joists.
Where do the span and footing-spacing numbers come from?
The attached-deck math follows the AWC Prescriptive Residential Wood Deck Construction Guide (DCA 6): Table 2 joist spans for pressure-treated southern pine 2×8s, cantilever limited to span/4, and Table 3A beam spans setting the footing spacing. It’s the document most local codes are based on — but your inspector always has the final word.
Affiliate links above may earn this site a small commission at no extra cost to you. Tool by Rogue Engineer — measurements match our deck build guides.
Tools & materials
How to build a floating deck
Step 1: Set the deck blocks
First and foremost, always check your local codes and pull permits if required. Since this is a freestanding deck less than 36″ off the ground, our local code did not require a permit. Since it’s not connected to the house, deck blocks were sufficient and saved us a lot of time. If you are connecting the deck to the house you will more than likely need to pour concrete footings extending beyond the frost line to prevent the deck from heaving with a frost. With ours freestanding, the frost may heave it slightly but once it thaws it settles back into place.
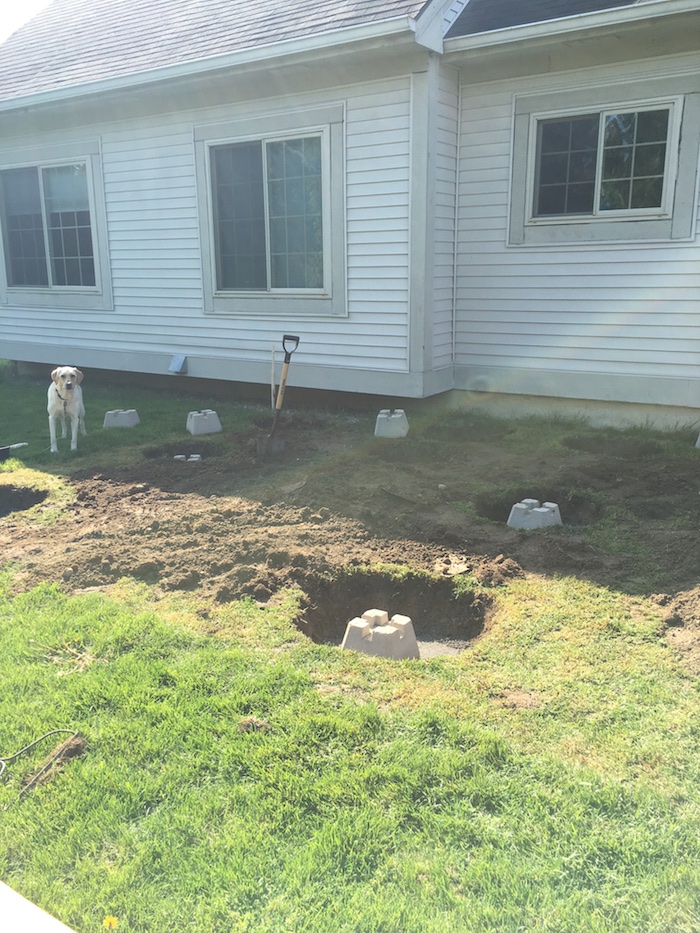
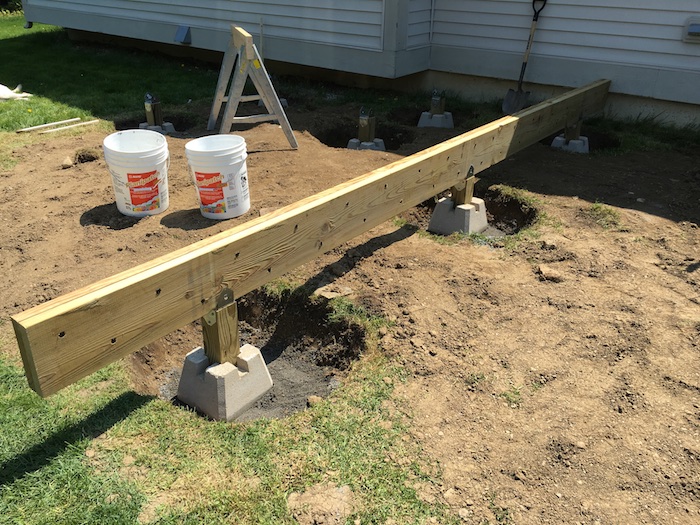
We started by marking where we wanted the deck blocks, dug down about 6″, and tamped it to make sure we were placing our blocks on solid ground. We used 16 ft beams, so with a maximum span of 6 ft and 2 ft of overhang on both sides we only needed 3 posts per beam. Our deck was 20 ft wide so the spacing between beams is 8 ft with 2 ft of overhang on both sides — three beams, plus one small beam for a bump-out in the house. Eleven deck blocks total.
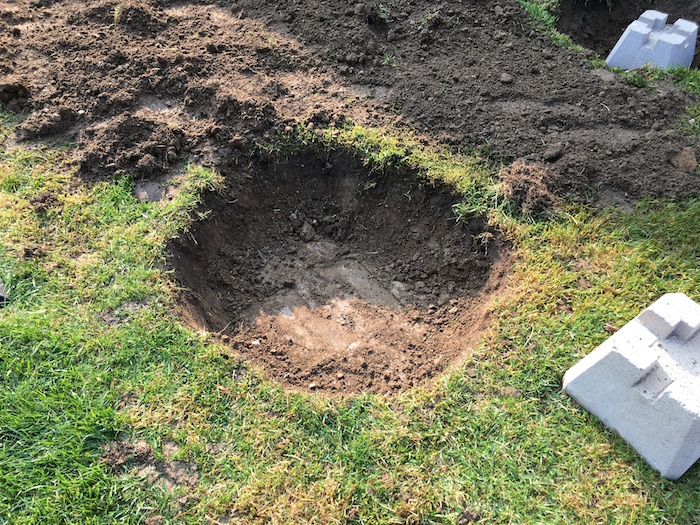
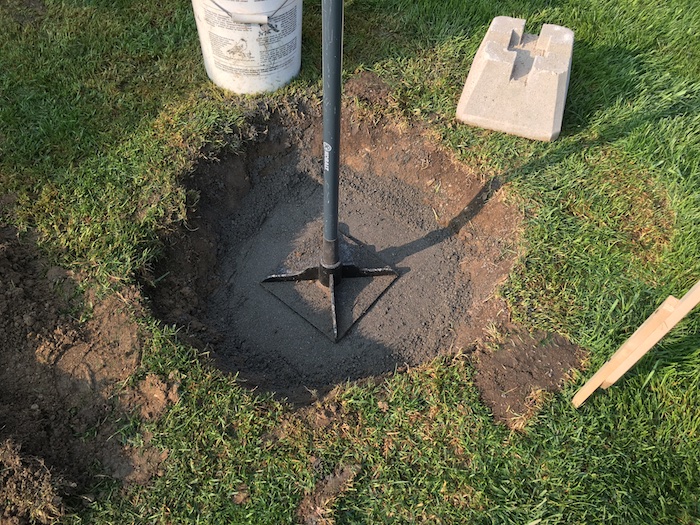
Next, we added about 6″ of stone dust (aka paver base) and tamped it down.
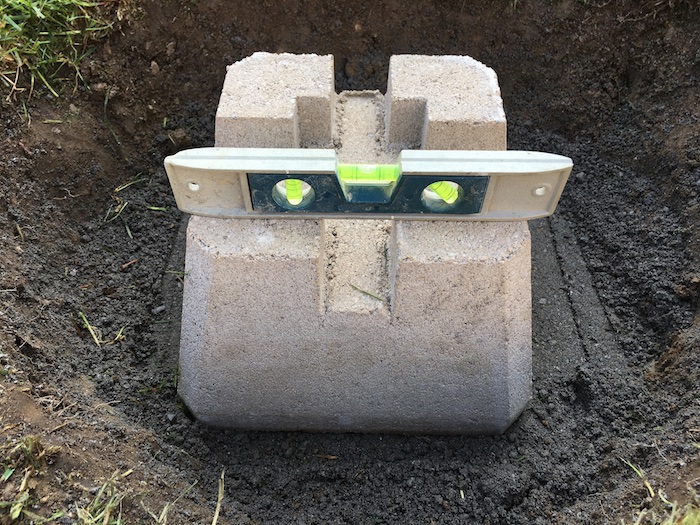
Then we placed the deck blocks, checked they were where they needed to be, and leveled each one — adding more stone dust to the low side, tamping, and checking again. Overall height wasn’t crucial yet, as long as each block sat no higher than 18–20″ below the bottom of the door.
Step 2: Posts and beams
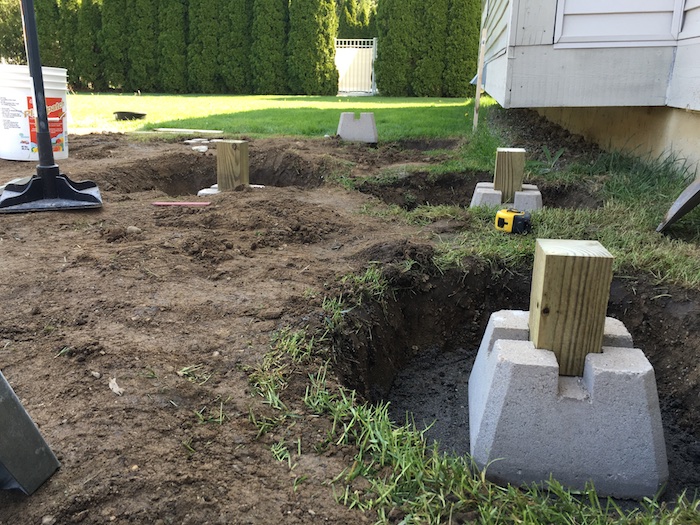
We placed our 4×4 posts in the deck blocks and marked them with a laser level 18″ below the finished deck height (9¼″ for beams + 7¼″ for joists + 1″ for decking + ½″ for good luck). Then we cut them all down at the saw, returning each post to its own block.
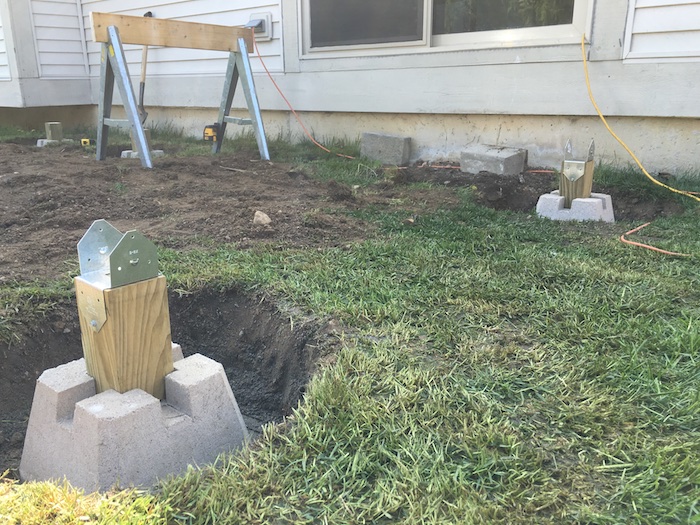
Next we attached the BSC post cap brackets with 1½″ connector screws — these connect each 4×4 post to the beam, which is two 2x10s screwed together with 2-7/8″ heavy-duty screws.
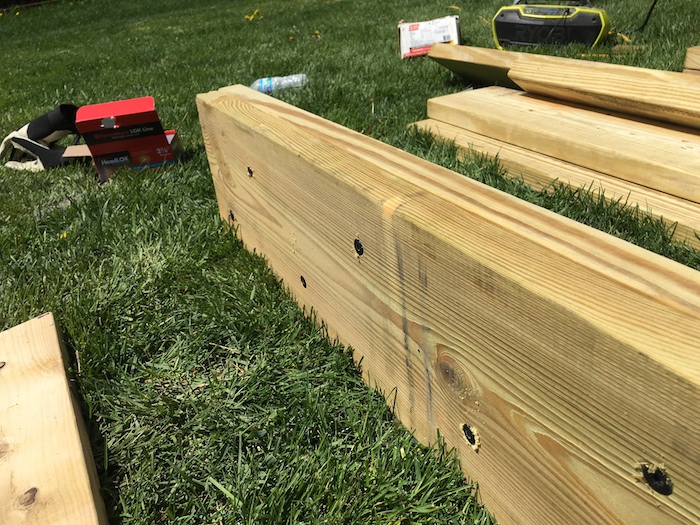
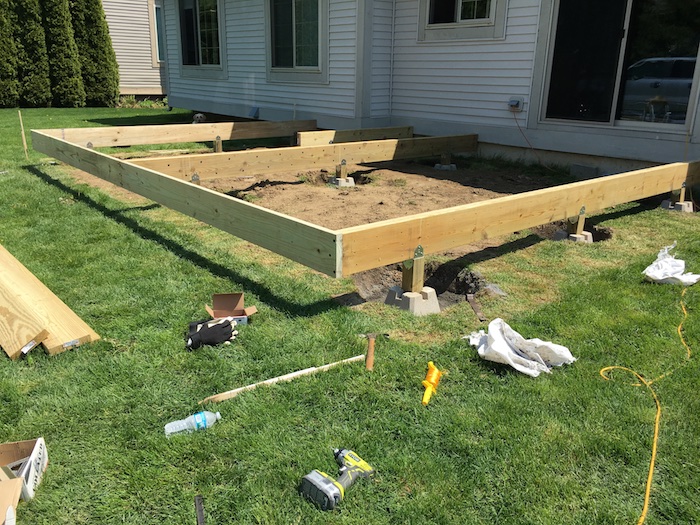
Placing the beams, we double-checked level, square to the house, and spacing. Then we added the cap boards to the beams, since the beams themselves would create the first step.
Step 3: Joists and steps
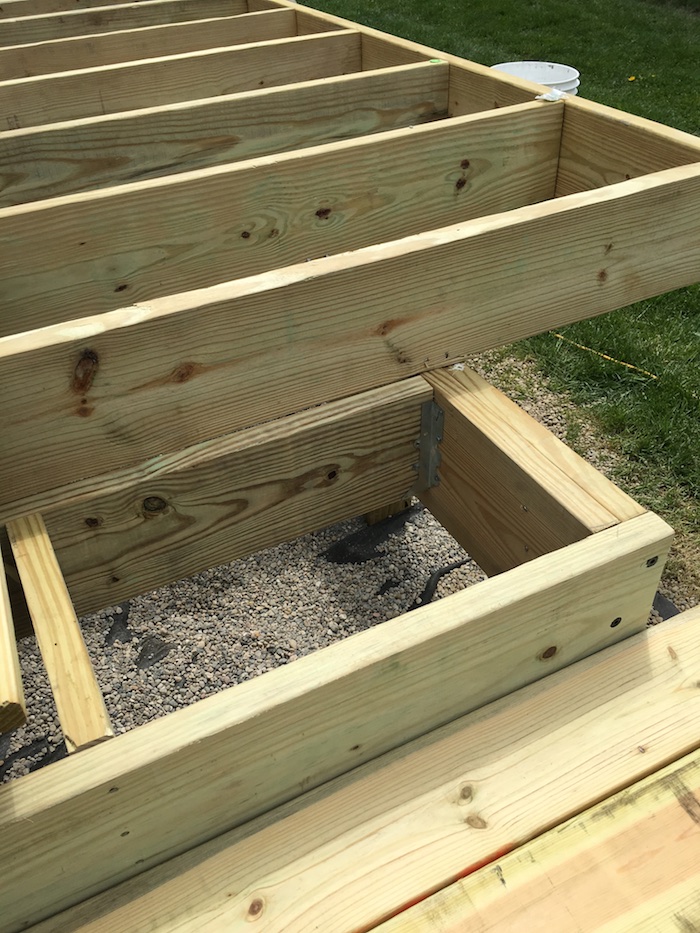
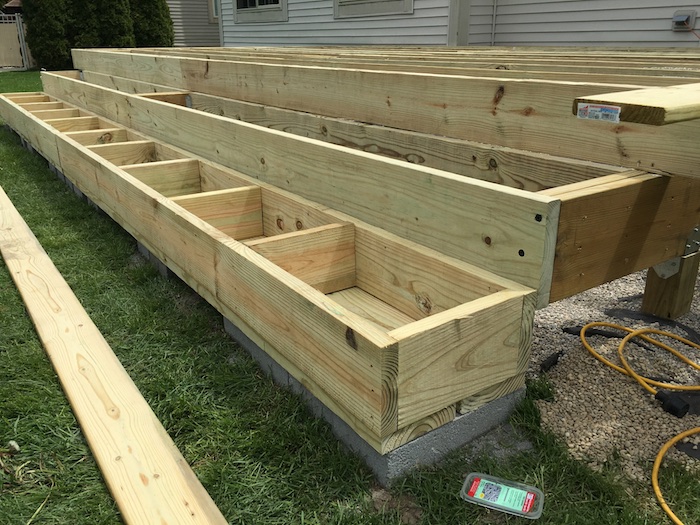
We spaced our 2×8 joists 16″ apart to span the 8 ft between beams, leaving ½–1″ between the house and the deck for drainage. We toe-nailed the 2x8x12 joists in place with 2 ft of overhang on both sides and added end caps. The joists stop 16″ short of the beam ends to create the first step down; a freestanding 2×8 box (joists 20″ apart) forms the final step.
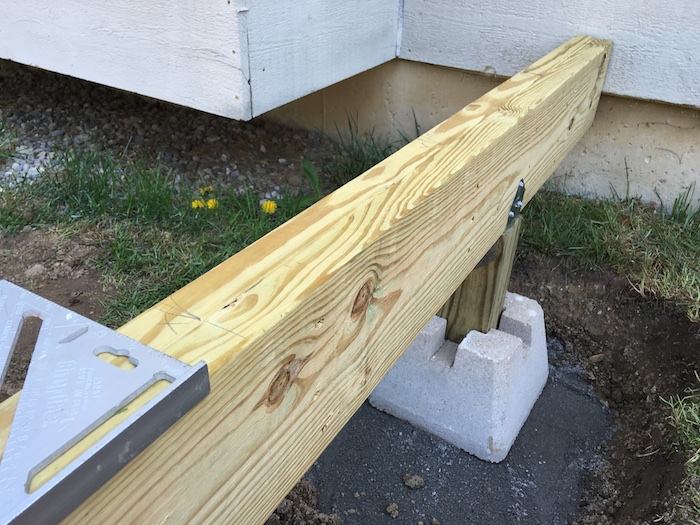
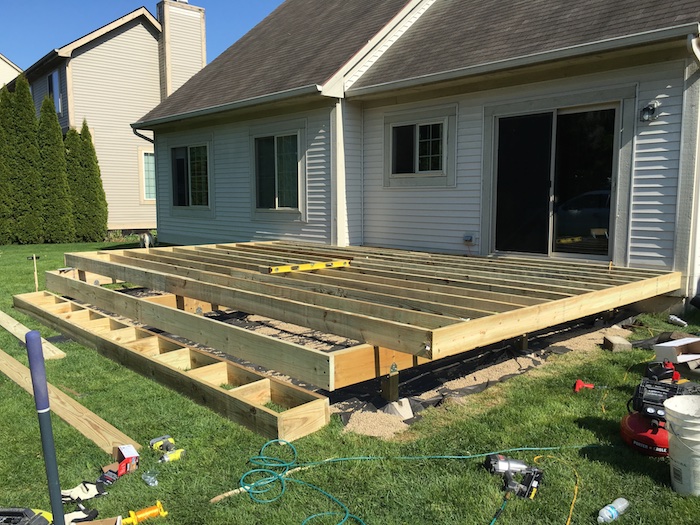
For the first step down we installed joist hangers and a 2×8 within the beams, then joists spaced 20″ apart. For the final step we laid and leveled 4″ solid concrete blocks for the step box to rest on.
Step 4: Decking with concealed fasteners
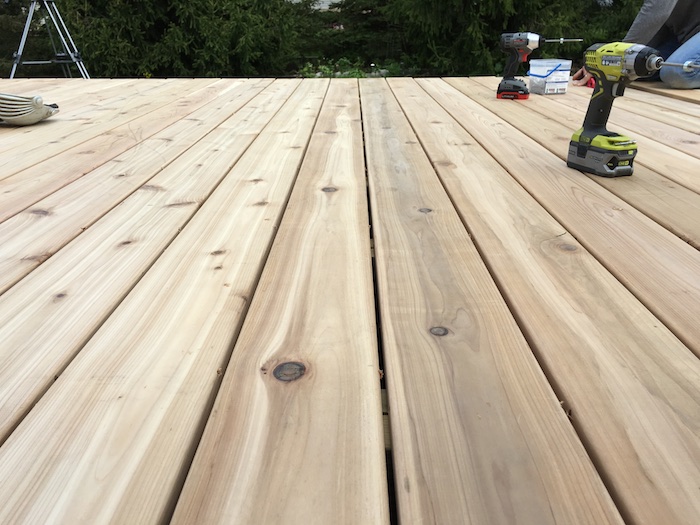
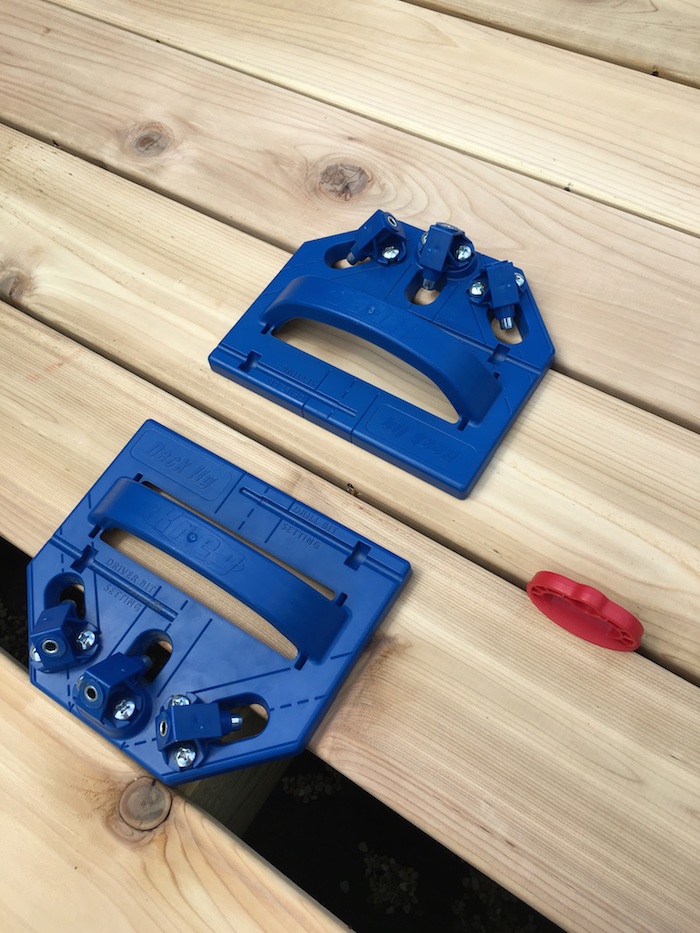
This was one of my favorite parts of the whole build — the screwless look is so clean. To conceal the fasteners we used the Kreg deck jig. It’s more work, but worth it. Kreg says it works with cedar, redwood, or square-edge composite decking; our 5/4 cedar (1″ actual) qualifies. We ran two jigs to speed things up, and discovered the 5/4 cedar really only needs pre-drilling at board ends.
After all the deck boards were secured, we snapped a chalk line and trimmed the ends with a circular saw, then repeated the same process on the steps. Done.
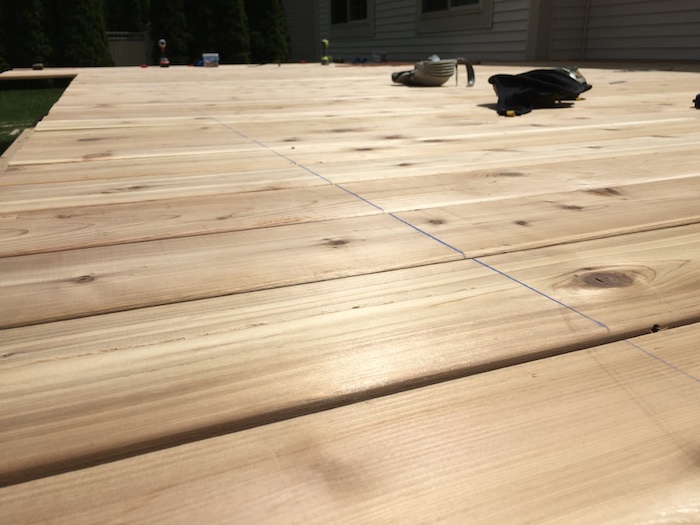
The finished deck
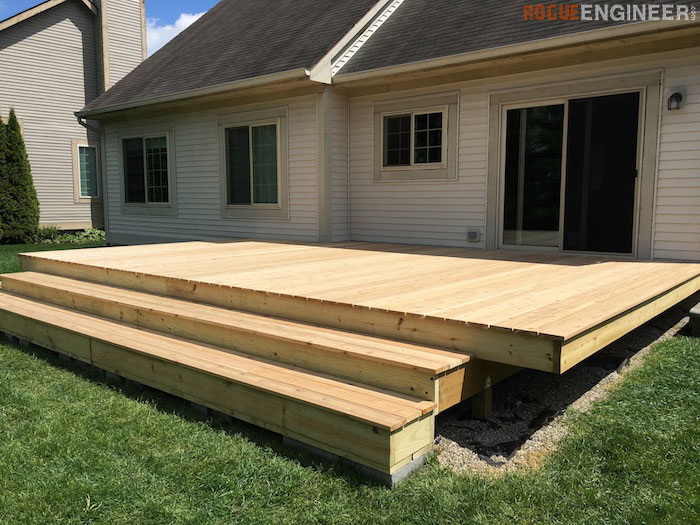
Or so we thought — check out our deck staining post. The color turned out amazing and you don’t want to miss it.
Floating deck questions, answered
Do I need a permit for a floating deck?
Often not — many codes exempt freestanding decks under a size threshold and under about 30–36 inches off the ground, which is exactly why we built this one detached. But permit rules are hyper-local: call your building department before you dig, every time.
Does a floating deck need concrete footings?
No — that’s the point. Because it’s not attached to the house, the deck can ride frost heave as a unit, so deck blocks on 6 inches of tamped paver base are sufficient. Attach the same deck to a house and you’d need poured footings below the frost line so the two structures can’t move independently.
How high can a floating deck be?
Keep it low — the deck-block system is meant for decks close to grade, and most permit exemptions end around 30 inches (guardrails become required above that too). Ours sits roughly 18–20 inches below the door threshold with two step-downs.
What is the best decking for a floating deck?
5/4 cedar is what we used — naturally rot-resistant, light, and it takes the Kreg deck jig’s hidden fasteners (which need solid wood or square-edge composite). Pressure-treated is the budget option; just let it dry before staining.
Keep building outside
Questions? Comments?
If you have any questions, drop them in the comments below — and when your build is done, post a picture. That’s the good part.
Jut started following this blog and this build is awesome! Two quick questions though…
1st – were there building permits involved? it is technically not connected to the house, so I’m guessing it isn’t required.
2nd – What are your thoughts on the resilience of the decking with the pocket screw-type method you used? any additional warping or cracks in the wood could require maintenance and it looks like you would have to remove all of the board from the end to the board requiring help! Of course, sealing and other preventative measures would help, but for the sake of argument…
Again, this is awesome. Love the blog/website. Keep on keepin on! Break the mold! Be all you can be. Like a rock. ehm… The more you know. “insert motivational caption here”.
Yep, you got it. Keeping the deck not attached to the house avoided the need to pull permits plus keeps it not taxable.
As for the cracking and warping issue, There will more than likely be some cracking issues as the deck settles. You can access the screws from between the boards, so you can just make the repairs as needed without removing additional boards.
And thanks a ton for the motivational words of encouragement. We seriously appreciate it. Happy building my friend.
Just built one of these myself and thought I would throw in some pics as well…The Zip System building is my shop. I added a small piece to that end of the deck so I can walk right out the door and into the shop without having to go up and down. I also ran the deck right into my “old” garage so that everything was at the same level as my garage is a dirt floor and the walls set right on the ground.
Dude this looks awesome! Like how everything is at one level.
Would you mind giving us an approximate dollar amount for what it cost you to build your deck? I’ve never built a deck before but some of the quotes we’ve been given from contractors are prompting me to want to do it myself.
We built the deck out of cedar which made it a little more on the pricey side, but it cost about $1500 to build.
hey. What kind of wood you used? cheers from brazil
For this deck we used cedar.
I have a similar design in mind. I’m just wondering if you get any lateral movement? Also, how are the blocks handling the weight after some years? I’m wondering how many blocks I can get away with using. Tia
It’s been a year and this thing hasn’t moved a bit. I based the spacing off of the local code so I would check out yours or refer to the AWC guide: http://www.awc.org/codes-standards/publications/dca6
Great build, the deck looks great, its been a year and days after you did this build i have couple of questions for you hopefully you have some time to answer them 🙂 how is the deck performing? at this point would you change anything that you did? is everything ok with the use of the Kreg deck gij? do you see any problems with the way you install the boards with no visible screws?
Thanks in advance “)
The deck is still performing well. We haven’t noticed any issue. The only thing we would have changed is the cedar top. We love it BUT the dogs nails just tear right through it, scarring up the stain.
One question. What length of 2×8 did you use for the joists on this deck to make it 20′ wide? Did you use 2x8x12’s and cut them down by the 4′ to make the deck 20′ wide?
Thank you.
I used 12′ boards and overhung them in the middle.
How did you even out the last row of joists for the finished riser to the first step?
Did you put in weed barrier and stone below the deck? Also how does the lowest step attach to the main structure?
Hi there. I’d like to follow your example when building my deck. I have a few weird spots I’m trying to wrap my head around. The biggest question is joining beams. I need to run 20′ and local shops only carry up to 16′ for 2×10. Could I simply run by beams 12′ long and but in additional beam running 8′?
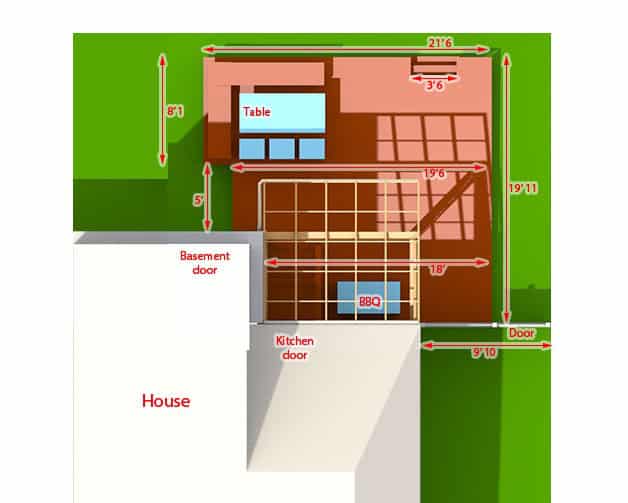
Even if I were to change their direction, the plan is for 18′ wide, so I’d have a similar problem that way.
Hey Jamison! My sister just closed on her house today and I’m headed up to Ypsilanti this weekend to put this deck behind her house! You did great here and can’t wait to follow suit on the design! Are you close by? Wanna come over and supervise?! LOL
Hey Jamison I built this floating deck this spring in time for our sons graduation. Great plans easy to follow. The design and concept seemed a perfect fit for the cold of New England. We added a side rail to keep the young children from jumping off the sides
Hello from a fellow Michigander – and thanks for sharing your experience with this floating deck. If you were to do this on a larger scale, say, 20′ x 50′, would you do anything differently? Thanks!
The same principles would apply just using appropriate block, post and beam spacing.
Hi Jamison! I’m just curious as to whether or not you noticed any settling/sinking with the use of the deck blocks? I’m in the planning process of my own deck and I see a lot of folks that say the deck blocks need to be 2′ apart. That seems like overkill. I saw an earlier comment that said it was good after a year, so how about now? Thanks!!
Still good to date! No sinking or heaving and we had a pretty brutal winter this year
ericvirostek yes
Hey Jamison,
First time post here. I really like the look of this deck, a lot. I am thinking of making it 26×16 and with rails. Our deck would sit about 30-33 in above grade. Looking to have no more than 3 steps. Would you recommend I follow your plans? Do you have them via pdf? New diyer here and want to add rails.
Hey Jamison, can you respond with county that had the rule for “Since this is a free standing deck and less than 36″ off the ground our local code did not require a permit.” I am trying to describe building this type of deck to my building inspector and he seems confused by it.
Canada has the same bylaws. If you look up City of Surrey in British Columbia you can search for the bylaws. The only other restriction is the area of the deck but don’t think that applies to all areas.
It depends on the municipality. In mine (Ottawa), it’s anything 24″ above grade, anything more than 100sq ft. and/or anything attached to the house.
Great explanation. I am going to use these blocks as the foundation for a 4×6 lean to greenhouse and I have wondered if there would be any need to secure the 4x4s into the dek block somehow (for wind)? Attached to the upright 4x4s would be horizontal 4xs that would serve as the place to attach the greenhouse. This is on a sloped apron of concrete. Thanks for any input.
Hi Jamison, i live in MN and am thinking about building a deck with Dec blocks, partially buried like you did. My concern is that the harsh winthers will cause some shifting of the blocks and stress on the deck. U posted this in June 2016 so it’s been through 2 Michigan winters. How is it holding up? And shifting? Thanks.
Eric
No shifting at all. From what I here, frost heaving is more of a problem in bad soil/clay. If you are on sandy soil it shouldn’t be an issue.
disqus_aIgWbB19tN easy
Hello Jamison. I’ve never built a deck before and gave it a go based on your plans. I used basic Redwood from a big box store and made the deck 12′ x 18′ with a wider top step and a smaller lower step which my wife insisted on to make the step down more gentle per your post deck building observations on your build. We are both now proud owners of a very beautiful deck and have you to thank for the motivation and technical know how…thank you so much from the McCullough’s in North Idaho. https://uploads.disquscdn.c…
That looks awesome! Thanks for sharing and glad it worked out.
Hi. Great plans and instructions. I noticed that you didn’t back fill the holes after you placed the deck blocks. Have you had any problems with water pooling in the holes or was there a reason that you didn’t back fill? I live in the Pacific Northwest and we get a bit of rain…
We actually did back fill those holes and cover everything in weed barrier and stone to weigh it down. You can see this in the last pictures before the decking goes in. Also make sure to pitch the ground below the deck away from the house as water will obviously penetrate the deck and you’ll want it to run away from the foundation of the house
Thanks. Missed that last pic. I have already added the weed barrier and stones but just wasn’t sure about back filling the holes. I’m assuming you used stone vs slag/fill to backfill.Thanks for the quick response as well. I’m starting the actual build on Sat so was hoping to get a quick response.
Thanks for the inspiration! Did your 4×4 posts have any play or movement once put on top of the blocks? I feel like I need to put shims in between my posts and the block.
I have the same question – as others in the comments section have. It would be great to get this question answered. Thanks.
Nice. Gives me a few ideas.
I’m looking at doing something similar but on a smaller scale. The deck will only be 10×12. And it’s only a foot off the ground. Will using 2x6s 10 feet long for the joists with a cantilever of about 20 inches and a span of 80 inches be ok?
Hey Jamison, great work as usual. Would it be possible to mount a pergola on a deck built like this? Thanks in advance.
Looks awesome! Great work. Structuring a similar plan based off of your deck, was it normal for the 4×4 to wobble some before attaching? I’m at the tampering phase with holes dug but a little concerned with the movement.
Great article!
Gave me some quite good advice on how to build floating deck, Thank you !
Deck Builders
The legs will catch water in the concrete and soon you have to replace them. I have now that problem
Hi Jamison! This is great! Thanks a ton for posting. Not sure if you are actively answering questions on here anymore but I thought I’d try.
What did you with the holes that were left around the deck blocks. Did you fill them in with dirt so that the holes were leveled off? If so, I’d imagine most of the deck block would then be buried in dirt and have you had any issues/concerns with that?
Also, it looks like you may have laid some sort of barrier and then gravel on top of that underneath the deck? Can you tell me more about that?
Thanks in advance for any help you can provide.
Charlie
Hi Jamison
Awesome deck! Was there any concern with spacing your beams 8ft (and therefore deck blocks)? I’ve read a few different places to space deck blocks between 4-6’? Thanks!
Are you able to make this a printer friendly (PDF) file. I want to print it and file it until I am ready to build.
Thank you
Great question! There’s no separate PDF for this one, the whole build lives on the article page. Easiest thing is to use your browser’s print option and choose “Save as PDF”, that’ll give you a copy to file away until you’re ready to build. Be safe and happy building.