Landscape Timber Retaining Wall
We had two big retaining walls to build and concrete block was out of our budget. Using 6×6 landscape timbers is a much more affordable option (about 1/2 the price) but the lifespan is less than that of concrete. After a ton of research I was able to come up with the construction plan to help mitigate water damage with drain lines and proper backfill, extending the lifespan, as well as build a structurally sound retaining wall reinforced with deadmen that tie the wall back into the hillside.
Step by Step Video
Required Materials
- 3/4″ Crushed Gravel Footing
- 3 or 4′ long 1/2″ Rebar (to pin the first course)
- 6×6 Landscape Timbers
- Simpson StrongTie 10in Timber Screws
- 4″ Perforated Drain Pipe
- Non-Woven Filter Fabric
- 3/4″ Clean gravel for Backfill
How to Build a Landscape Timber Retaining Wall
A step by step guide to building a Landscape Timber Retaining Wall.
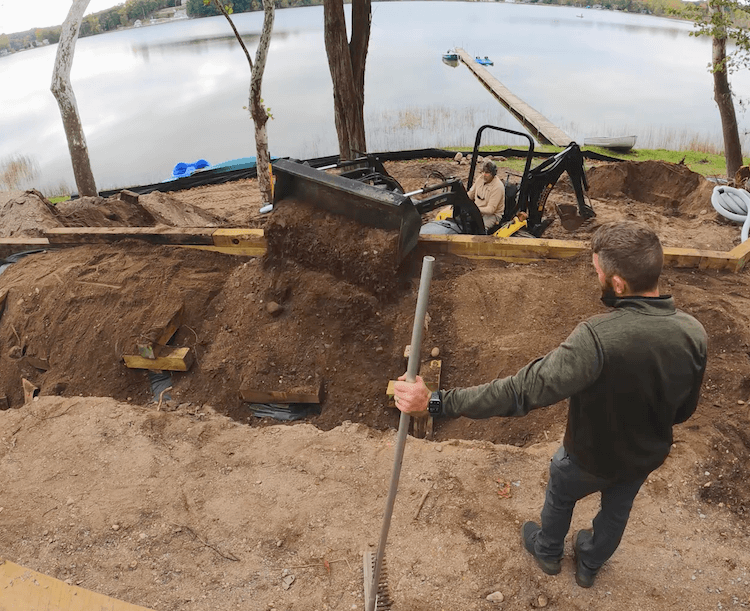
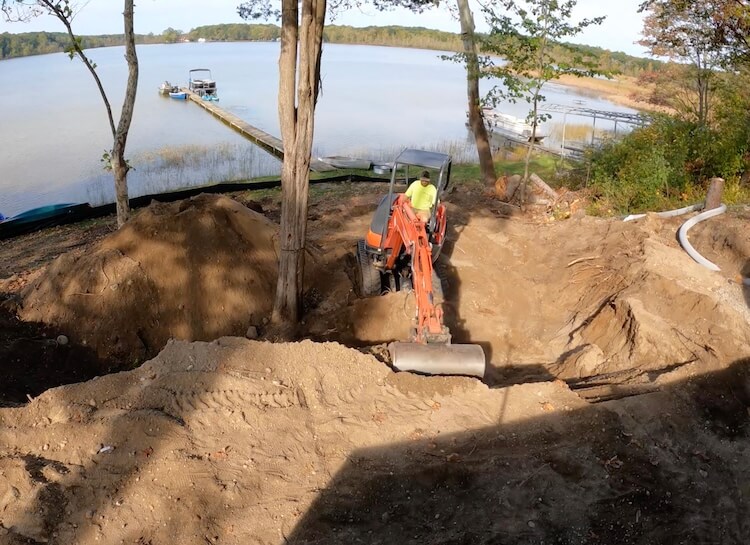
Layout and Excavation
Start by laying out exactly where you would like your retaining wall to go and using marking paint to map out the area. Then you will need to cut out the hillside. This can be done with a shovel for low walls or for larger projects, a machine may be required (such as a tractor, mini skid steer, or mini excavator). When excavating for a wall 3-4 feet or taller, not only do you need to cut out a level spot where the wall will go, but you will need to cut back into the hillside as far back as your wall is tall. For example, if you have a 4ft wall you will need to cut 4ft out behind the wall.
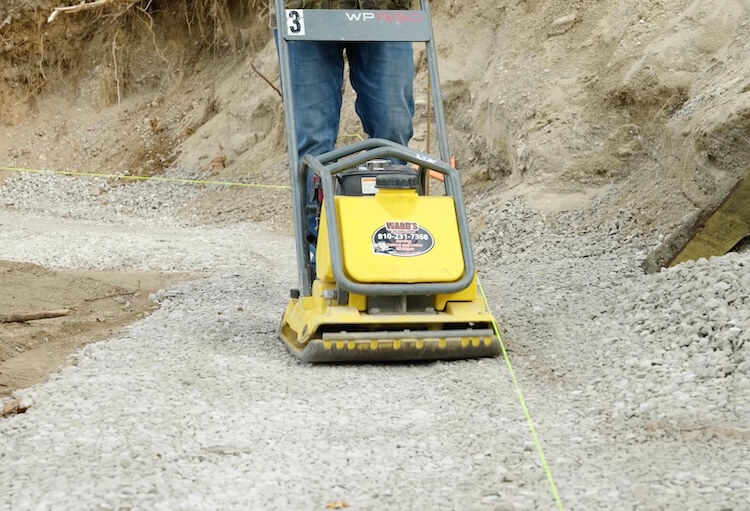
Preparing the Footing
The retaining wall you build will only be as good as the footing that it sits on. After excavation, lay out the wall location again on your new grade. Then dig out a tench for your footing. The footing should be 16in wide, minimum, and 6-8in of compacted crushed gravel. The depth of the trench should also include the height of one full row of timbers which will be buried below the finished grade. So if your timbers are 5-1/2″, your footing trench should be 11-1/2 to 13-1/2″ deep.
With the correct depth for your footing, compact 6-8in of 3/4″ crushed gravel making sure that the finished footing is level (side to side and front to back). Filter fabric can also be installed below the footing to help prevent and settling if dealing with any bad subsoil.
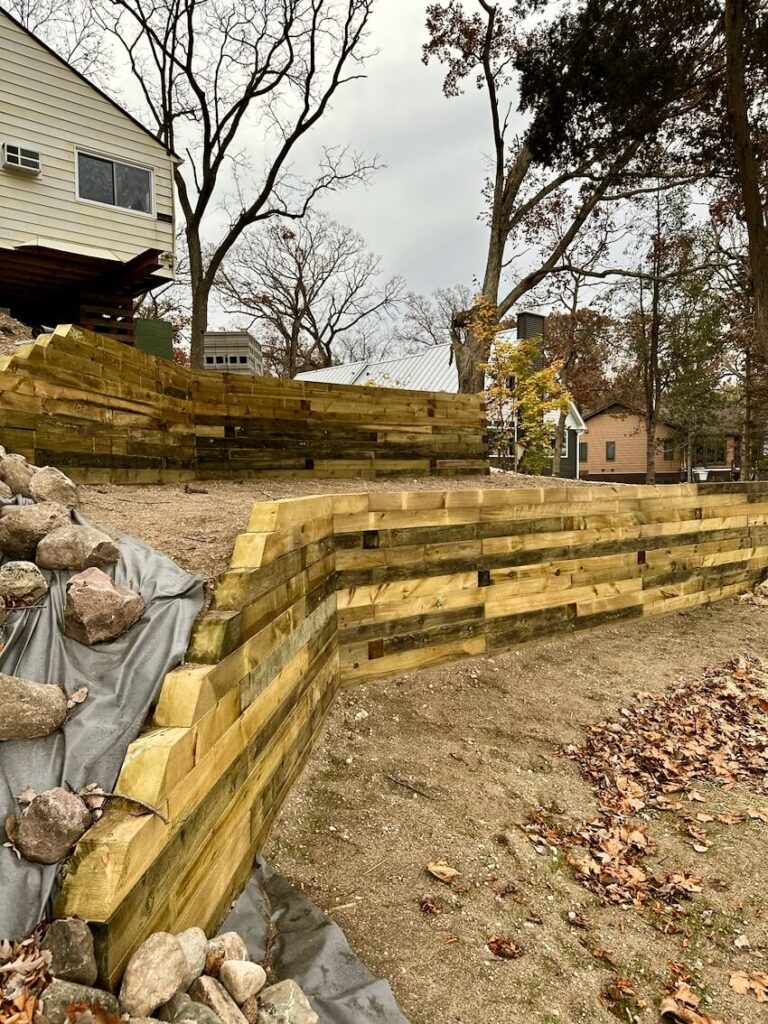
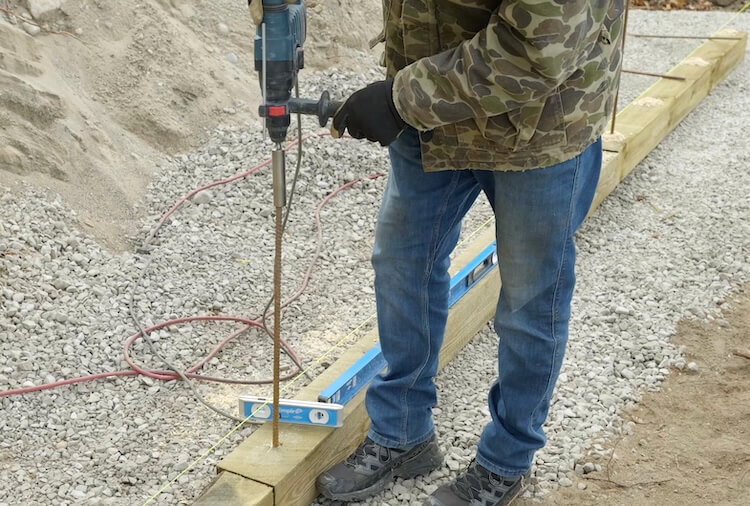
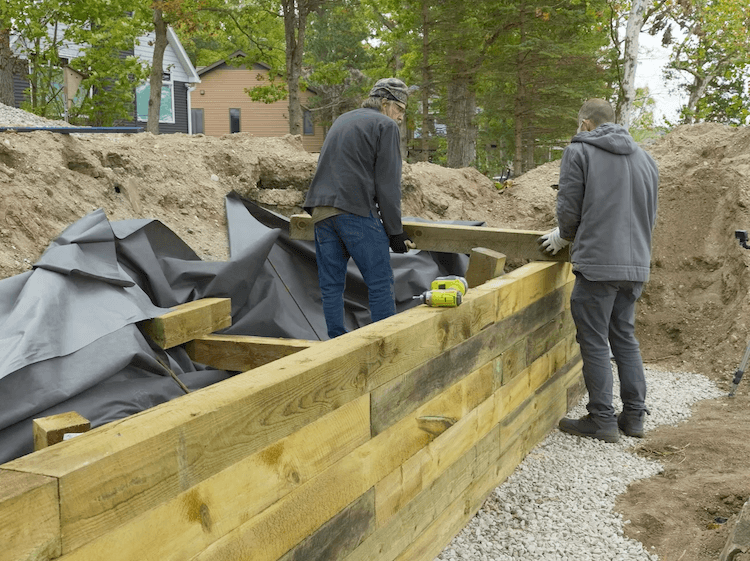
Setting the First Course
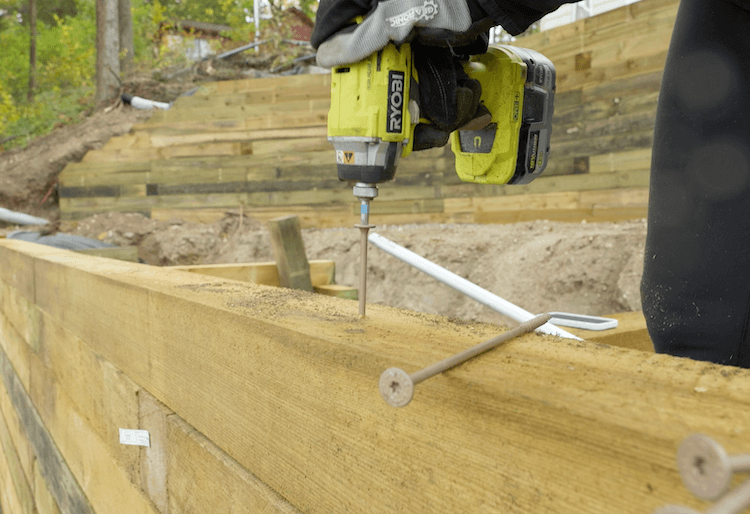
The first course of timbers is the most important course in the entire wall. This is because there is really no adjustment of the rows once you get going. The first course needs to be perfectly in place and level. Using a long level, set your timbers in place, making minor adjustments to achieve level side to side. Check adjacent timbers with your level to make sure those are set in the same level plane and there are no low spots or high spots. When setting the first course, the timbers will need to be pinned to the ground with a minimum of 3ft long 1/2″ rebar. These should be spaced about 2ft apart. Start by drilling 1/2″ holes at these locations and drive the rebar through the timbers until flush with the top. I found that using a hammer drill and ground rod driver attachment makes this process a lot easier and safer.
Take your time to make sure this first course is perfect, it will make the rest of the project go a lot smoother.
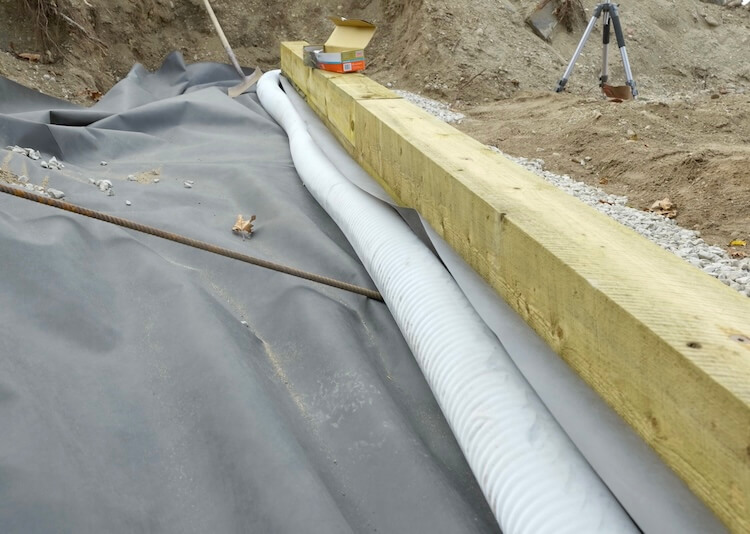
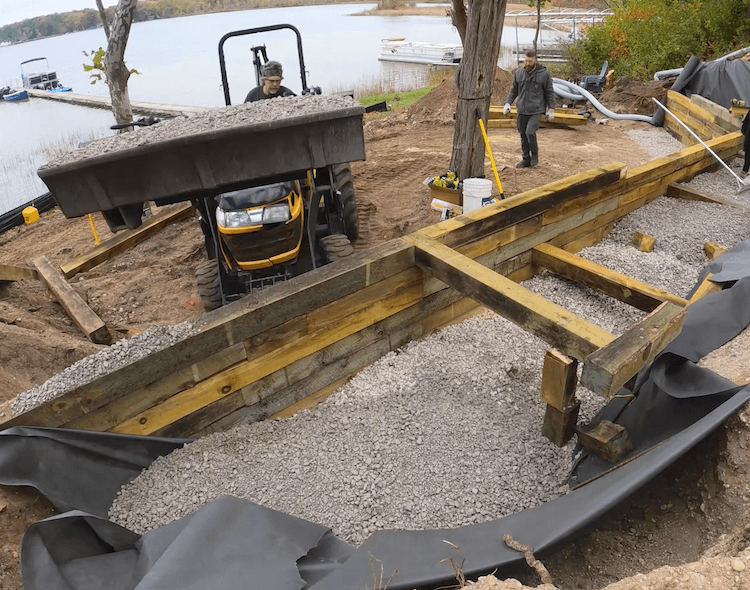
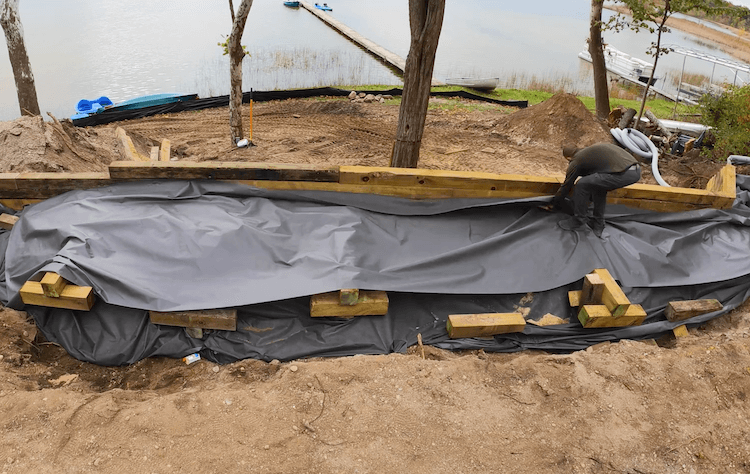
Installing a Drain Line
All retaining walls need to have a way for water to escape, or else the water will saturate the soil and create an excess surcharge on your wall which could result in failure. Also, excess moisture on the landscape timbers will accelerate decay. To prevent this you will need to place a 4 inch perforated drain line behind the first course of timbers that leads out to daylight for water to drain freely. Non-woven filter fabric should also be installed below the pipe and up the back of the hillside. This will prevent any silt and soil from working its way into your drainage stone behind the wall and clogging up that area, rendering it useless.
Woven filter fabric should not be used as it can create hydrostatic pressure by not allowing enough water to pass through, essentially creating a dam.
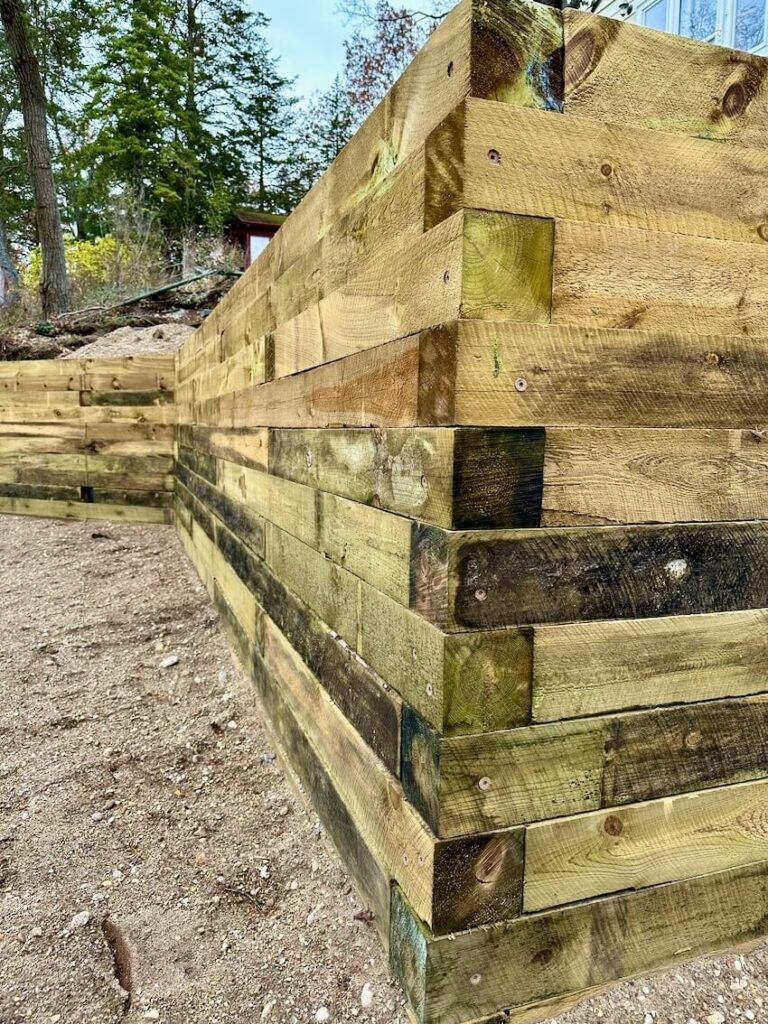
Fastening the Timbers
For a long time, most people have attach timbers using 10in spikes that had to be driven in with a sledge hammer every 2ft. Well there is now a much easier way to do it. Simpson StrongTie makes a 10in Timber Screw that is exterior grade and requires no pre-drilling. Plus, with the wafer head design you get a ton of strength and a flush top that won’t get in the way of the next course.

When building a timber wall, make sure to stagger the seams and any corners that you may require. Also, you will need to step back every course by 1/4″. I installed mine so that every joint was in the middle of the timber above and below it.
Drainable Backfill
Backfill behind the wall with washed (or “clean”) 3/4″ gravel and make sure to encase that drainage stone with your filter fabric. This will allow proper drainage without the fines from regular gravel or soil clogging up the drainage field.
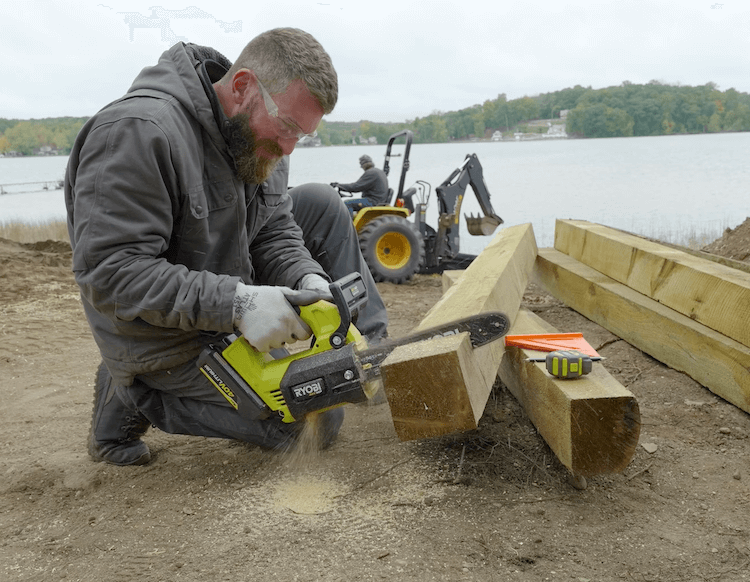
Cutting and Sealing Timbers
In some cases you may need to cut a timber. I found that these easies way to do this was by marking on two sides with a speed square and cutting with a small chainsaw.
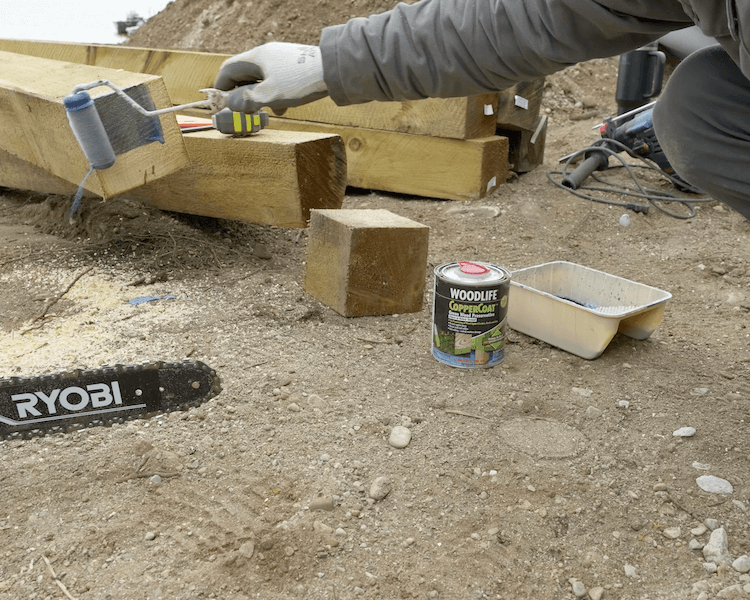
Any cut ends will need to get sealed with a below ground preservative. For this I painted on a generous amount of CopperCoat Wood Preservative.
Installing Deadmen Reinforcements
For walls over 2-3 feet in height you will create an unstable wedge of soil behind the wall adding back pressure to your wall. To reinforce the wall you will need to install deadmen. Deadmen are a T-shaped tiebacks that will secure the wall to the stable soil behind it. The deadmen is perpendicular to the wall and should be as long as your wall is tall (i.e. 4ft wall = 4ft deadman). Deadmen have a 2ft timber secured at the end, parallel to the wall. I would recommend securing deadmen every 3rd row (one vertical foot between them) and spacing them 8ft apart (horizontally). Doing this every 3rd row will allow you to stagger the deadmen, creating a more even reinforcement. The first row will be buried and pinned so this can be omitted.
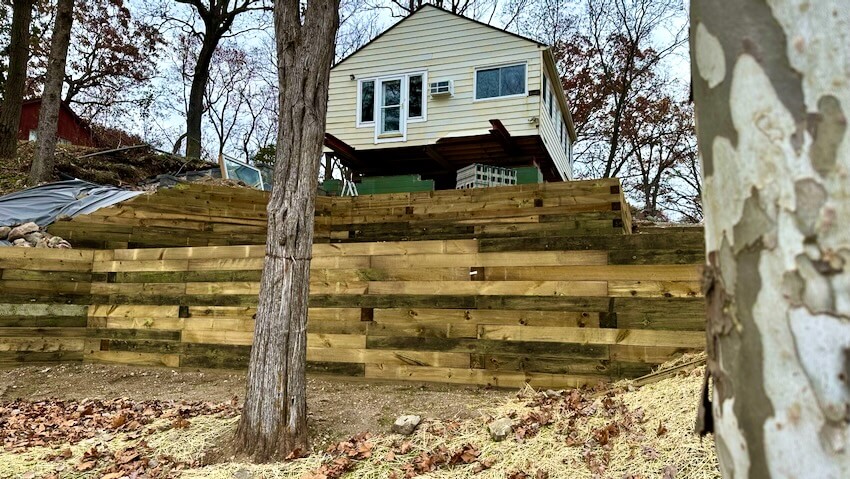
Cover Drain Field and Dress with Topsoil
Once the wall is in place and your drainage stone is backfilled within 6-12″ from the top of the wall, the drainage stone can be covered with filter fabric to prevent any silt from leaching into the drainage field.
The last 6-12″ can be backfilled with good topsoil to allow for planting grass or small plants. Avoid planting trees or large shrubs on top of taller retaining walls as the added dynamic pressure from large growing roots and swaying trees could be detrimental to your wall.