Adding Flower Beds and Getting the Perfect Edge
When we built our barn we didn’t do much in the way of landscaping around the barn. We just planted grass right up to the side of the building. Since this is one of the first things you see when you pull in the driveway we decided to dress it up with a new flower bed. This seems like a big job and it is, but we were able to figure out a few tricks to speed the process up as well as get the perfect transition between the lawn and beds WITHOUT using any type of edging!

These steps will show you how we installed a new flower bed and created a clean transition between the lawn and flower bed.
Total Time: 1 day
Layout
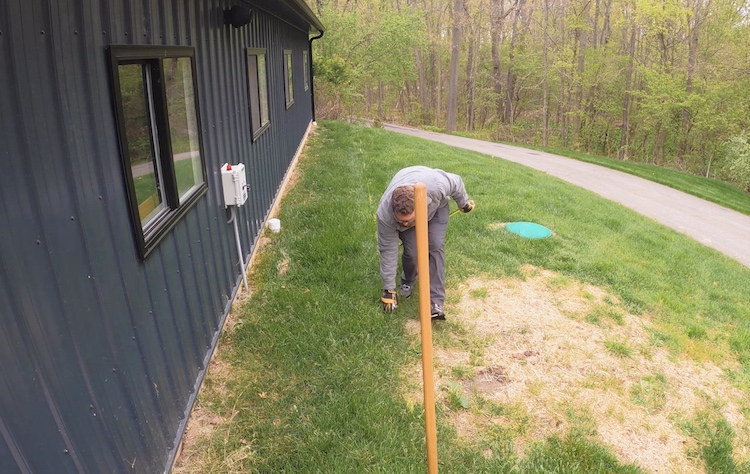
We went for a straight edge and measured 4ft off the side of the building, marking with spray paint. If you want a more organic look then consider using a hose to plan out your curve.
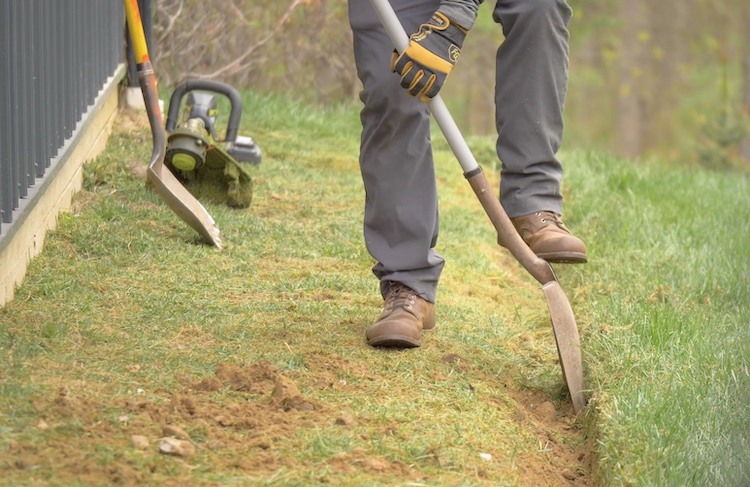
Cutting the Edge
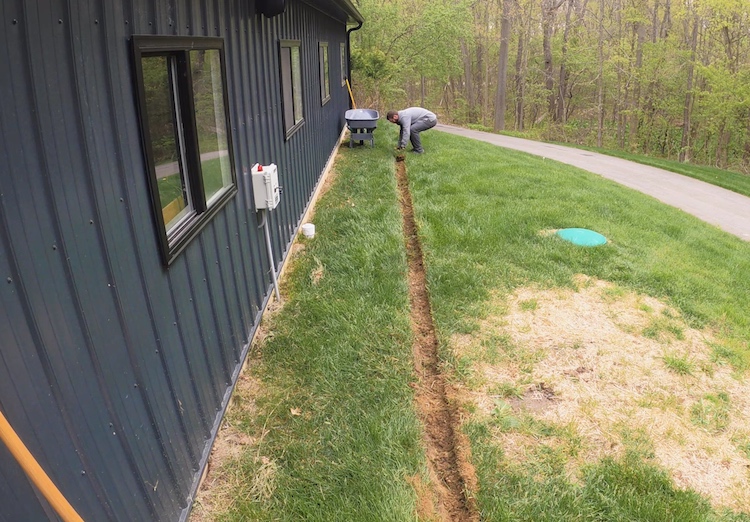
I started by running my Ryobi 40V power head with edger attachment down that line to cut a straight line through the sod.

I then came back about 6″ inside that line and started removing the topsoil and grass using a spade shovel. And yes, I know my lawn could use some help, we’re working on that.

After loosening up the sod and before removing, I cut the sod to be removed in about 2ft sections and they lifted out easily. Using a wheelbarrow I could relocate the sod to a spot in the woods.
Removing the Lawn
I opted to use a string trimmer to scalp the lawn down as low as possible before covering with weed mat. This method will result with some grass popping back up after planting but it beats shovelling all the sod.
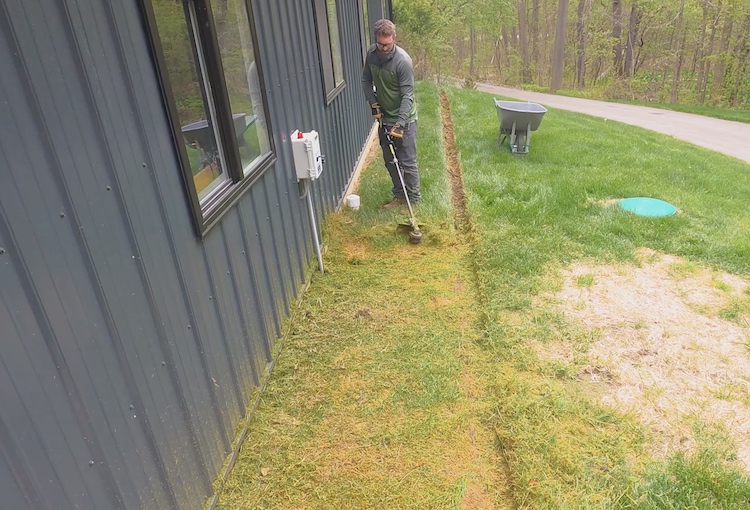
I then cleaned my trench back out with a flat head shovel and made that edge as vertical and straight as possible. This is the key to a good clean transition between your lawn and new flower beds.
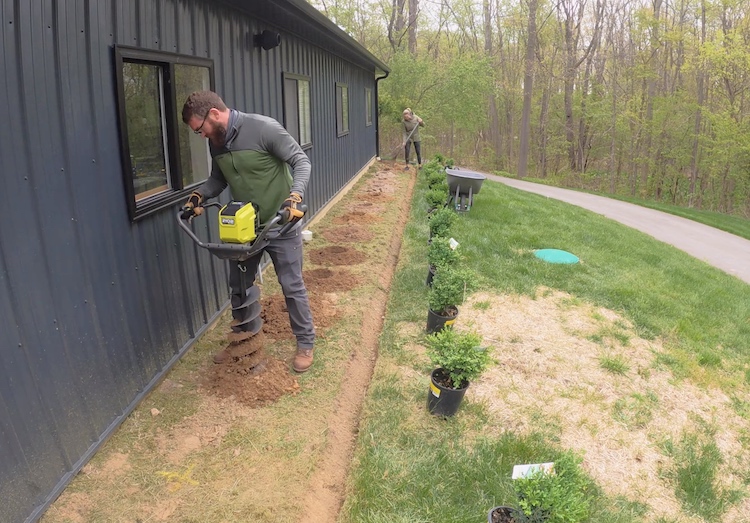
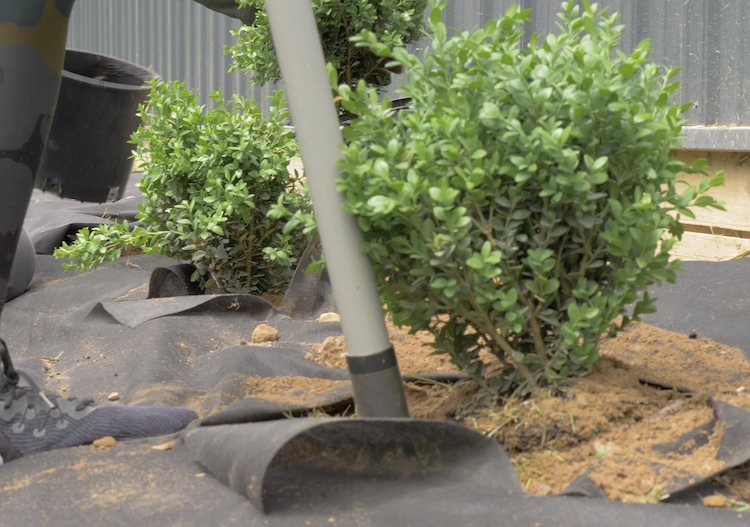
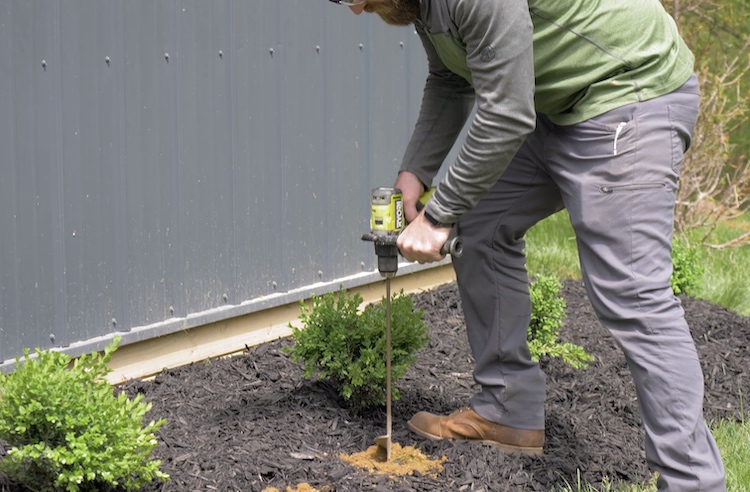
Digging Holes for Shrubs
As far as the planting went, we wanted to keep it simple so we went with boxwoods for the main evergreen. Rather than digg all the holes after laying weed barrier, we decided to do this first to prevent unwanted soil on top of the weed barrier.
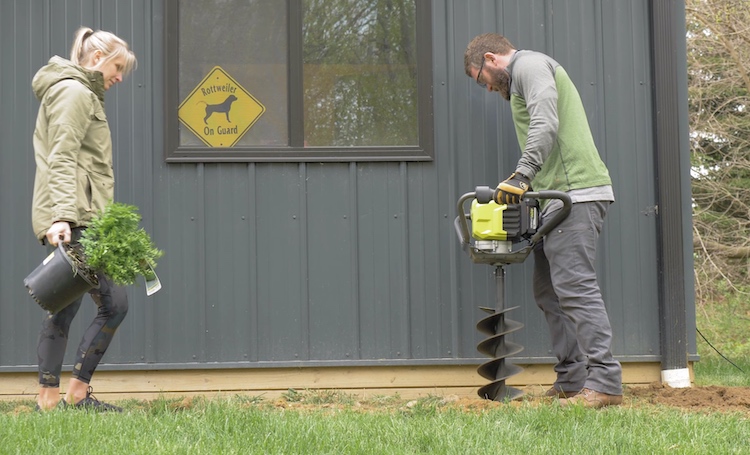
Luckily we had our Ryobi 40V auger and it was sized perfectly for these plants. This made quick work of digging those holes.
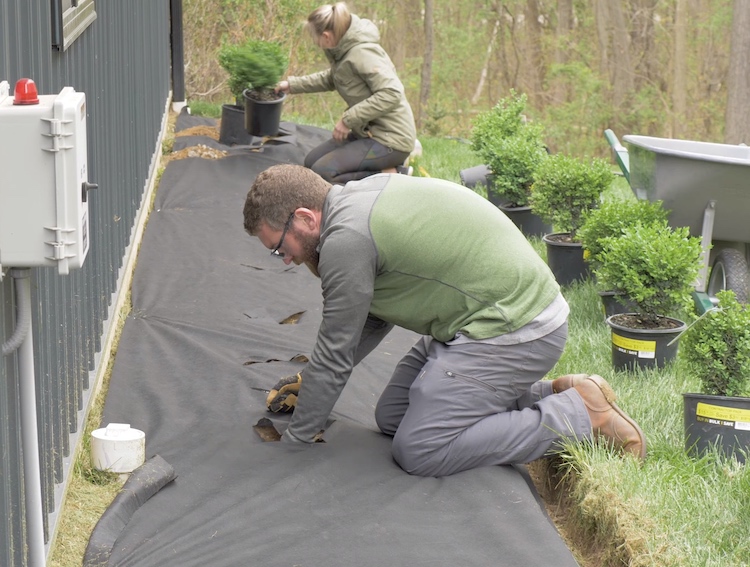
Laying Weed Barrier
This is essential to stop the grass from growing through. However, if you are removing all of the sod, it may not be necessary. Another benefit of a straight 4ft wide garden bed is that a 4ft roll fits perfectly. Staking the fabric with garden stakes will make sure it doesn’t move when planting and laying mulch.
Planting
We then located and cut the holes with a utility knife for the plants. The holes should be a little bigger than the plants container and it is wise to add a little starter fertilizer to the bottom of the hole before planting.
With the extra soil under the fabric we could backfill around the plant.
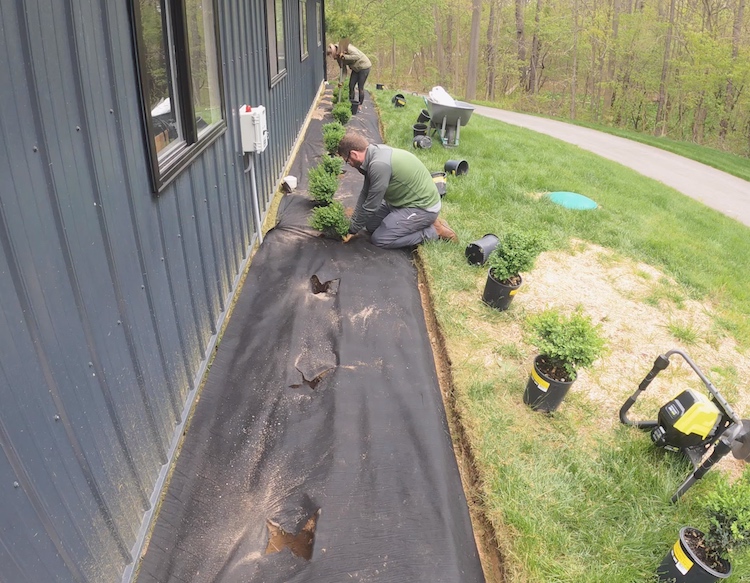
When backfilling, make sure to compact the soil completely around the base of the plant. Leaving air pockets around the ball of the plant could prevent establishment. The handle on your shovel works great for this.
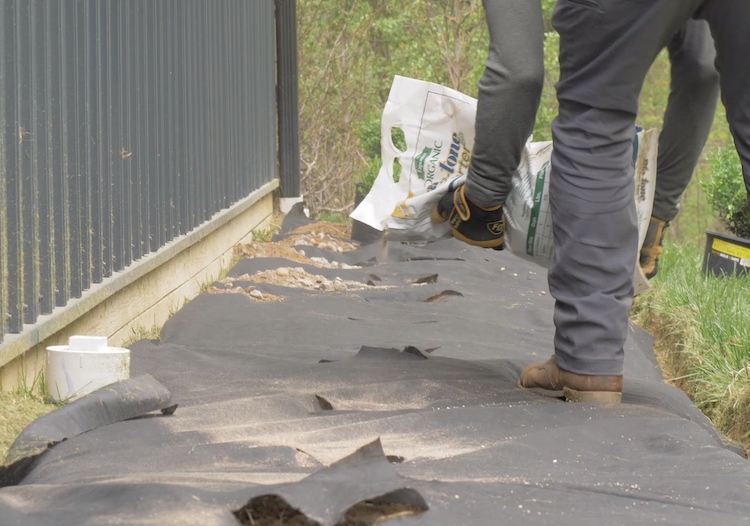
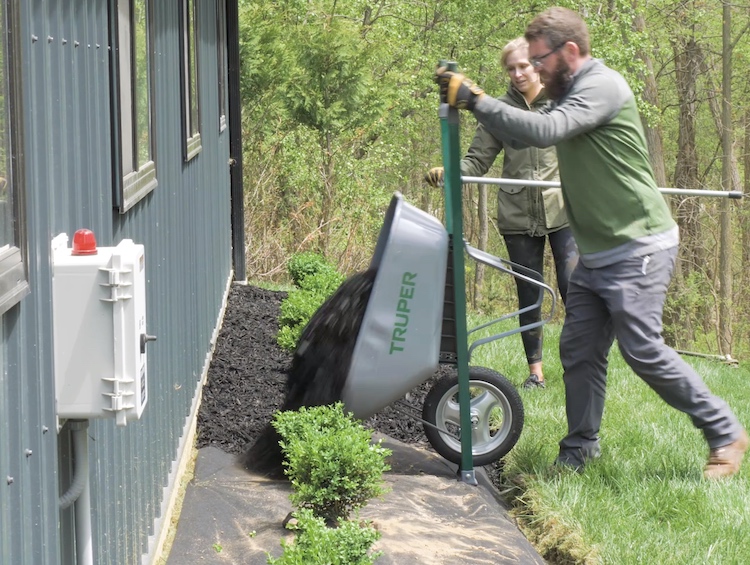
Mulching
If you are buying in bulk, a wheelbarrow and a pitchfork are a must. If you are buy bags that will make transporting a lot easier.
Planting Annuals
The easiest way to plant smaller plants is with a drill and garden auger attachment. I started by pulling back the mulch and fabric but after a few holes I realized you could just drill right through it all which made the process so much faster.
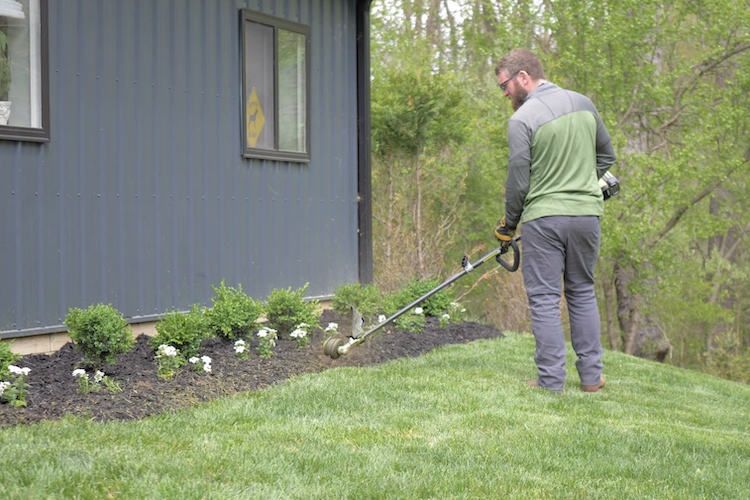
Maintaining the Perfect Edge
After mowing your lawn you’ll want to come back and cut back any grass that is hanging over your new garden bed. With the trench and mulch there is no soil it won’t grow into the bed, but it may hang over and not give you that crisp line you’re looking for.
Use a string trimmer and turn it vertically, this will allow you to cut back any hanging grass. Be sure to hold the trimmer such the any debris flies away from you and not back at you. Also, take your time and don’t rush this step.
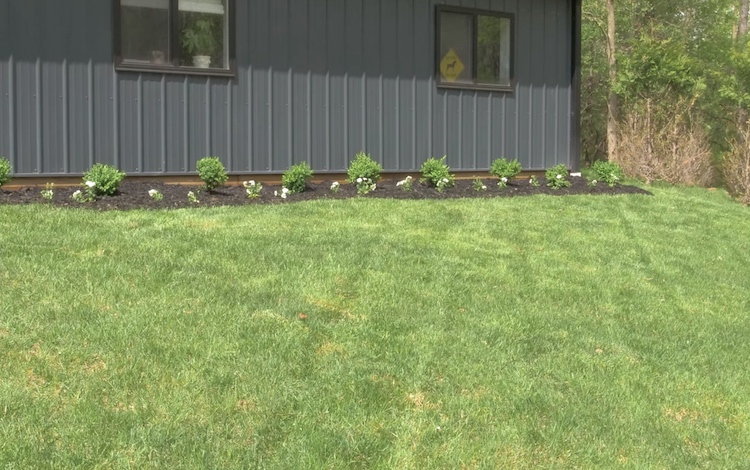
Enjoy!
Our new flower beds really look good and we can’t wait for the plants to mature. If you end up taking on a project like this we would love it if you shared a photo and any tips you may have learned in the comments!