Converting a Golf Cart to Lithium
Converting a golf cart from lead acid batteries to lithium batteries is more affordable than you might think. I’ve had several golf carts over the years and my main complaint is having to maintain and replace lead acid batteries after at the end of their usable life (which is about 2-5yrs costing $1k-$1500). Luckily the price and design of lithium batteries has come a long way since the last lime I checked and now you can get an equivalent replacement kit for about the same price. Not to mention the fact that you drop about 275 lbs, gain storage space, never have to worry about topping off with distilled water, AND THEY LAST 10-20yrs! I can go on and on about the benefits of this conversion but that being said, this was a no-brainer for me.
Full Project Video
Is it worth converting golf cart to lithium?
The short answer is, yes. Here are some reasons to consider:
– Lithium batteries have a much longer lifespan (about 10-20yrs) as opposed to lead acid (about 2-5yrs) and Big Battery offers a 10yr warranty.
– Lithium delivers the same amount of power throughout the entire discharge cycle, but lead acid batteries start out strong, but the power decreases throughout the discharge cycle.
– The price is about the same for comparable range, however you can increase the range by adding more batteries. The only downside is that you will need to purchase a new charger.
– The weight savings is huge! You can drop about 275lbs by with a comparable lithium setup.
– Plus they are maintenance free!
How much does it cost to convert your golf cart to lithium batteries?
An equivalent range lithium kit is $1,469 but you have to purchase a different charger which is an additional $299, bringing the total to $1,768. While you can find cheaper lead acid batteries, six new 8V T-875 Trojan batteries are around $1500 depending on where you purchase them.
Is it hard to convert a golf cart to lithium batteries?
No, with a lithium kit that has the same size batteries as your lead acid batteries, the process of converting to lithium is no more complex than replacing the batteries in a golf cart. The only difference is that the batteries are wired in parallel to a busbar instead of series like lead acid batteries.
Can you convert 36V golf cart to lithium?
Absolutely, there are 36V and 48V lithium kits that are the same size
How to Convert a Golf Cart to Lithium
Determine the Correct Voltage and Capacity for your Golf Cart
If you don’t know the voltage that your golf cart requires, you can easily figure this out by looking at the battery pack. If you have six 8-volt batteries then your cart is a 48V, while six 6-volt batteries would give mean you have a 36V cart. You will need this info when purchasing your new lithium batteries.
When it comes to capacity (for far you can drive on a charge) this will depend on your needs. If you want the same range, a 2 battery kit should work just fine for you. If you need more range than that you can simply add batteries to your cart (up to six) to extend the range.
Note that the lead acid batteries are linked together in “series” which means that the voltage is added together to get to the required amount (this limits the capacity). While the lithium batteries each output the required voltage so they can be wired together in “parallel” to increase the capacity (more batteries = more range).
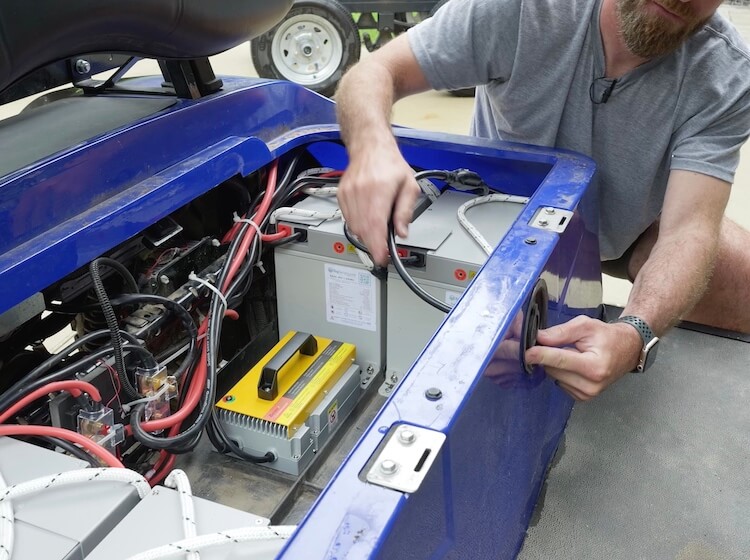
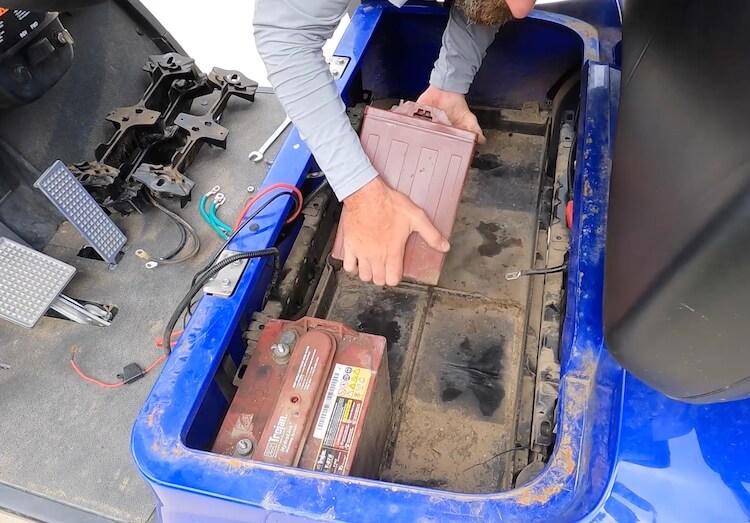
Remove the Lead Acid Batteries
To remove the old batteries you will need to start by removing any support/hold down brackets and disconnect the battery cables using a wrench. Take note of the positive and negative cables that connect the batteries to the speed controller. Then with the battery cables disconnected you can lift the old batteries out. These batteries are very heavy an this can be made easier using a battery puller.
Clean the battery tray and inspect the cables that connect to the batteries for any corrosion. Clean if necessary.
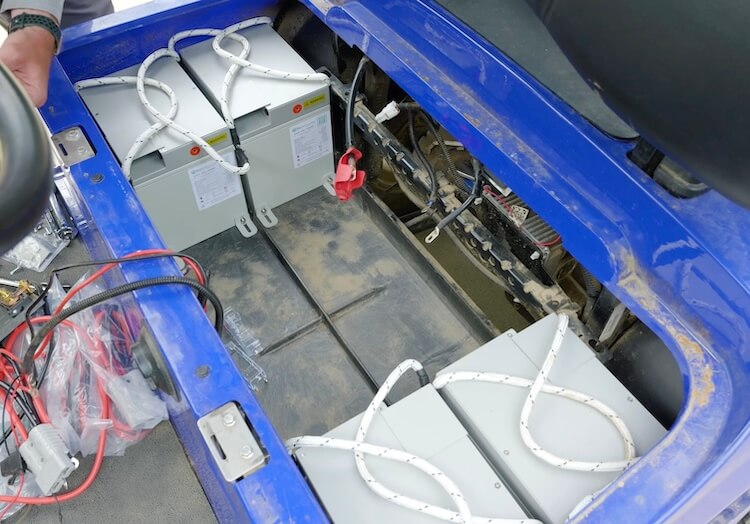
Place and Secure Lithium Batteries
Since the Eagle batteries from Big Battery have the same footprint you can place them in the battery tray with no modifications. Locate the batteries such that the weight is evenly distributed in the cart and the cable connections are accessible. Secure the lithium batteries in place using the supplied L-brackets and screws.
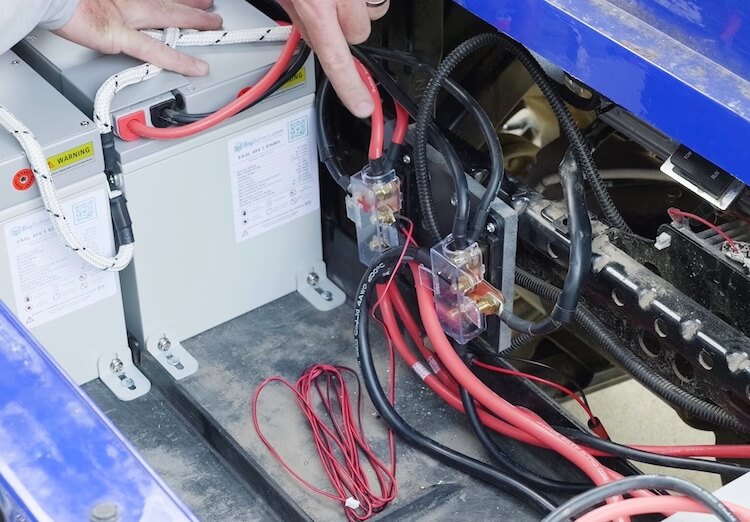
Install Parallel Busbar
The parallel busbar is how you will connect your batteries together and to the main controller. This is also where you can connect your pigtail for your charger to connect, battery level meter and step down converter, which is what reduces the voltage from 48V to 12V for lighting and other accessories.
Install the busbar with screws or bolts in a location such that the cables from the controller will reach. All the positives go on one side and the negatives on the other. Tighten down the nuts with a wrench for a secure connections.
Cable Management and Checks
Make sure to tidy up your battery compartment, routing wires, securing with zip ties and connecting to batteries. Also check to make sure each of the batteries have the breaker (opposite side from plug) flipped to the on position.
You may also opt to install the charger on board like I did. If so simply mount the charger to the tray. Connect to the charger to the pigtail and if you want to mount a waterproof outlet (I used this one) in place of the old charging port, that can be removed and an outdoor outlet installed in it’s place. When it’s time to charge you can plug it in with any extension cord.
Once everthing is secure, put the seat back in place and cruise away.