
Potion Bottles
We were invited to be part of the Home Depot Halloween Style Challenge, so while looking around for some ideas I came across a post from Tikkido for these awesome free creepy potion bottle labels. I loved how she created these awesome labels and decided to make my own potion bottles. So with some empty bottles we had in the kitchen I created quite the collection of potions!
Be sure to check out how we staged these potion bottles on our faux fireplace mantel for our Home Depot Style Challenge.
For sneak peeks of our upcoming projects be sure to follow me on Facebook and Instagram. Also, follow me on Pinterest to get tons of projects plans from all around the web!
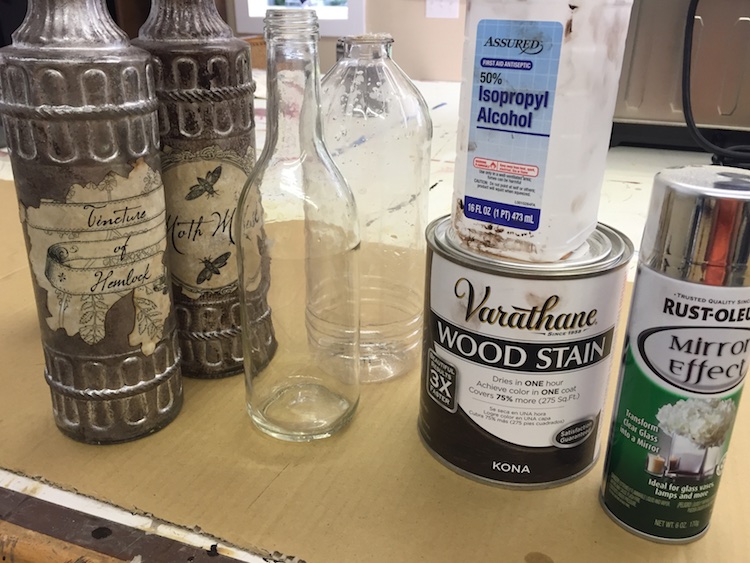
Materials
- Clear Empty Bottles
- Mirror Spray Paint
- Kona Wood Stain
- Vinegar or Rubbing Alcohol
- Spray Bottle
- Mod Podge[/one_half_last]
Disclosure: The links provided in the “materials” and “required tools” sections are affiliate links. If you would like to support our site and help keep our content free come find out more about how we can make money with no extra cost to you.
How to make Potion Bottles
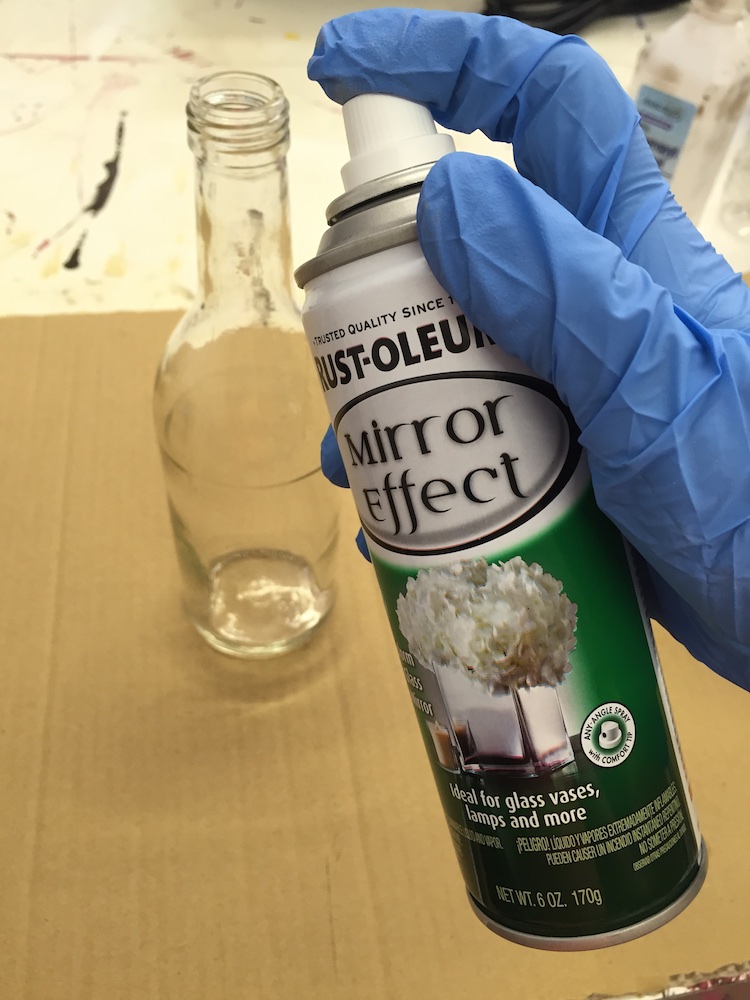
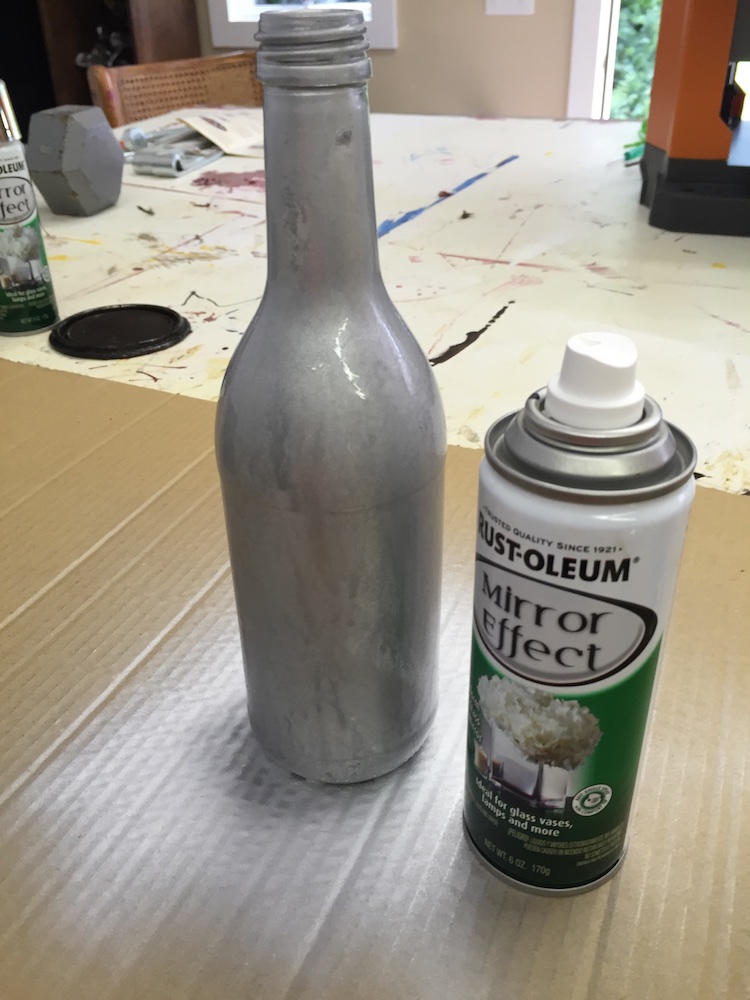
Step 1: Paint
Using the mirror effect spray paint, coat the bottle with with a think coat of paint. It may look drippy in places, but this is only your first step in the process.
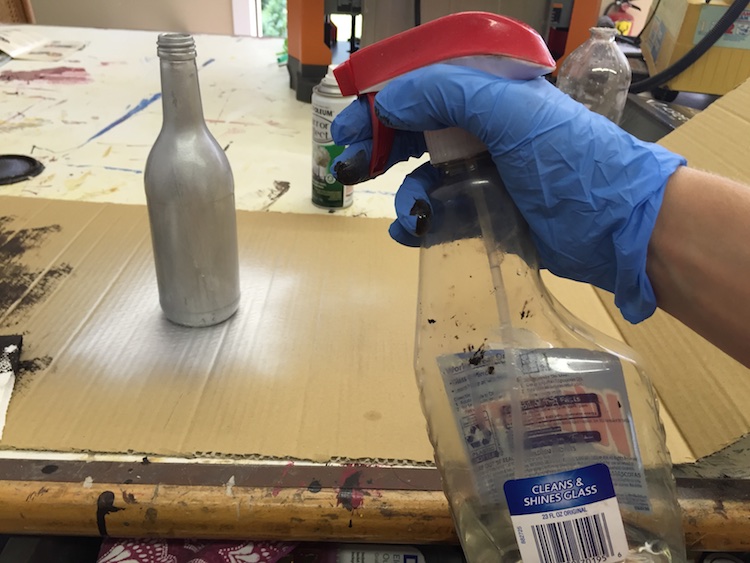
Step 2: Vinegar and Stain
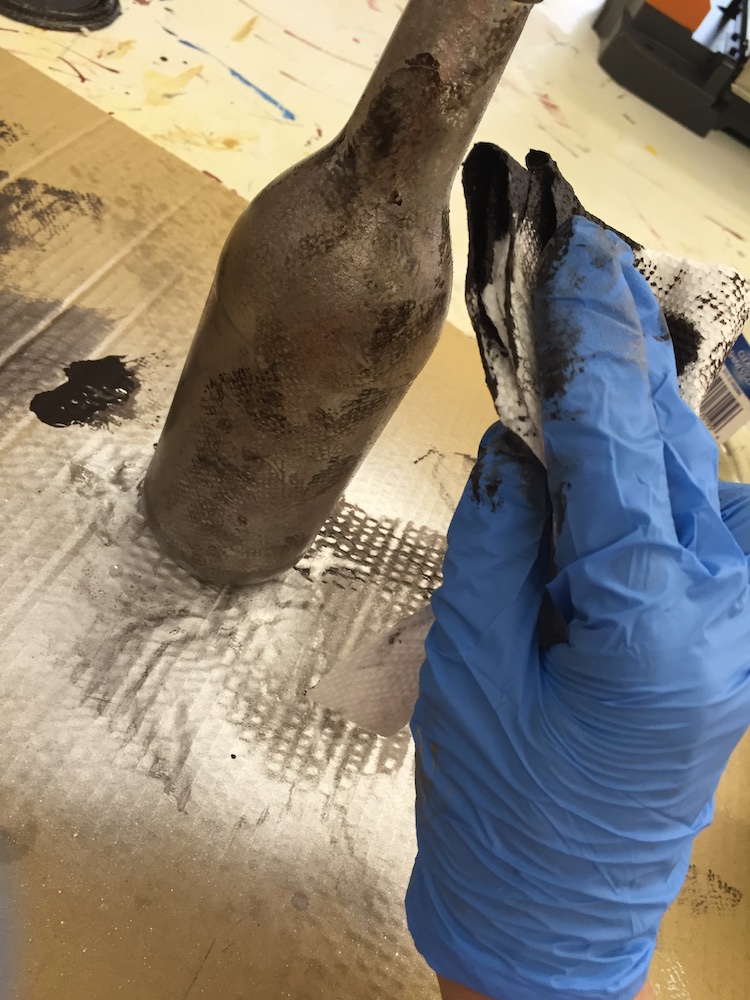
Let the mirror paint dry for roughly 30 second and spray on either your rubbing alcohol or vinegar. Just mist the bottle, the areas where the solution hits will remove the mirror spray patin from the bottle.
Dip a paper towel in your stain, and dab on a surface to remove excess stain. You don’t want to have too much stain on the rag when you apply to the bottle.

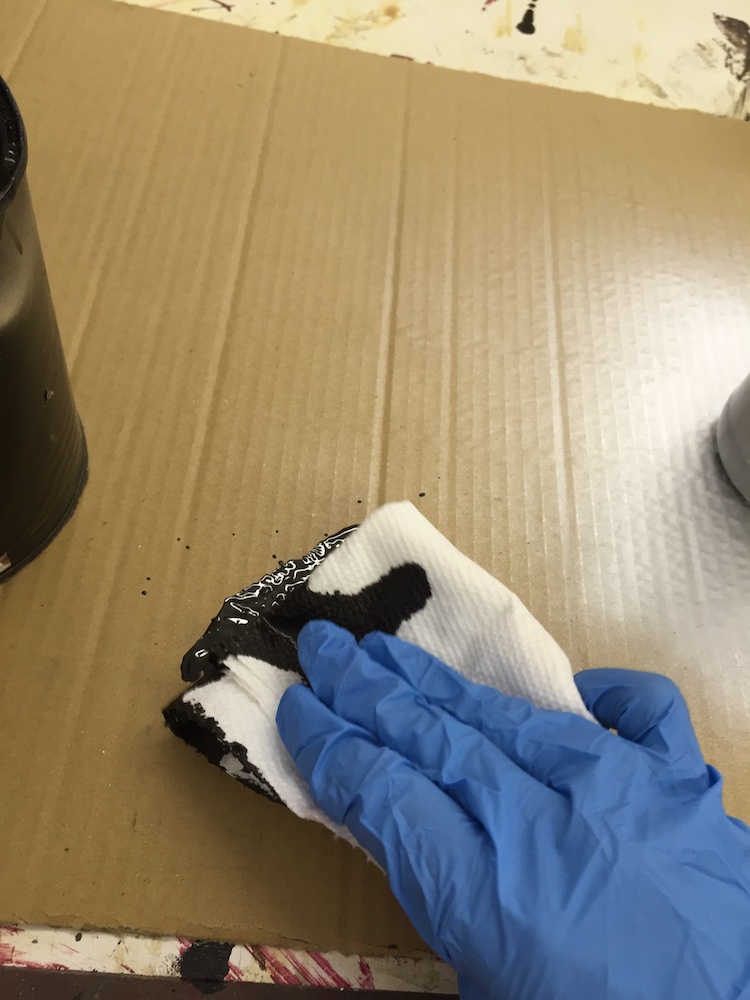
Use stain rag and blot on your bottle. You may decide to add more of your vinegar or rubbing alcohol at this time to take off a little more!
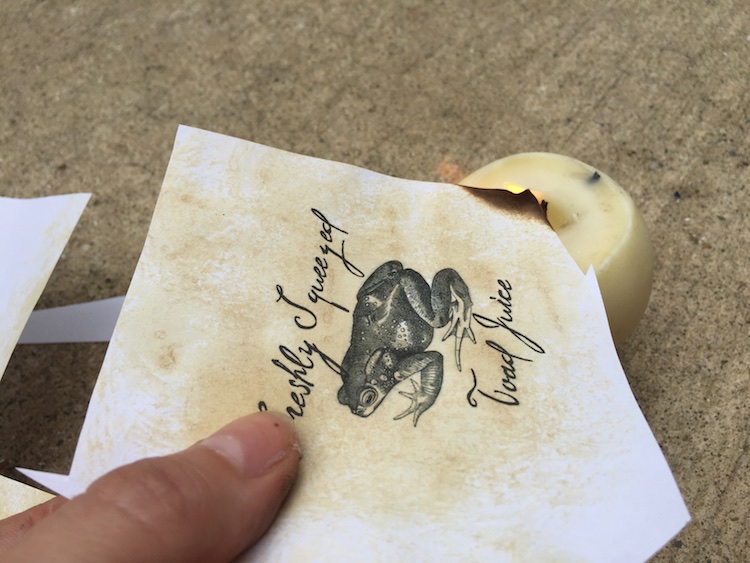
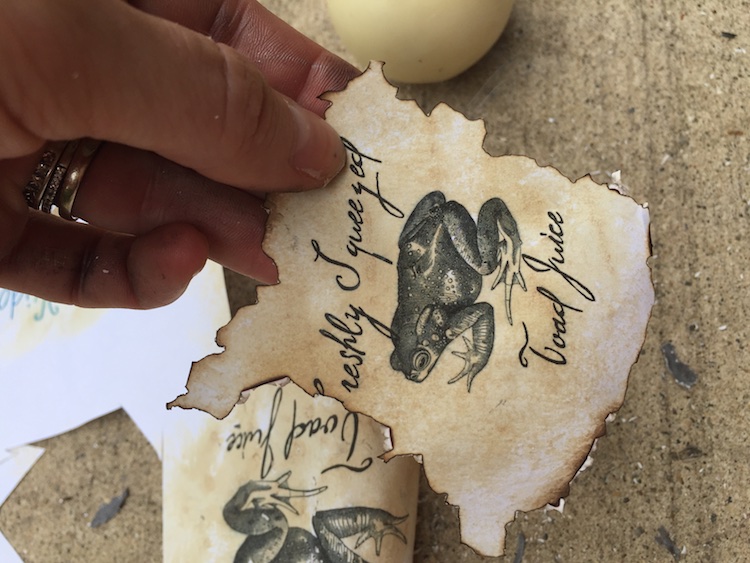
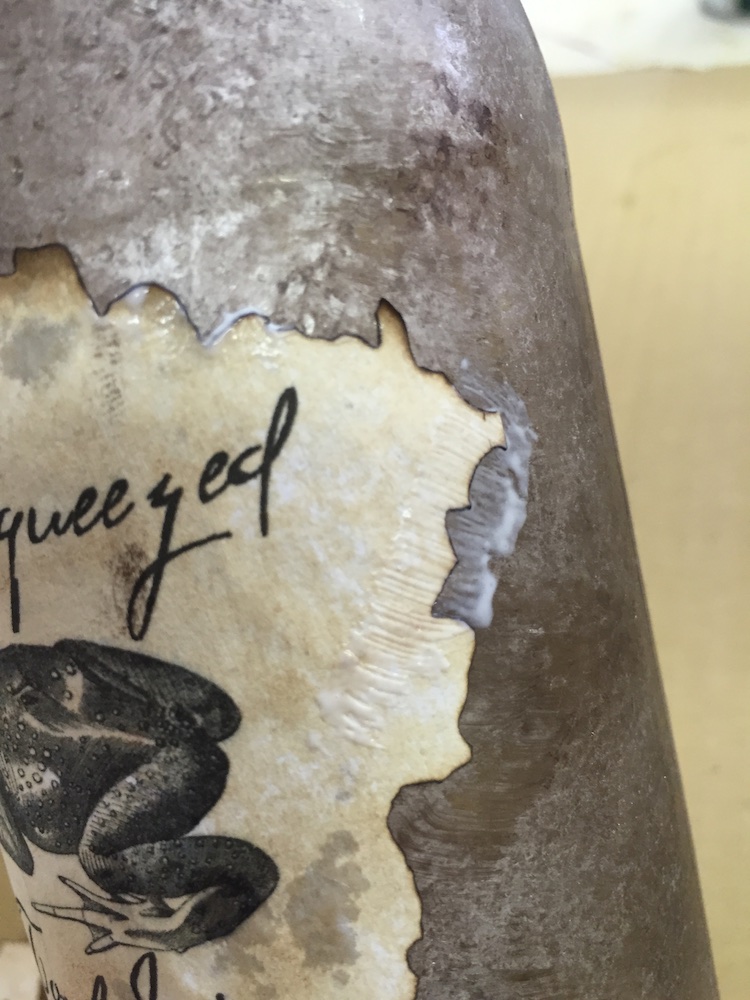
Step 3: Prepare Labels
I found these printable potion labels here, not only did she have some amazing printable labels, but I loved the technique she used to make them look worn. Once the labels are printed, soak a tea bag in water and blot your labels.
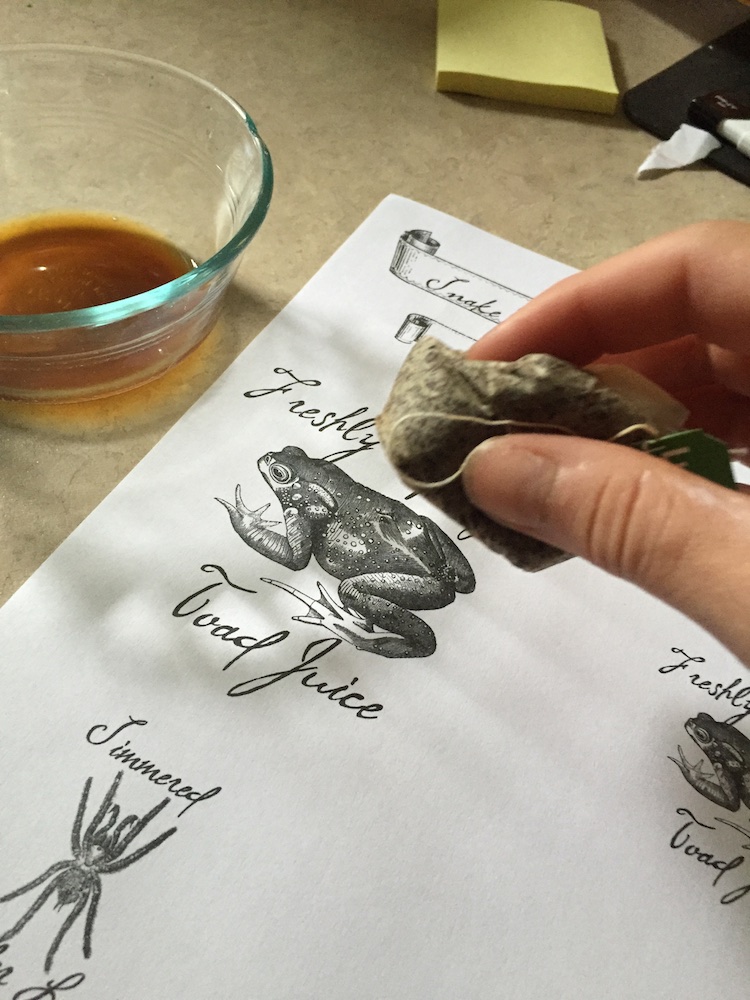
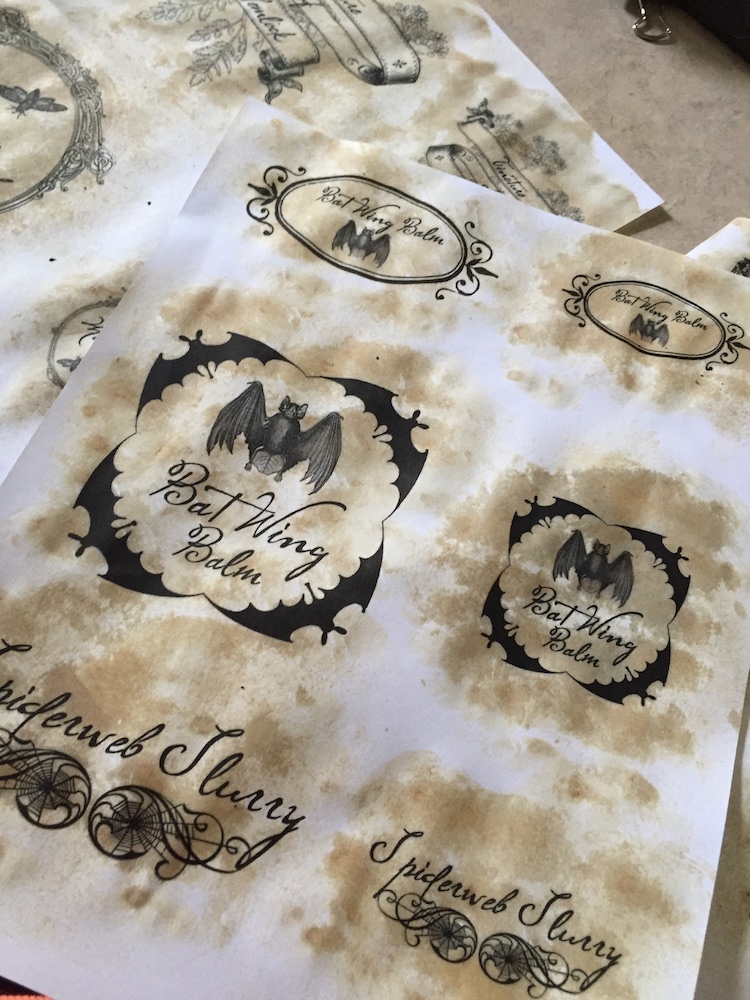
Once dry, cut the labels out and burn around the edges.
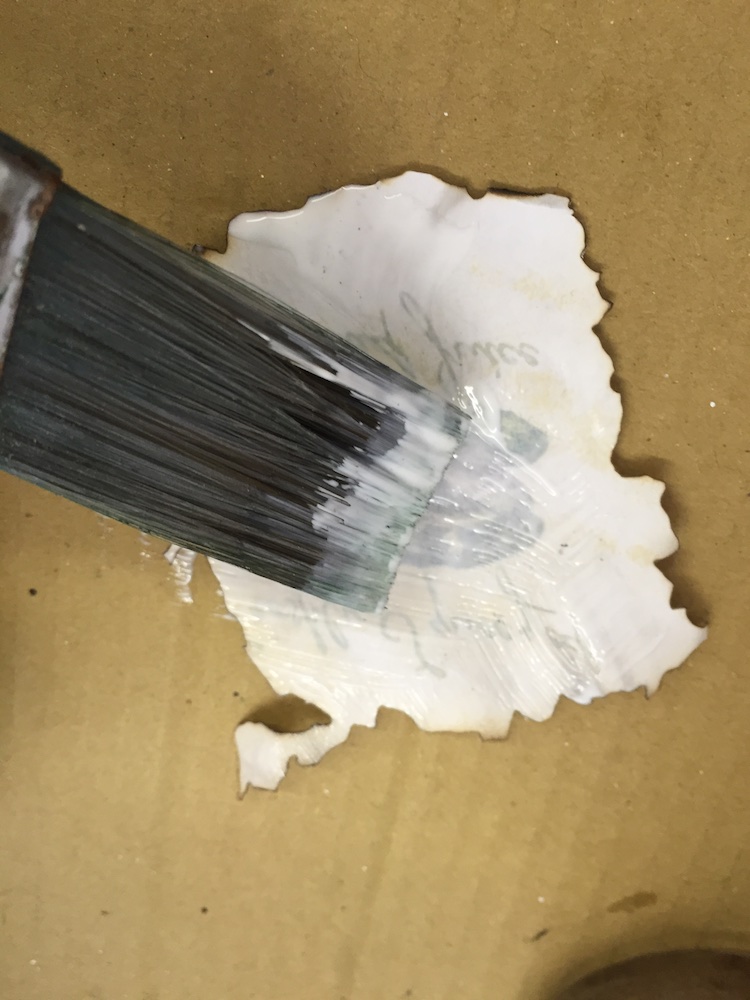
Step 4: Apply Labels
Using Mod Podge and a foam brush, I applied a think layer to the back of the label and placed it on the bottles. To make sure the labels really stuck down, I applied a thin layer on the top of the labels over all the edge.
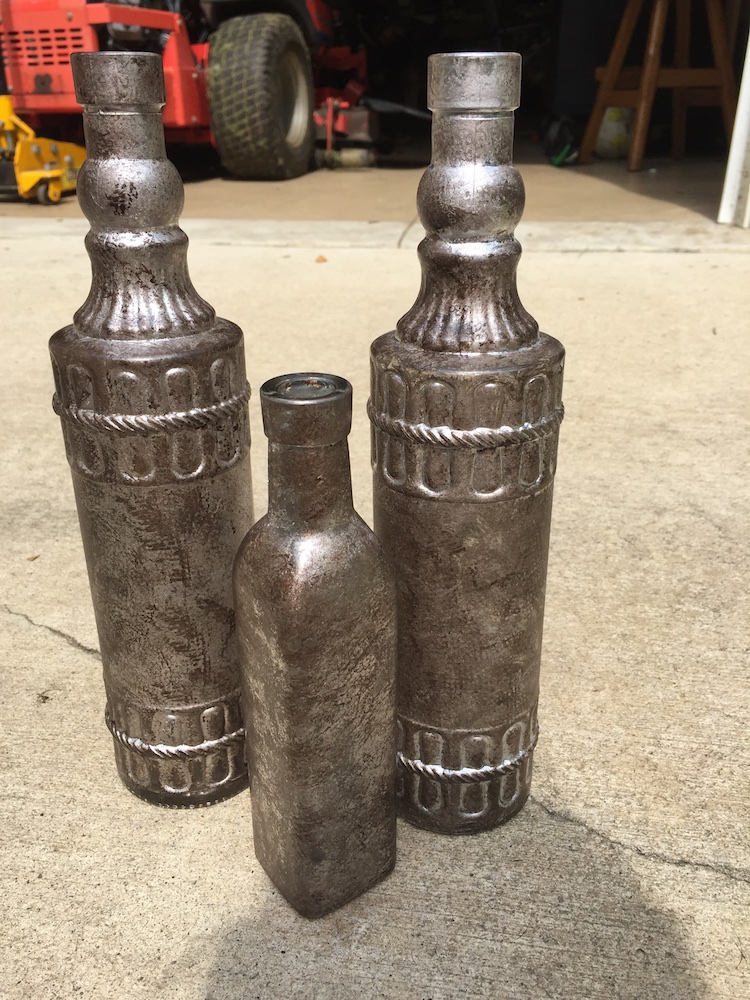
Well there you have it! These simple DIY potion bottles made a great addition to our Halloween decor. I love how they turned out, be sure to check out how I decorated out mantel with these bottles for the Home Depot Style Challenge! Happy Halloween!

Questions? Comments?
As always, if you have any questions don’t hesitate to comment below and especially don’t forget to post pictures of your finished products in the comments! ENJOY!
These are so cool.. The stain combined with the mirror effect paint is a very nice finish! My favorite is the effect of burning off the sides of the labels!
Thanks Anika!