
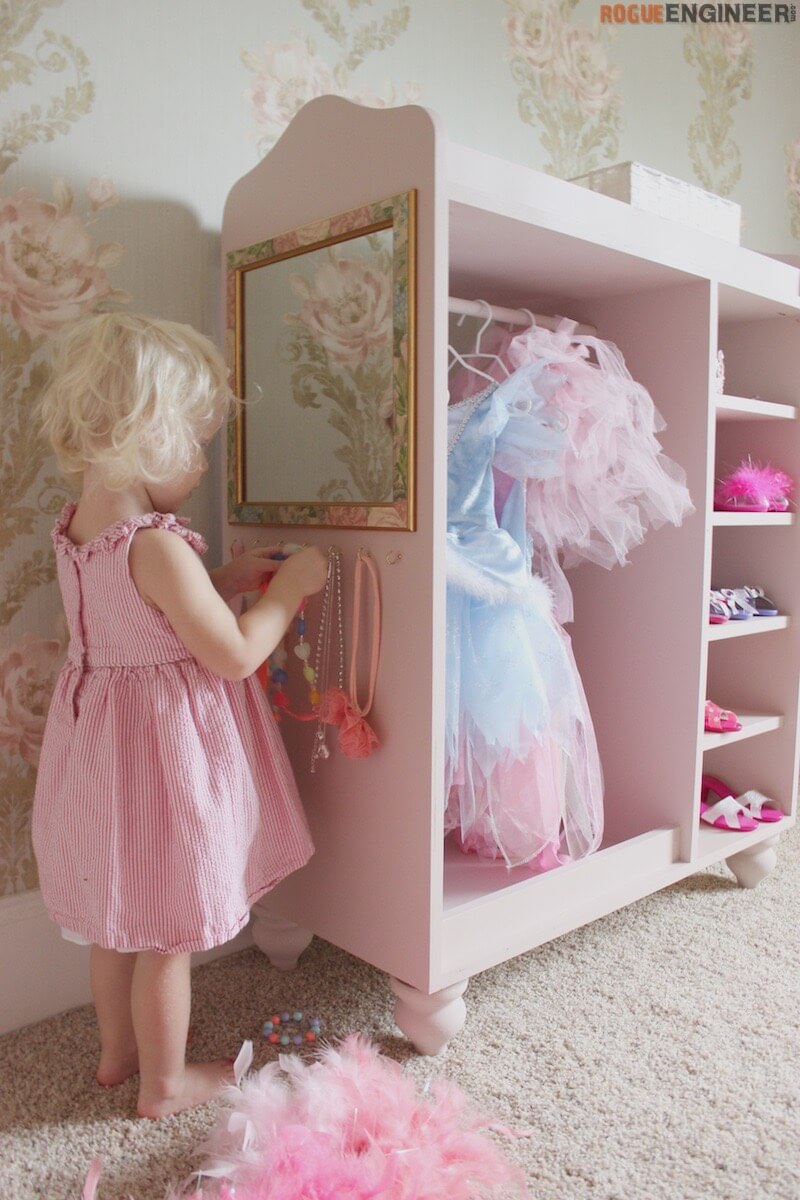
Dress Up Center
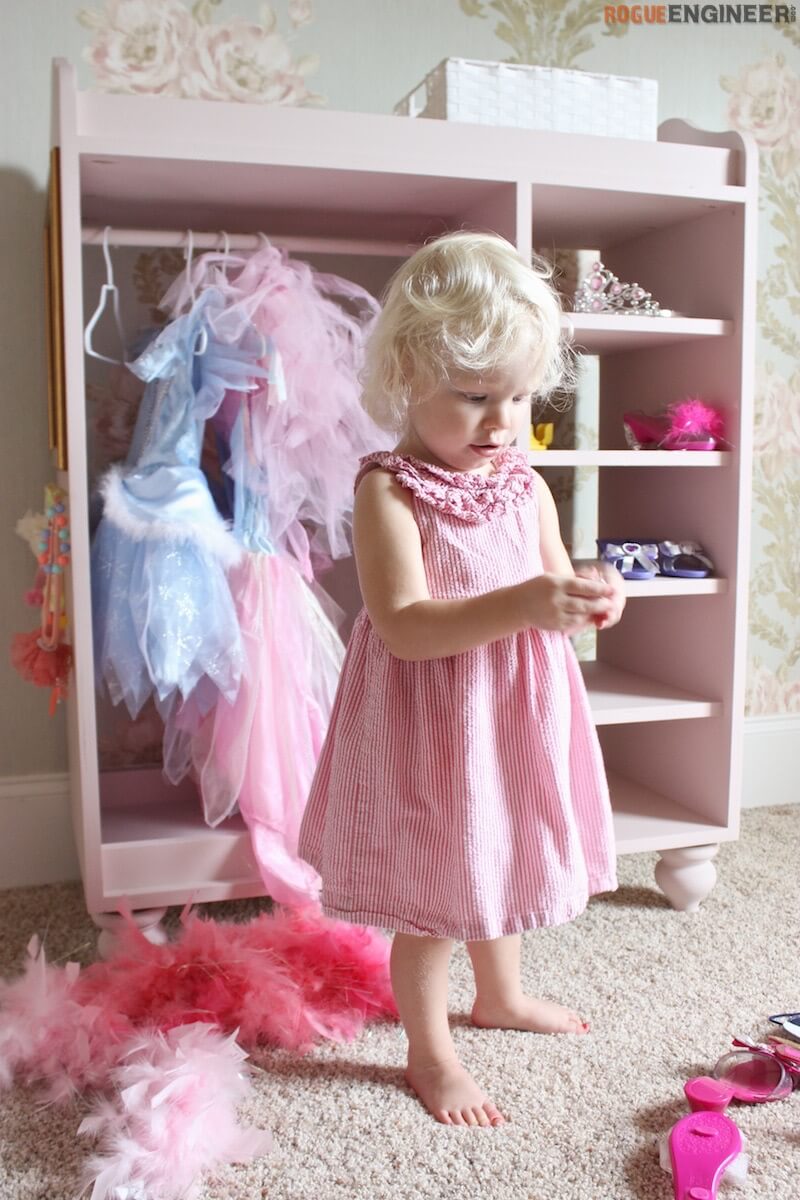
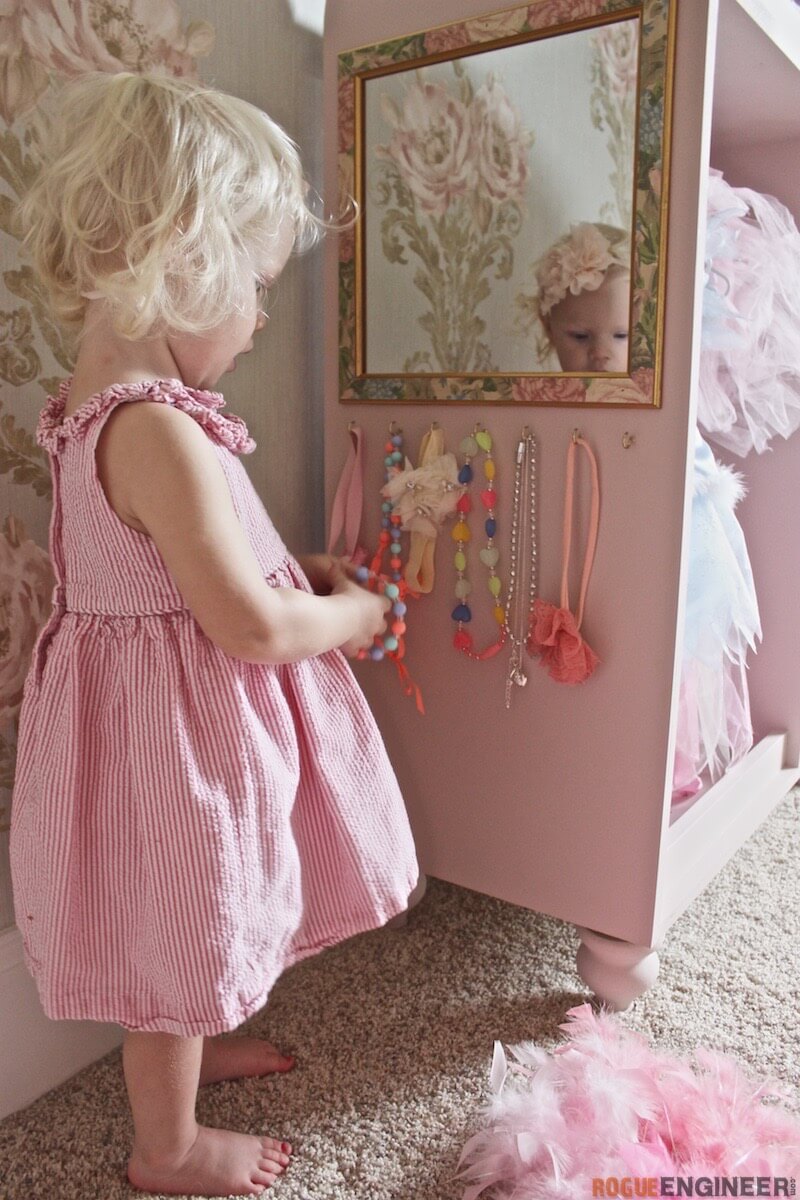
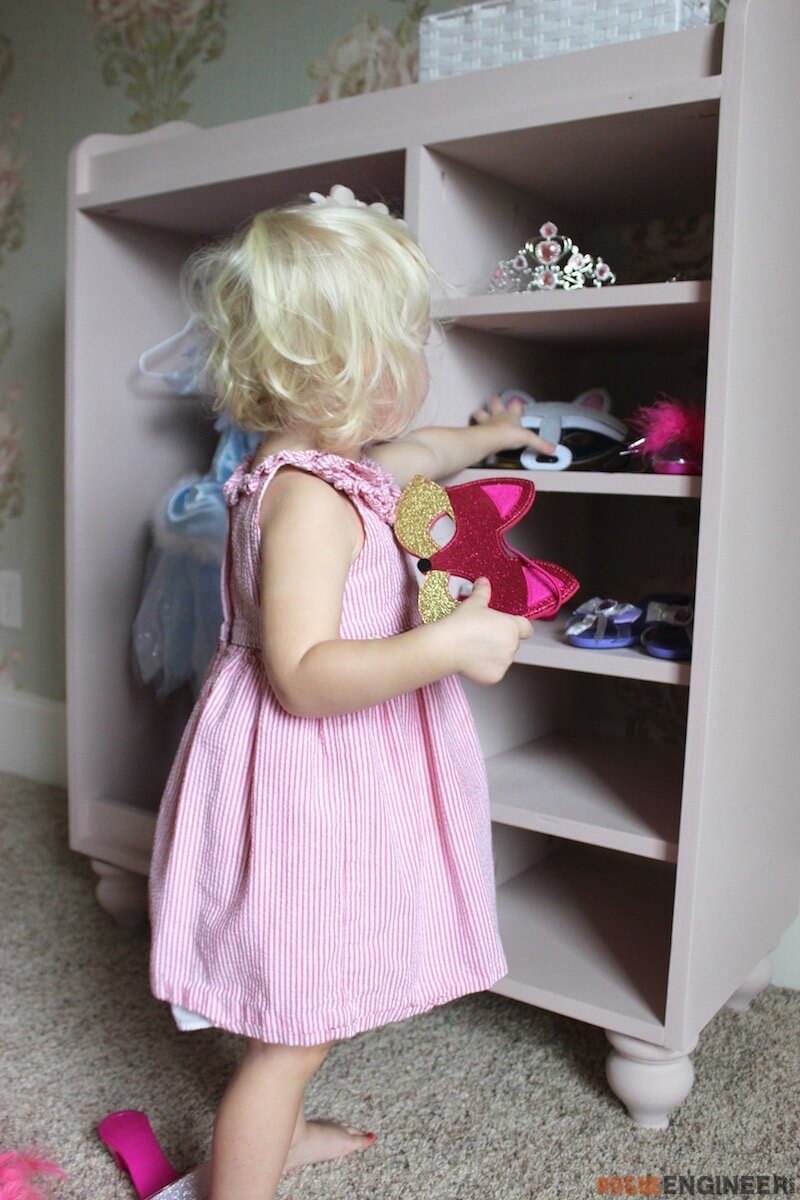
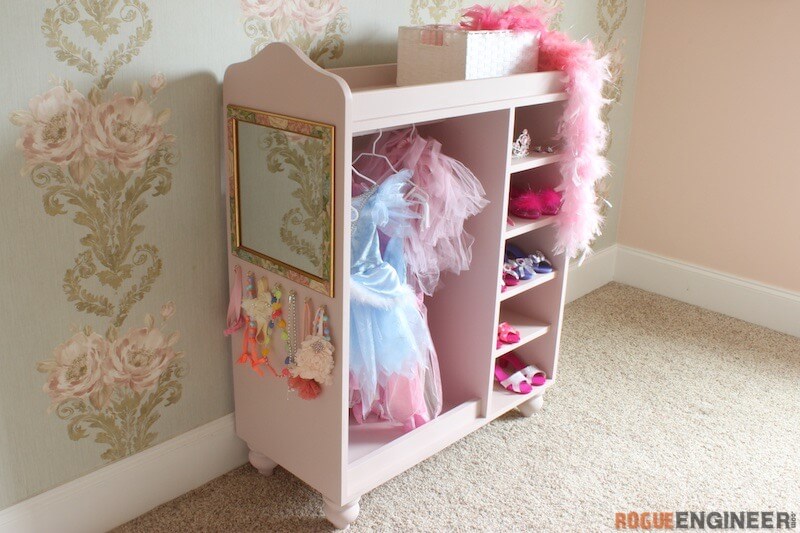
We knew a dress up center was going to be a hit with our little girl. The problem is that she, like her mother, has a thing for shoes. So we made sure to include plenty of room for her to store all of them. I really like how this turned out but I think the thing I am most proud of is that it is from a single sheet of Purebond Plywood. So for about $50 plus the price of the feet you can build this beautiful dress up center!

I’ve had the pleasure of getting to know the folks at Purebond and one thing I know is that they really care about their product, what’s used in it, and where it comes from. That’s why they use an award-winning soy-based, formaldehyde-free formulation, that is safe to work around and to live with. Plus, they’re plywood is made with renewable, responsibly-harvested North American hardwoods. Pretty cool huh? What’s also cool is that they’re willing to help keep this content free for you guys so return the favor and go check them out! Or just go pick up some of their hardwood plywood at Home Depot.
For sneak peeks of our upcoming projects be sure to follow me on Facebook and Instagram. Also, follow me on Pinterest to get tons of projects plans from all around the web!
Required Tools
Materials
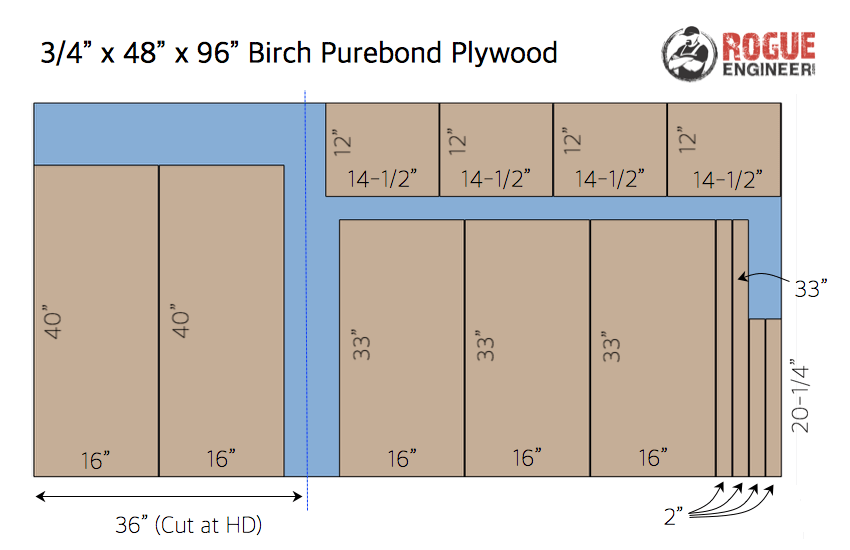
- Qty 1 – 3/4″ x 48″ x 96″ Birch Purebond Plywood
- Qty 1 – 1″ Wood Dowel
- Qty 4 – Heavy Duty Top Plate
- Qty 4 – Furniture Feet
- 1-1/4″ Pocket Hole Screws
- 1-1/4″ Brad Nails


Disclosure: The links provided in the “materials” and “required tools” sections are affiliate links. If you would like to support our site and help keep our content free come find out more about how we can make money with no extra cost to you.
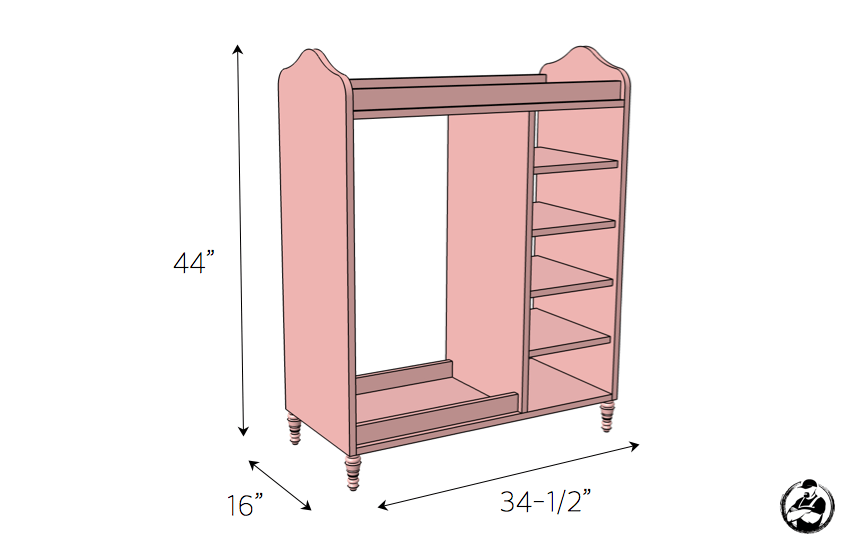
Dimensions
Cut List
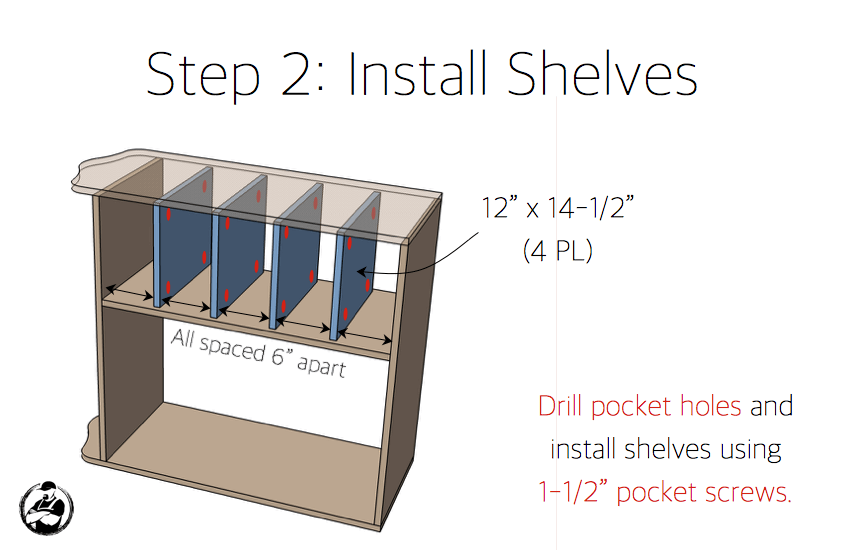
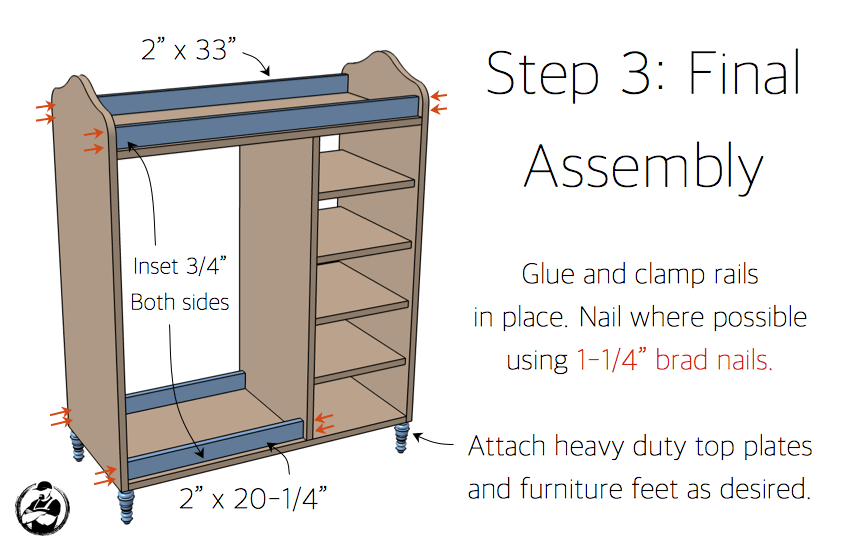
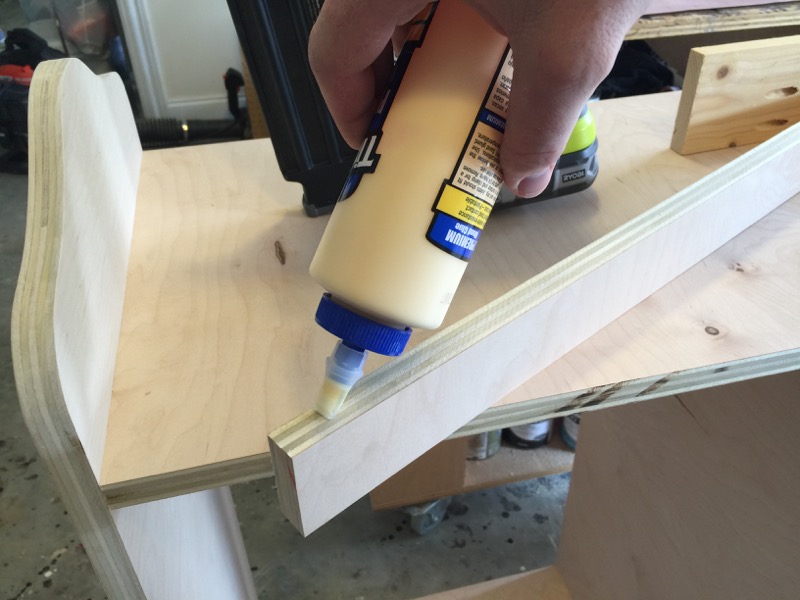
How to build a Dress Up Center
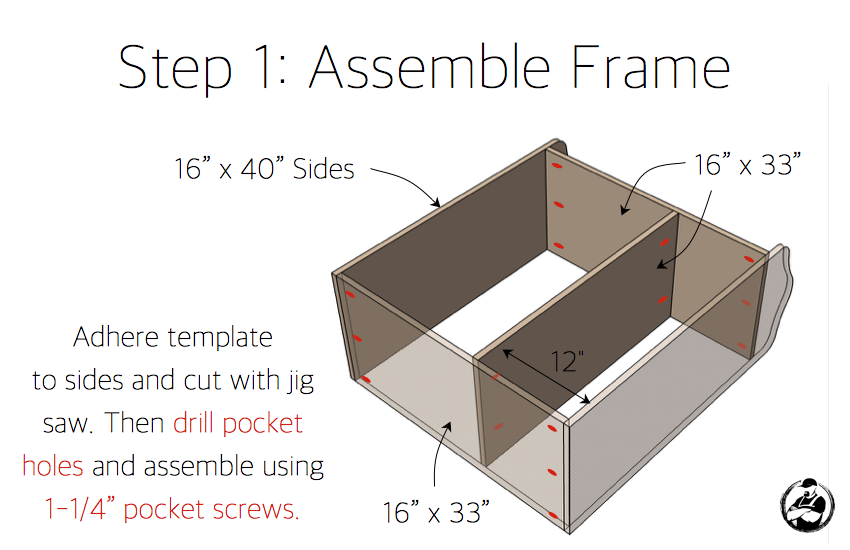
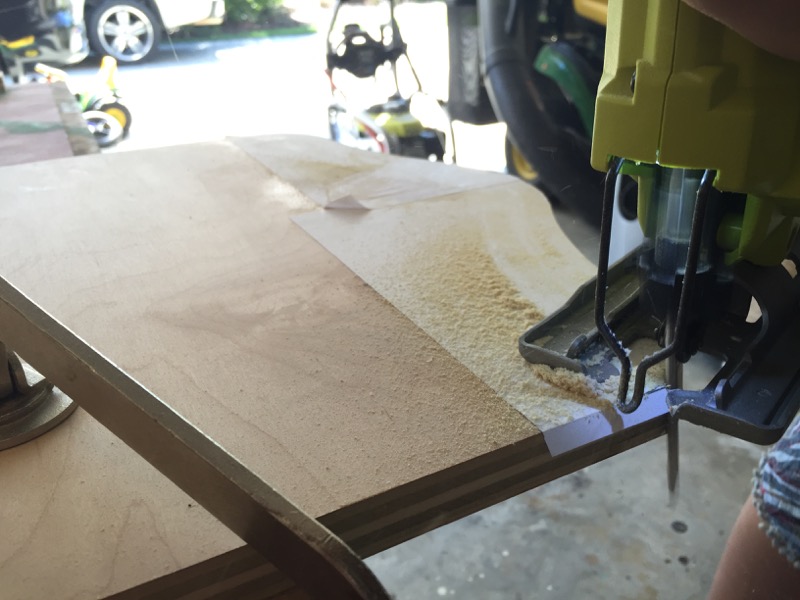
This is a pretty straight forward build but if your going to take this on I recommend downloading the printable PDF below which includes the template I used for the side panels. Happy building!
I then cut the 1″ dowel about 1/4″ longer than the width of the hanging area. Then I drilled about an 1/8″ deep hole the same diameter of the dowel on each side. Then you should be able to snap the rod firmly into place.
Finishing
After sanding using 220 grit sandpaper and orbital sander, we sprayed the dress up center and feet with blush pink chalked paint from Rustoleum.
That’s it! I hope you enjoyed this project and I know any little girl would love to have something like this.
Questions? Comments?
As always, if you have any questions don’t hesitate to comment below and especially don’t forget to post pictures of your finished products in the comments! ENJOY!
Awesome plans!! Exactly what I was looking to build for my daughter for Christmas, So glad God pointed in your direction. Thank you very much!
One quick questions: Would you please be able to point me in the direction of ‘how to build drawers’? I’d like to convert the bottom two shelves of this dress up center into pull-out drawers.
Thank you again, and Kind Blessings to you and yours!
Thanks so much for the kind words.
Drawer with drawer slides. Allow 1/2″ on both sides. (ex. https://rogueengineer.com/diy-telephone-table-plans/)
Drawer without slides (ex. https://rogueengineer.com/diy-printmakers-media-console-plans/)
Hello!
Thank you for this post! I have searched high and low for the perfect dress up center for our daughter, with the perfect bit of charm, and this is exactly what we were looking for!!! Anyway, I didn’t see in the materials or the directions the instructions for adding the dowel to hang the dresses or what thickness you went with? I know this is an easy step, but I’d love to hear your thoughts. Thanks again!!!!
Ahh, I can’t believe I overlooked this. I cut the dowel about 1/4″ longer than the width of the hanging area. Then I drilled about an 1/8″ deep hole the same diameter of the dowel on each side. Then you should be able to snap the rod into place. Hope this helps.
Hey I’m sorry I’m not understanding how to put the dowel in I read your directions but unsure ? Please let me know asap
You can always just buy closet rod supports and it would make it a lot easier. Since not much is being put on this rod I opted to just counterbore holes on each side of the rod for it to snap into. Hence cutting the rod slightly longer.
Hello,
I just completed the dress up center in time for Christmas. I think it turned out pretty good. Thanks for sharing the plans Jamison. I’m sure my daughter will love it.
Turned out great! Thanks for sharing. I’m sure your little princess will love getting it Christmas morning.
Hi, did you attach the top plates and feet with glue only? I’m sure this is a silly question but this is my first project
I’m having problems receiving the printable PDF plans. I have entered in my email address and the only email I have received says, “Thanks for subscribing.” Is there a better way to view the printable PDF plans?