
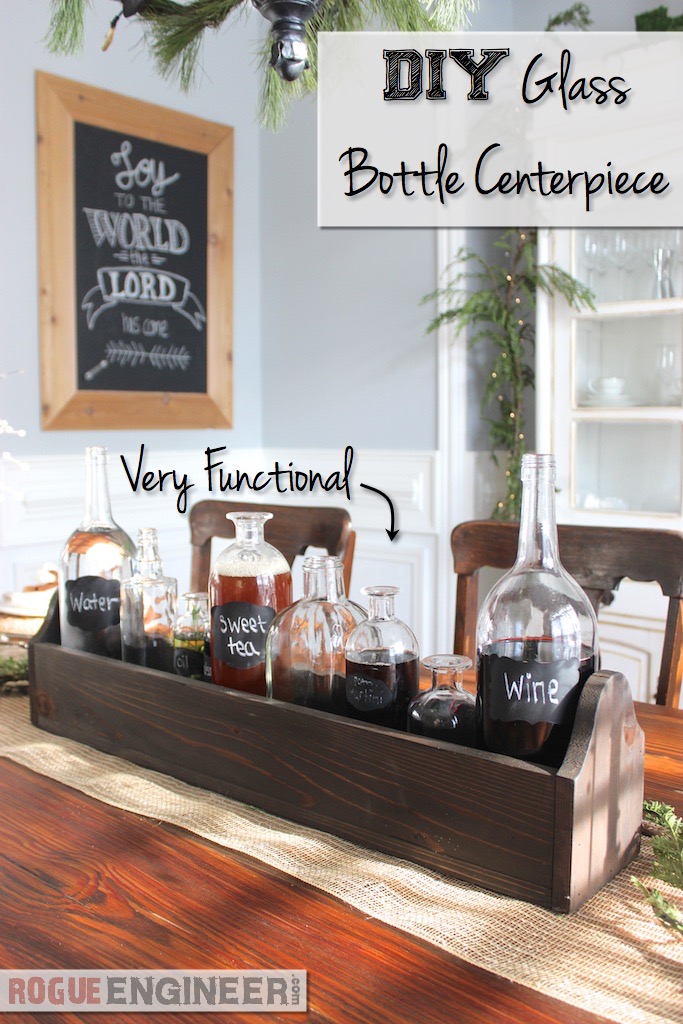
Simple Glass Bottle Centerpiece
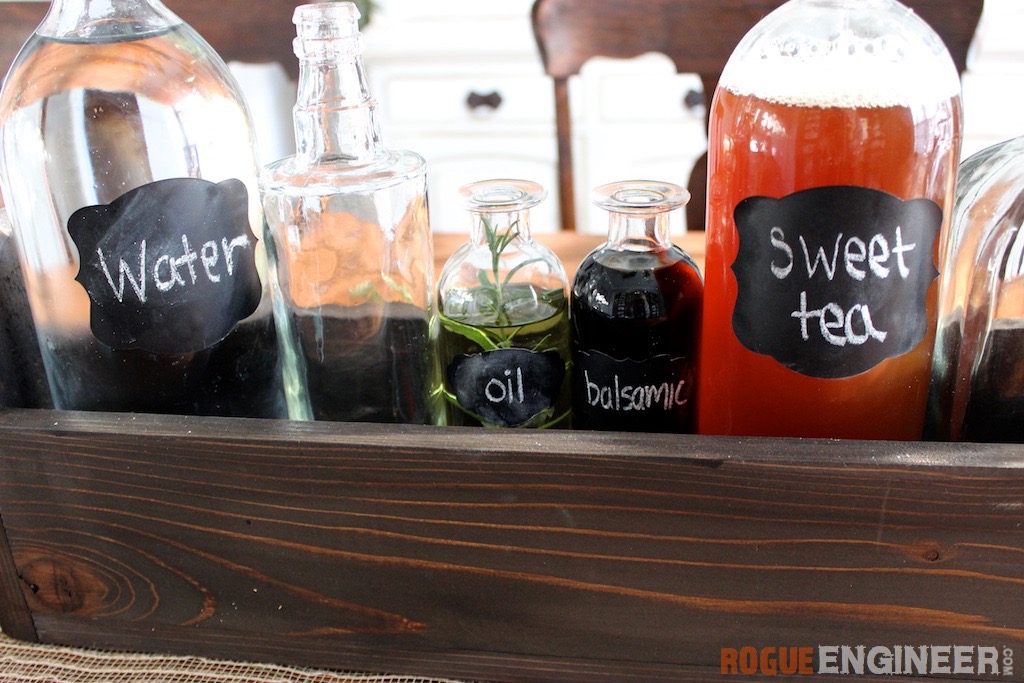
When shopping around for Christmas, I came across a wooden box holding different size glass bottles. I loved the look of the box with the clear bottles, but then I thought wouldn’t that be great for a functional centerpiece for our Christmas table. If you are anything like us, then you like a good glass of wine (or a few) with dinner. But who wants wine bottles cluttering up your beautiful holiday table?! Not only can you have extra wine but you now have a place for water, sweet tea, cocktails, salad dressings, olive oil, or vinegar.

Disclosure: The links provided in the “materials” and “required tools” sections are affiliate links. If you would like to support our site and help keep our content free come find out more about how we can make money with no extra cost to you.
Tools Required
Materials
- 1″ x 6″ x 8′ (Cedar; Actual Dimensions: 3/4″ x 5-1/2″ s 8′)
- 1″ x 4″ x 8′ (Cedar; Actual Dimensions: 3/4″ x 3-1/2″ s 8′)
- 1-1/4″ 18 Gauge Brad Nails
- Assorted Glass Bottles
- Chalkboard Sticker Labels
Plans
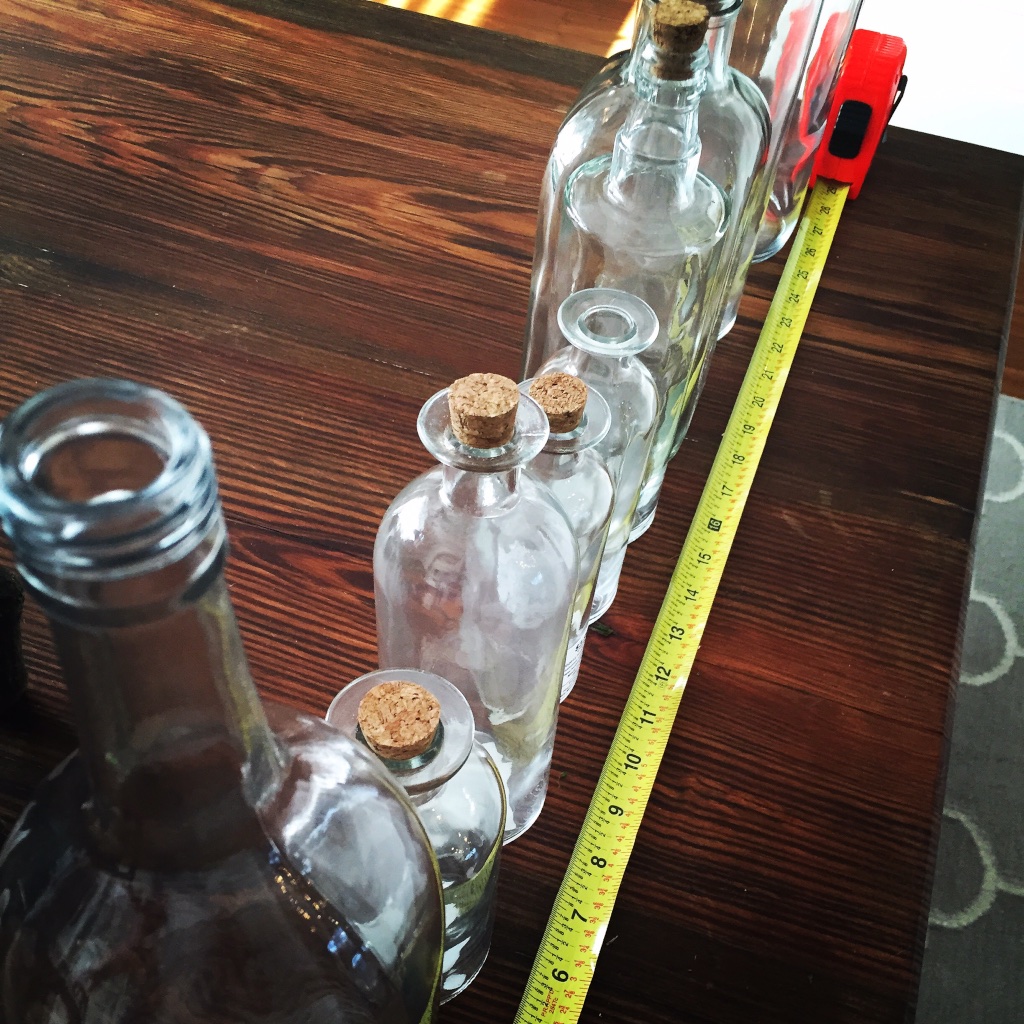
Step 1: Measure and Cut Boards
Lay out all your glass bottles and measure the length from end to end. I would recommend adding about a 1/2″ in length.
Then cut two 1×4’s and one 1×6 to this length. The 1×4’s with be the front and back and the 1×6 will be the bottom.
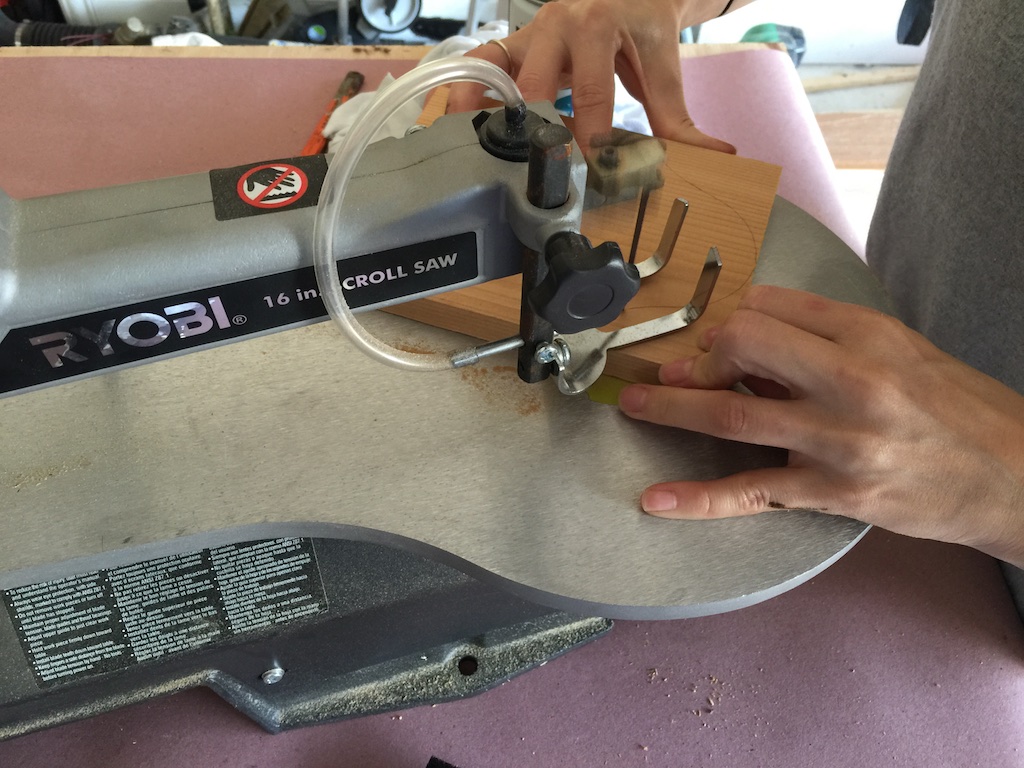
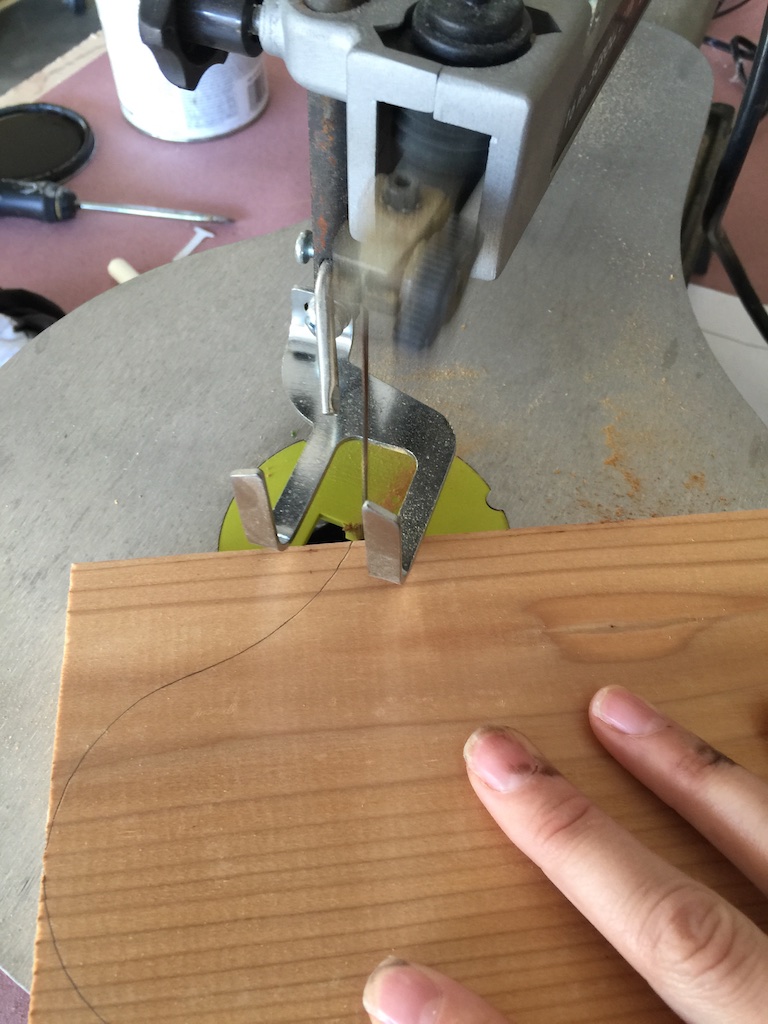
Step 2: Cut Sides
The sides are made from the 1×6 and should be 7″ in length. Print off the template below and cut out two sides using a jig saw or scroll saw.

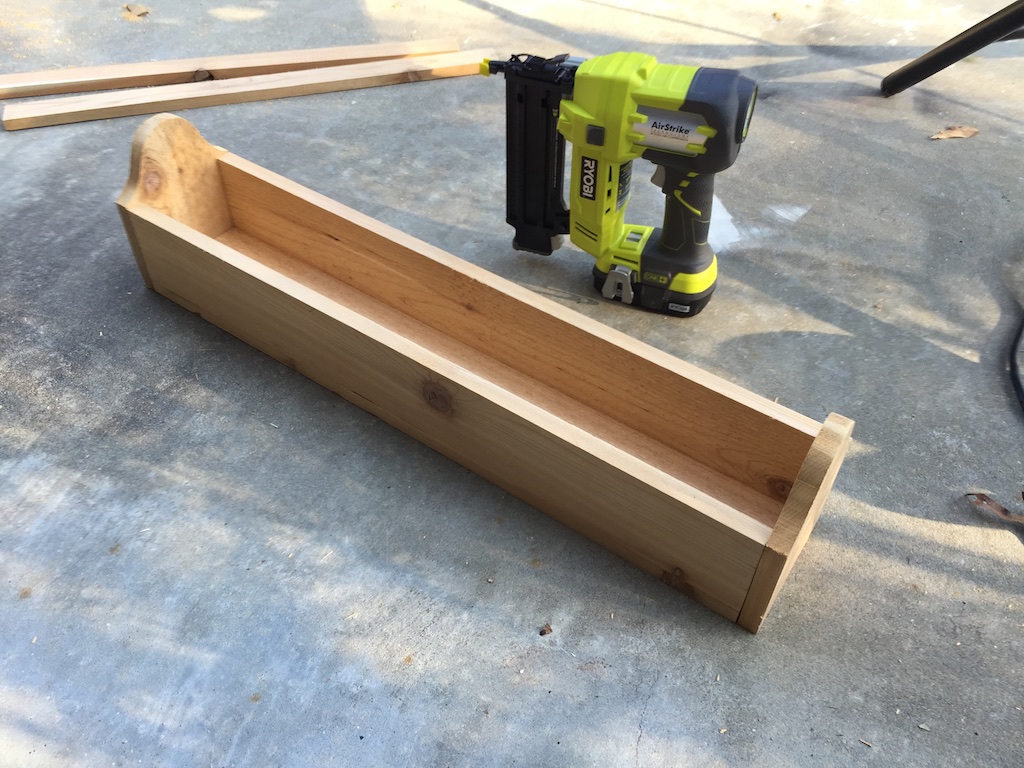
Step 3: Nail Bottom to Front and Back
Nail the 1×6 bottom to the 1×4 side as shown, using 1-1/4″ brad nails. We decide to have the rough side of the cedar on the inside of the box but that decision is up to you.


Step 4: Attach Sides
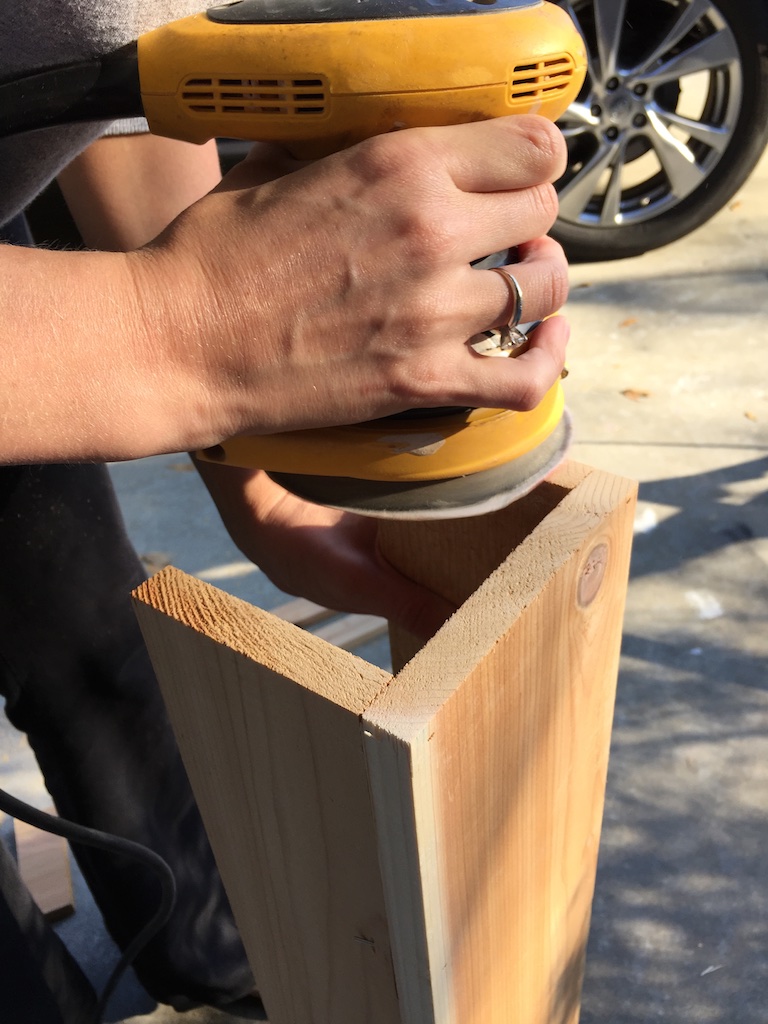
Before nailing, sand the edges of the current assembly flush so the sides will sit evenly. Then, attach the sides using 1-1/4″ brad nails.

Finishing
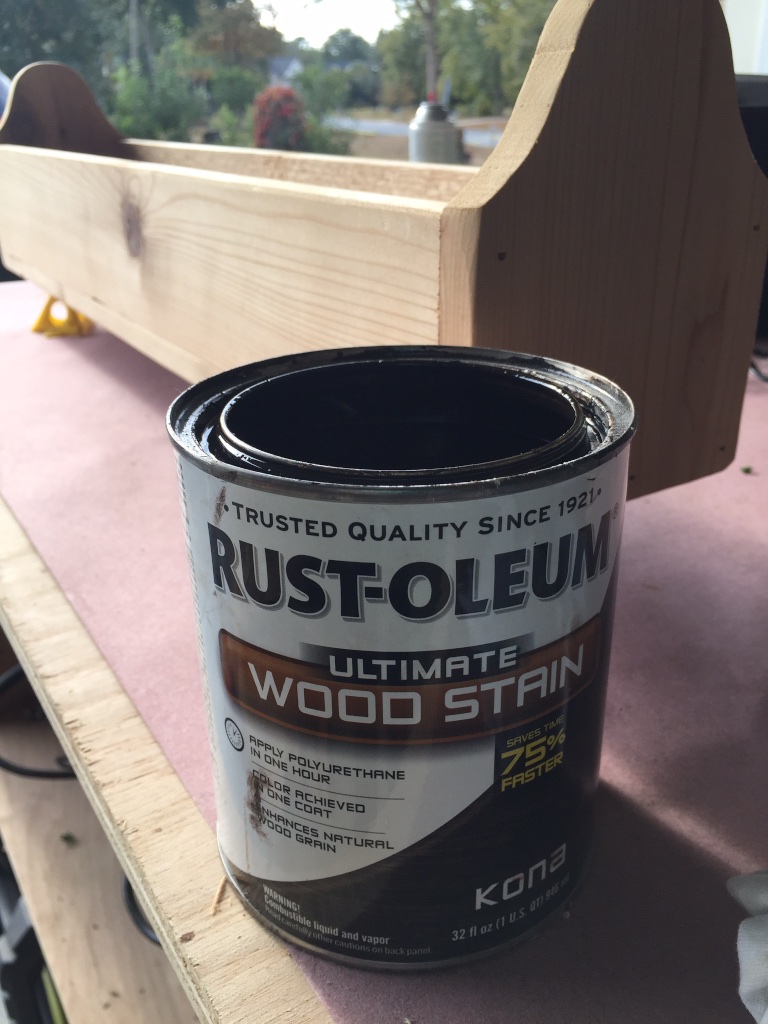
Finish as desired. We decide to stain the box using the Kona wood stain from Rust-Oleum.

Questions? Comments?
As always, if you have any questions don’t hesitate to comment below and especially don’t forget to post pictures of your finished products in the comments! ENJOY!
OK, so this is stinkin’ brilliant!!! Thanks for sharing. I hope you two are doing well this holiday season. God bless! 🙂
Thanks Susan! Hope all is well on your end too and have a merry Christmas!