Storage Shelves with Workstation
When we built our home, one thing we didn’t get around to was storage shelving in the basement. We had a designated storage room but totes were stacked on top of each other and essentially we just had a place to pile our crap. Needless to say, this was not organized, not easily accessible and also extremely frustrating when it was time to look for something. That’s why we decided that it was time for a makeover.
One of the units that we wanted to build was a multi-purpose unit. It needed to have standard tote storage, coat hanging space, and a large work surface for random odd jobs like wrapping presents or fixing household items. With readily accessible materials, limited tools and about $150, we built this storage unit with workstation and couldn’t be happier.
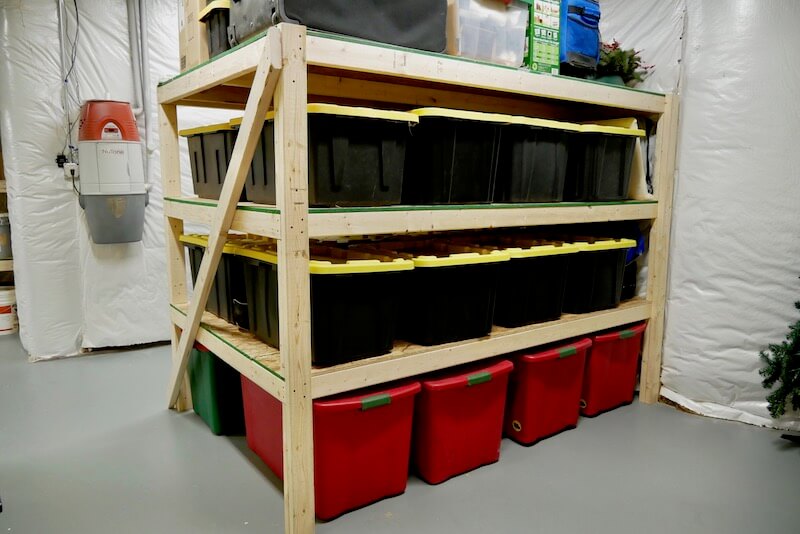
We also built a heavy duty storage unit that will hold up to 32 storage totes for only about $125. Get those plans here.
Time to Complete
1 Day
Estimated Cost
$100-200
Skill Level
Beginner
If you love this stuff as much as we do, you might want to consider following us on Instagram where we post sneak peeks and behind the scenes stuff in our stories. Also, did you know you can get tons of projects plans from all around the web when you follow us on Facebook and Pinterest!
Tools
Materials
- (3) 1/2” x 4’ x 8’ OSB Sheets
- Optional to swap one sheet for melamine for a smoother work surface
- (22) 2 x 8 x 8’ Lumber
- (2) 2 x 2 x 8′ Lumber
- 4′ x 8′ Pegboard
- Wooden Closet Rod
- 2-1/2” Wood Screws
- 1-1/4” Brad Nails or Wood Screws
- 27 Gal Storage Bins
Disclosure: The links provided in the “materials” and “required tools” sections are affiliate links. If you would like to support our site and help keep our content free come find out more about how we can make money with no extra cost to you.
Dimensions
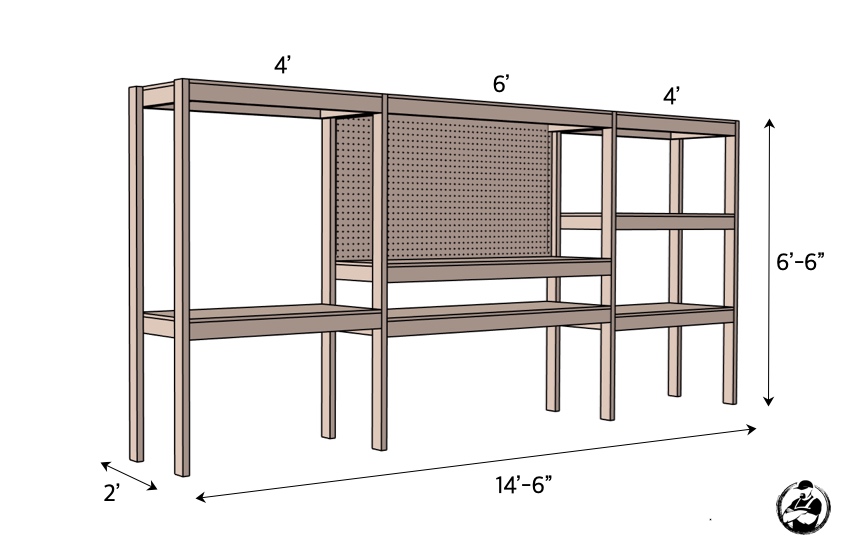
These plans will guide you through the process of building a multi-purpose storage unit with space for standard tote storage, coat hanging space, and a large work surface for random odd jobs and tool storage.
Total Time: 1 day
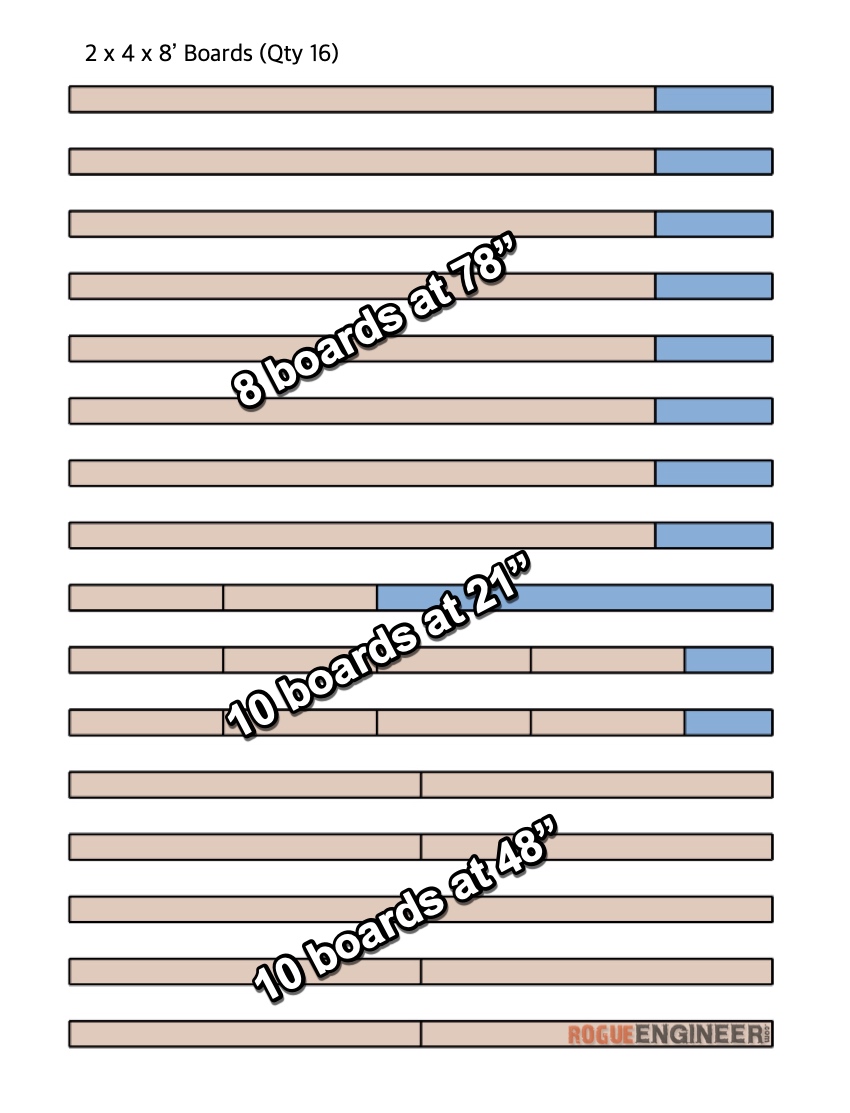
Cut the 2x4s for the Shelving Units
Cut the OSB for the Tops
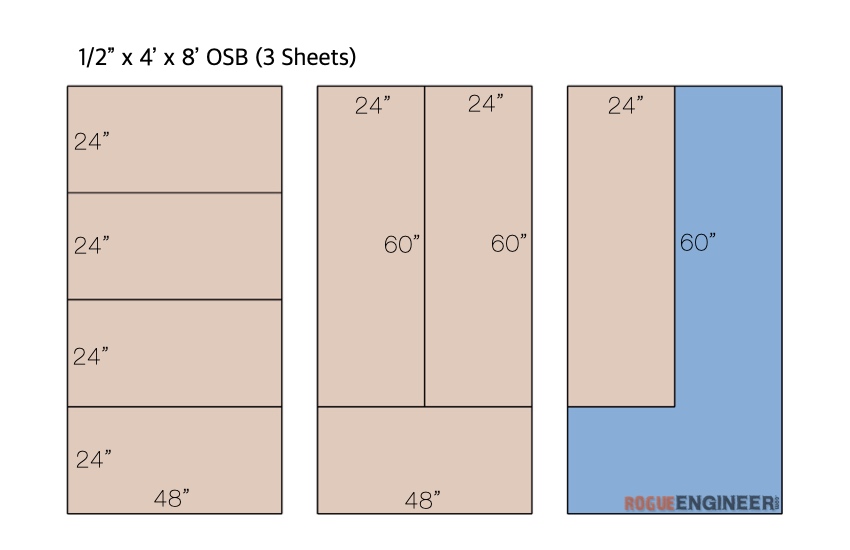
Note: I swapped out on the OSB sheets for a melamine sheet so that the workbench and lower shelf would have a smooth surface to work on.
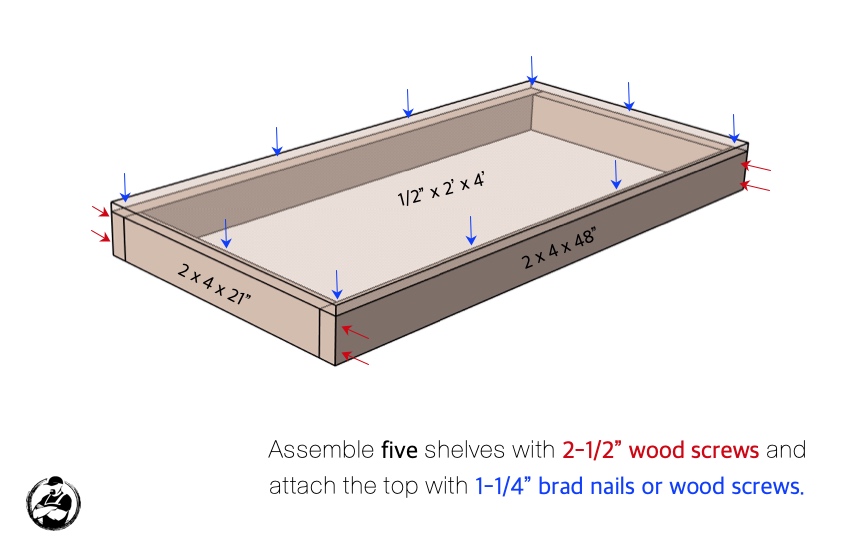
Assemble the Shelves (Qty 5)
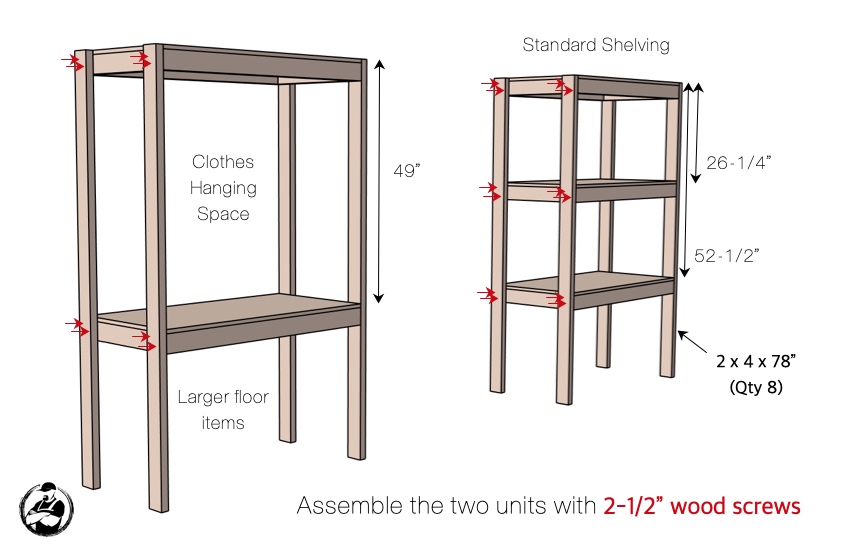
Assemble the Shelving Units
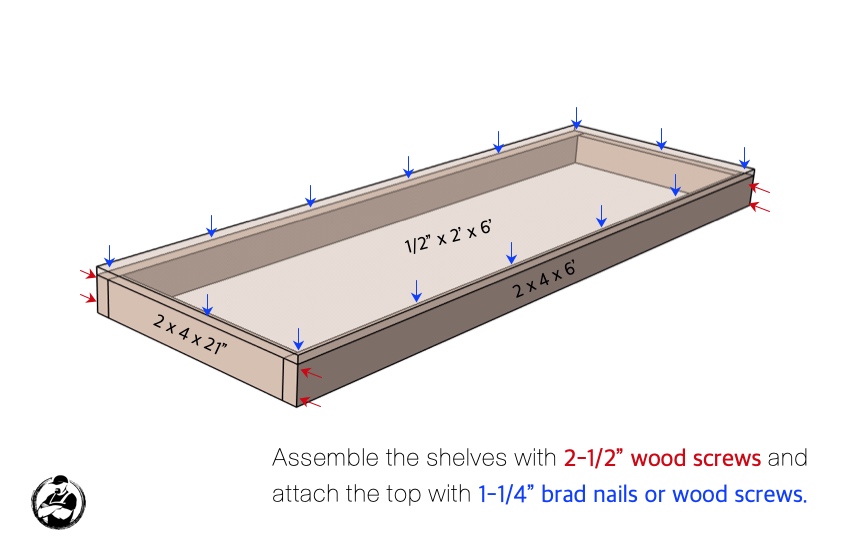
Cut the Boards for the Middle Platforms

Assemble the Middle Platforms
Install the Middle Platforms

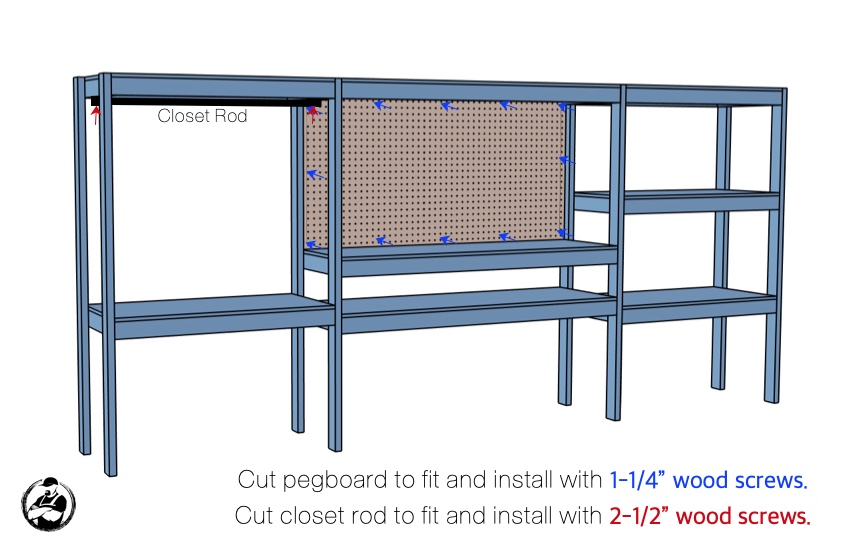
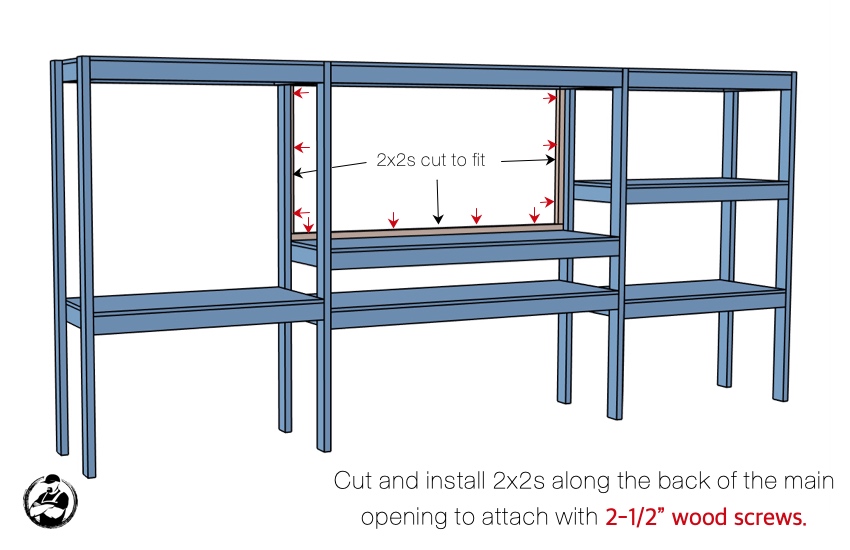
Cut and Install Pegboard Supports
Install Pegboard and Closet Rod