
DIY Fire Pit Makeover (Backyard to Campsite)
Take a bare, overgrown fire ring and turn it into a level, safe, campsite-style hangout — in a weekend, with gravel, block, and a couple of benches.
Three ways to make over a fire pit
Pick the level that matches your yard and your weekend. The table below is the fast decision — the rest of this post is the full campsite version I built on my own property.
| Makeover approach | Cost | Time | Skill |
|---|---|---|---|
| Gravel + block ring only | ~$150 | Half day | Beginner |
| Block ring + built seating (a solid weekend) | ~$300 | Weekend | Beginner–Intermediate |
| Full paver patio + pit | ~$800+ | 2–3 days | Intermediate |
Before you light anything, three things to get right:
- Clearance. Keep a fire pit at least 10 feet from structures and overhanging branches (NFPA general open-burning guidance). Measure it before you set a single stone.
- A stable base. A gravel or paver base keeps the seating and block ring from settling unevenly through freeze-thaw cycles. Skip it and the ring heaves and tilts by the second winter.
- The right block. Retaining-wall block rated for fire-pit use resists spalling under heat. Standard concrete pavers can crack when they take direct high heat — don’t line the ring with them.
Why I gave my fire pit a makeover
During quarantine, my family basically lived around a rustic fire ring in the woods behind the house. It did the job, but by that summer it was overgrown, uneven, and had nowhere real to sit. The goals were simple and worth writing down before you start your own: level the gathering area, add firewood storage, and build proper seating so people actually want to stay out there.
What follows is the campsite-scale version — boulders, a retaining wall, lighting, and real chairs. If your pit lives on a flat suburban lot, you can hit the same result with the block-ring approach in the table above and skip the heavy equipment. The order of operations is the same either way.
What you’ll need


How to make over a fire pit area
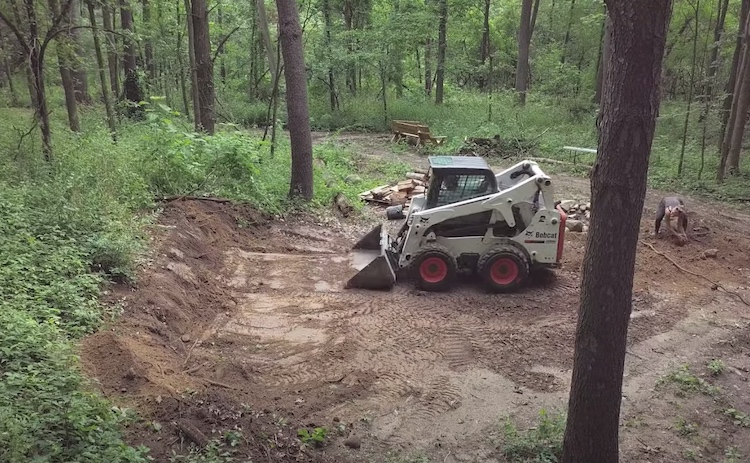
Step 1: Clear and level the area
Pull the old stone ring and any rustic seating out first so you can see the actual footprint. I borrowed a skid steer to expand and level the gathering space, cutting tiered sections so ATVs could still get in. For a flat backyard pit you won’t need equipment — just strip the sod, rake it flat, and check it with a level across a straight board. A level base is what keeps everything you build next from settling crooked.
And if you want covered seating next to the fire, we put a pergola over ours — the free Pergola Builder in our how to build a pergola guide turns your exact footprint into a cut list, shopping list, and cost estimate.
Step 2: Build the fire ring
Handpick boulders (or set a single course of fire-rated retaining-wall block) into a tight containment ring. Inside the ring I added marble chips — they give you drainage and airflow under the fire and look clean when the pit’s cold. Keep the finished ring at least 10 feet from structures and overhanging branches.
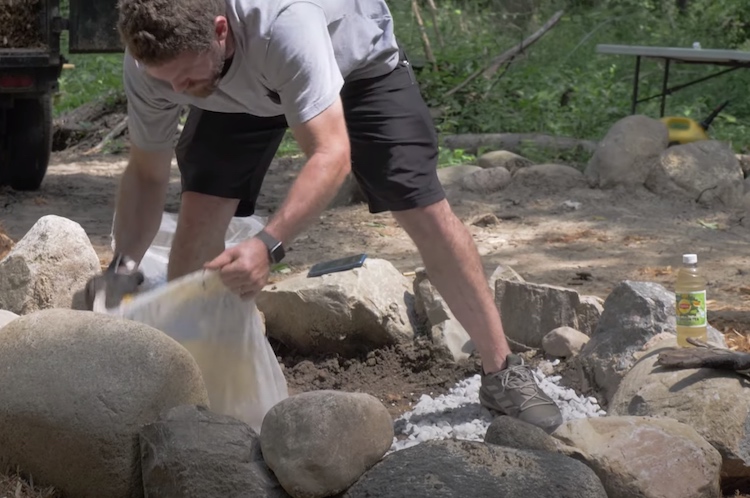
Step 3: Ring it with pea gravel for fire safety
Lay a 3-foot pea-gravel ring around the pit. It’s the single cheapest safety upgrade you can make: it stops stray embers from catching mulch or grass, and it gives you a clean, stable place to set chairs and feet. This is the layer most bare fire pits are missing.

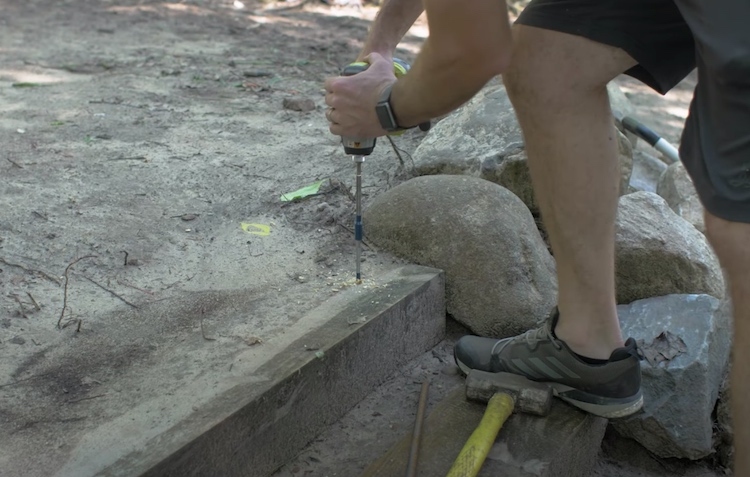
Step 4: Add retaining walls and steps (if your site is sloped)
On my sloped site I built boulder retaining walls from stone already on the property and turned leftover timbers into steps. To keep the steps from creeping downhill, I drilled through each timber and drove 2-foot rebar stakes through the holes into the ground. Flat-lot makeover? Skip this step entirely.
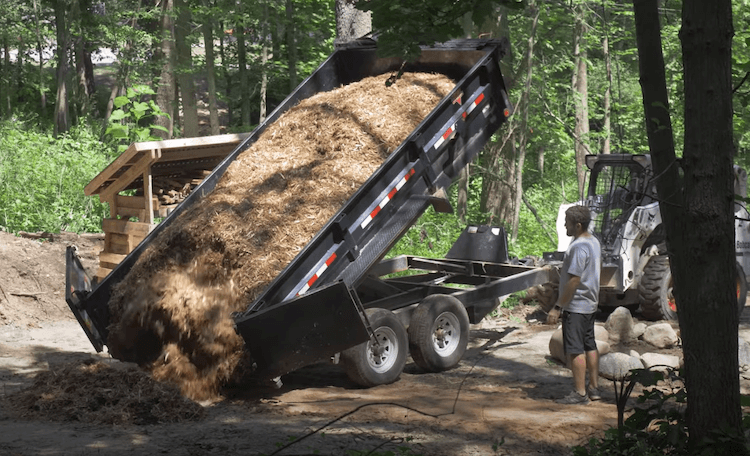
Step 5: Lay ground cover and clear the brush
I covered the main gathering area in natural cedar mulch — it drains, smells good, and keeps the dust down. Before mulching, clear the perimeter: I used a RYOBI 40V string trimmer with a brush-cutter head for the heavy growth, a backpack sprayer for brush killer on the poison ivy, and a pole saw plus a 40V chainsaw to drop one hazardous dead tree near the pit. Do the tree work first, on a calm day, away from where people will sit.
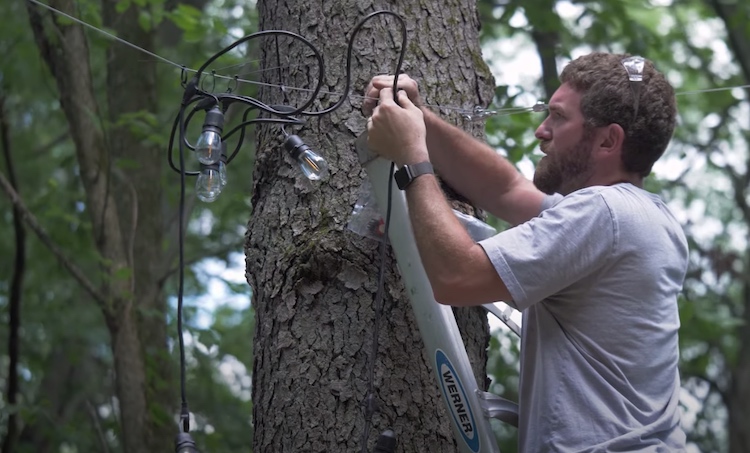
Step 6: String the lights
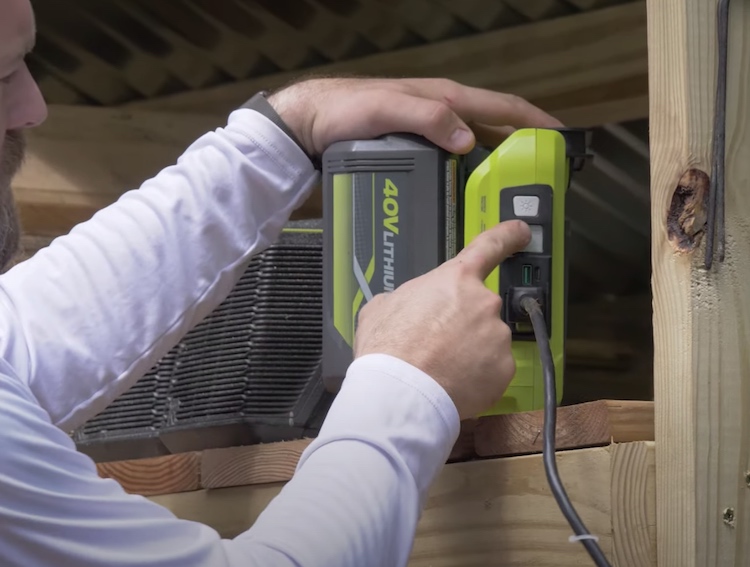
I ran a steel cable between trees and hung six strands of LED string lights from it. Off-grid, so I powered them with a 300-watt inverter running off a 40V RYOBI battery. On a suburban lot you’ll just tap an exterior outlet — but the cable-between-anchors trick is what makes the lights hang taut instead of sagging.
Step 7: Build the seating
This is what turns a fire ring into a hangout. I already had a couple of outdoor benches out there, and I built four more Adirondack chairs in about three hours to round out the circle. Pressure-treated lumber holds up outside; a low bench or two is the minimum. Free build guides for both are linked below.

The result
A bare, overgrown fire ring became a level, lit, campsite-style hangout with real seating, safe clearance, and firewood storage close by. The backyard version of this — level base, block ring, pea-gravel surround, and a couple of PT benches — gets you 90% of the feel for around $150–$300 and a single weekend.

FAQ
How far should a fire pit be from the house?
Keep it at least 10 feet from any structure and out from under overhanging branches, per NFPA general open-burning guidance. Check your local fire code too — some municipalities require more, and many ban open burning during dry spells. Measure the clearance before you set the ring, not after.Do I need a gravel base under a fire pit?
Yes. A gravel or paver base lets water drain and keeps the block ring and seating from settling unevenly through freeze-thaw cycles. Without it, the ring heaves and tilts within a season or two. A 3-foot pea-gravel ring around the pit also catches stray embers, so it’s doing double duty as a safety layer.Can I use regular pavers around a fire pit?
For the surround and seating area, yes. For the ring that takes direct heat, no — standard concrete pavers can spall and crack under high heat. Use retaining-wall block rated for fire-pit use, natural stone, or a steel fire ring insert for the part that actually contains the fire.What’s the cheapest way to make over a fire pit?
Level the base and ring the pit with a single course of fire-rated block, then add a 3-foot pea-gravel surround. That’s roughly $150 and half a day, and it covers the two things that matter most — a stable, level base and ember-safe ground. Add a bench or two later when you’re ready.How long does a fire pit makeover take?
A block-ring-plus-gravel refresh is a half-day job. Add built seating and you’re looking at a full weekend. A full paver patio with an integrated pit runs two to three days. The seating is what stretches the timeline — the ring and gravel go fast.


Be safe and happy building,
Jamison