
Building a Block Retaining Wall
Quick answer: A block retaining wall built on a compacted gravel footing, with a perforated drain line, clean-gravel backfill, and geogrid reinforcement on taller walls, will last a lifetime. The failure mode you see in leaning DIY walls is almost never the block — it’s a bad footing or trapped water. The step-by-step below covers both, plus cutting, capping, and when geogrid is required. Video and full instructions below. Documented by Jamison Rantz.
When it comes to retaining walls, concrete blocks are fairly straight forward to install and will last a lifetime. But, it’s not as easy as just stacking the blocks. If not done properly your concrete block retaining wall can have issues resulting in leaning and possibly falling over. The steps below will show you how to properly build a concrete block retaining wall and avoid these potential downfalls.
On a tighter budget? We also built a 6×6 landscape timber retaining wall for about half the material cost — same footing and drainage playbook, shorter lifespan.
Tools & materials
How to build a concrete block retaining wall
A step by step guide to building a concrete block retaining wall.
Selecting your Concrete Block
When selecting concrete blocks for your retaining wall you will want to make sure that they have some type of locking feature. This could be a lip on the back of the block, a tongue and groove connection, or a locking pin configuration. This will make sure that the block do not slide forward from the back pressure created by the hillside you are trying to retain.
Check your local codes to see if you need permits or engineering for your particular wall. In some cases, walls over 4 feet tall could require engineering.
Layout and Excavation
Start by laying out exactly where you would like your retaining wall to go and using marking paint to map out the area. Then you will need to cut out the hillside. This can be done with a shovel for low walls or for larger projects, a machine may be required (such as a tractor, mini skid steer, or mini excavator). When excavating for a wall 3-4 feet or taller, not only do you need to cut out a level spot where the wall will go, but you will need to cut back into the hillside as far back as your wall is tall. For example, if you have a 4ft wall you will need to cut 4ft out behind the wall.

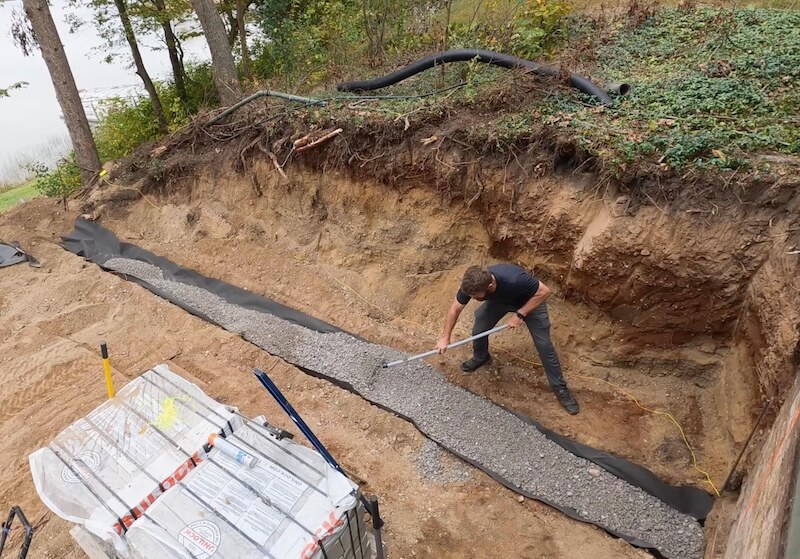
Preparing the Footing
The retaining wall you build will only be as good as the footing that it sits on. After excavation, lay out the wall location again on your new grade. Then dig out a tench for your footing. The footing should be 16in wide (or more depending on you block depth) and 6-8in of compacted crushed gravel. The depth of the trench should also include the height of one full row of blocks which will be buried below the finished grade. So if your blocks are 6in tall, your footing trench should be 12-14″ deep.
With the correct depth for your footing, compact 6-8in of 3/4″ crushed gravel making sure that the finished footing is level (side to side and front to back). Filter fabric can also be installed below the footing to help prevent and settling.
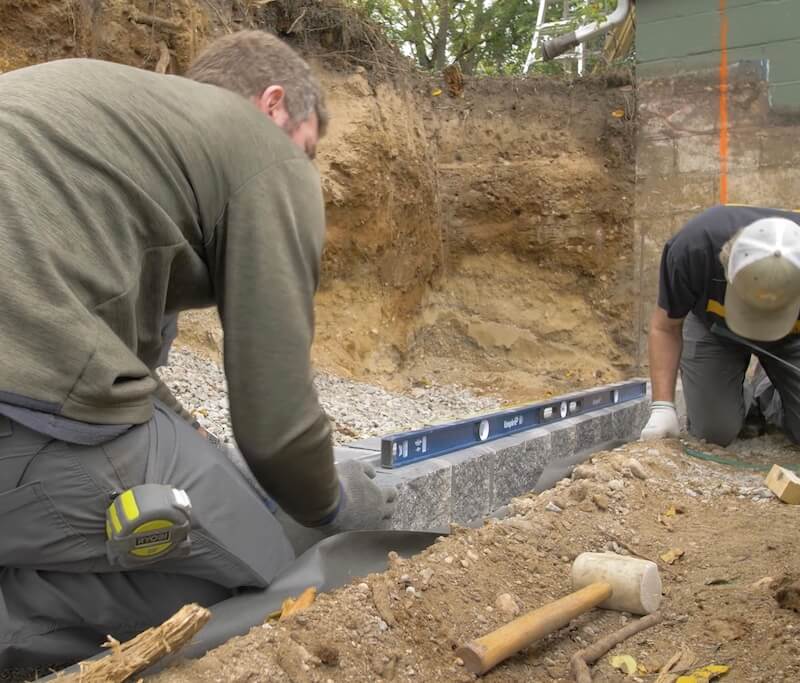
Setting the First Course
The first course of block is the most important course in the entire wall. This is because there is really no adjustment of the rows once you get going. The first course needs to be perfectly in place and level. Using a long level and a dead blow hammer, set your blocks in place, making minor adjustments to achieve level side to side. Check adjacent blocks with your level to make sure those are set in the same level plane and there are no low spots or high spots. When setting the first course, the blocks may be tipped ever so slightly back. They should be near level front to back but if anything the wall should be leaning back into the hillside ever so slightly.
Take your time to make sure this first course is perfect, it will make the rest of the project go a lot smoother.
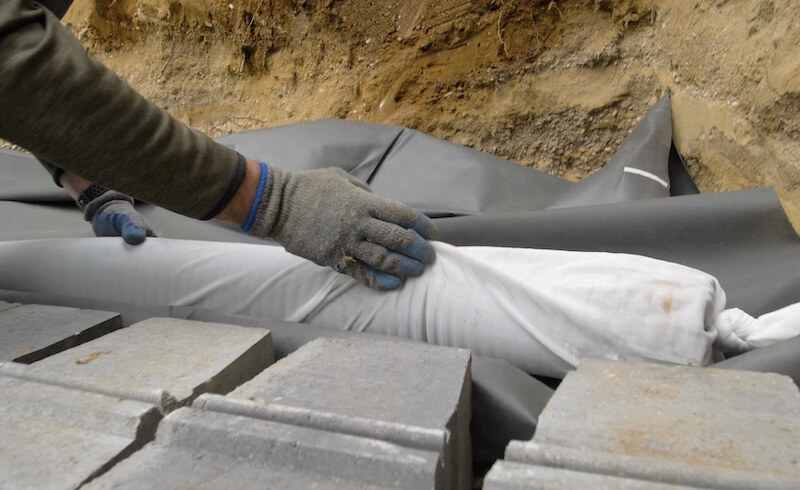
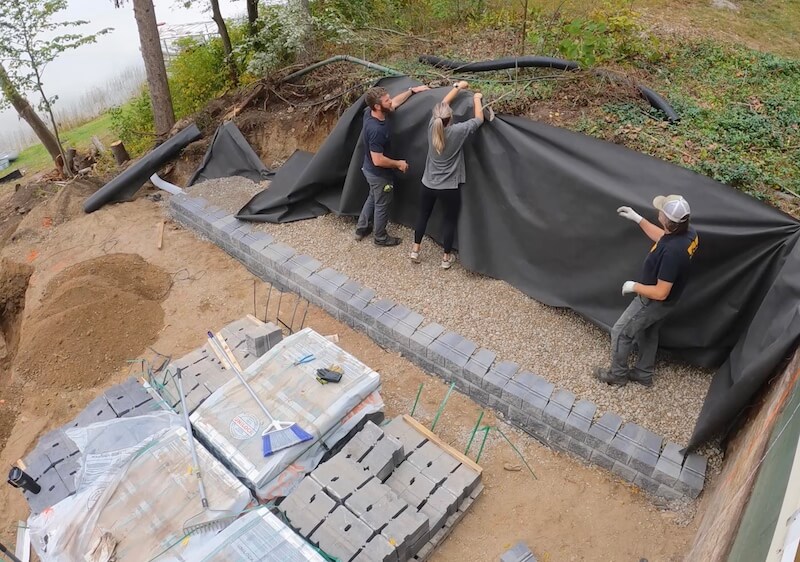
Installing a Drain Line
All retaining walls need to have a way for water to escape, or else the water will saturate the soil and create an excess surcharge on your wall which could result in failure. To prevent this you will need to place a 4 inch perforated drain line behind the first course of block that leads out to daylight for water to drain freely. Non-woven filter fabric should also be installed below the pipe and up the back of the hillside. This will prevent any silt and soil from working its way into your drainage stone behind the wall and clogging up that area, rendering it useless.
Woven filter fabric should not be used as it can create hydrostatic pressure by not allowing enough water to pass through, essentially creating a dam.
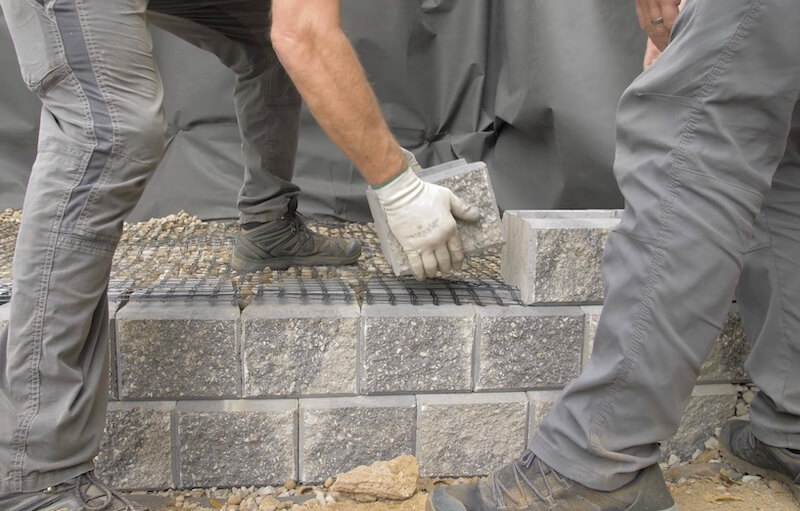
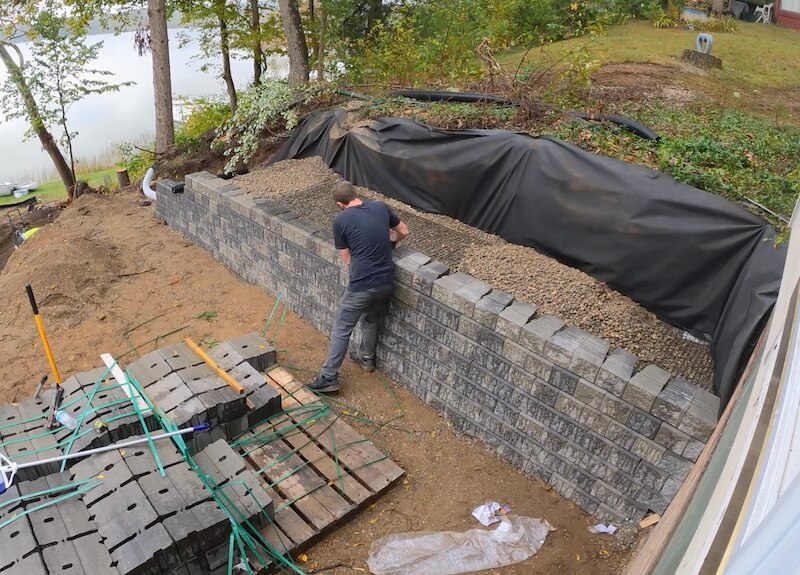
Stacking Blocks and Backfill
When stacking the blocks, make sure to stagger the seams and assure there is no pebbles or material between the blocks that would create an uneven placement.
Backfill behind the wall and in between any gaps in the blocks every course or two with washed (or “clean”) 3/4″ gravel and make sure to encase that drainage stone with your filter fabric. This will allow proper drainage without the fines from regular gravel or soil clogging up the drainage field.
Cutting Blocks
In some cases you may need to cut a block. This can be done with a masonry chisel and small sledge hammer or a masonry diamond cutting blade on an angle grinder or concrete saw. Take proper precautions to avoid concrete dust as it is harmful.
Installing Geogrid when Necessary
For walls over 3-4 feet in height, or walls that will be supporting poor soil, you will need to install geogrid which will reinforce the wall by stabilizing the ground behind it. Geogrid is installed between layers of block (minimum of 16″ between geogrid layers) and laid back into the gravel backfill as far back as the wall is tall. For example, if you have a 6ft wall you will need to lay 6ft of geogrid behind the wall. Some geogrid is uniaxial, which means that the strength is only in one direction, while others are biaxial, meaning the strength of the material is in both directions. Take note of this and roll out your geogrid so that the strength is going back into the hillside.
There is a thing called angle of repose, which is essentially the angle that the soil wants to settle to if the wall was not present. This creates back pressure on the wall, and if not stabilized, can result in failure. By installing geogrid, the unstable wedge of soil behind the wall is stabilized and the angle of repose is moved back into the hillside, relieving your wall of that added pressure.
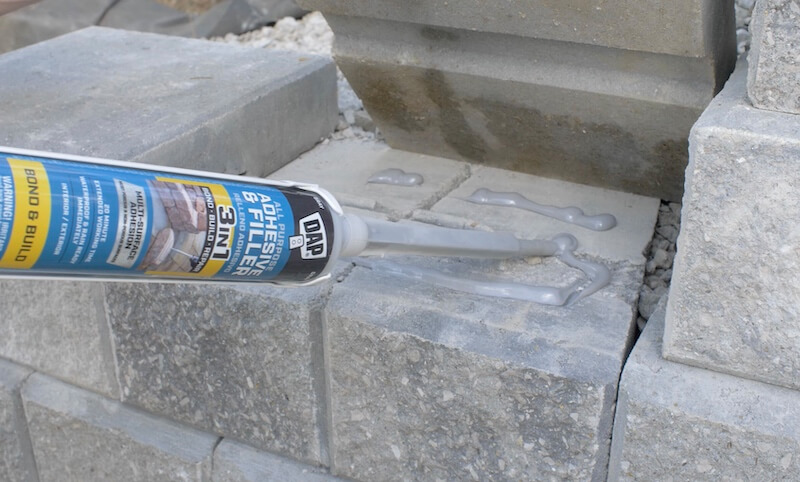
Adhering the Top Course and Caps
Since the top row of stone or caps wont have the weight of any blocks above it to prevent it from moving, it will require an adhesive to assure the blocks or caps stay where you want them. For this we used DAP All Purpose Adhesive & Filler which is perfect for this because it is a 2 part epoxy that creates a strong bond between the two surfaces. Plus, it’s weatherproof immediately and can even be used to recreate any chipped or broken areas.
Cover Drain Field and Dress with Topsoil
Once the wall is in place and your drainage stone is backfilled within 6-12″ from the top of the wall, the drainage stone can be covered with filter fabric and the last 6-12″ can be backfilled with good topsoil to allow for planting grass or small plants.
Avoid planting trees or large shrubs on top of taller retaining walls as the added dynamic pressure from large growing roots and swaying trees could be detrimental to your wall.
Block retaining wall questions, answered
Can I use regular cinder blocks for a retaining wall?
Not on their own. Hollow-core cinder blocks have no locking feature and no mass behind them — the hillside will walk them forward. Use purpose-made retaining wall blocks with a rear lip, tongue-and-groove, or pin system. (If you must use CMU block, it needs a concrete footing, rebar, and grouted cores — a different project entirely.)
Does a block retaining wall need a concrete footing?
No — segmental retaining wall blocks want a compacted gravel footing: 16 inches wide minimum, 6–8 inches of compacted 3/4″ crushed gravel, with one full course of block buried below grade. Gravel drains and flexes with freeze-thaw; a poured footing under a gravity wall can actually crack and heave.
When do I need geogrid?
For walls over 3–4 feet, or any wall holding back poor soil. Lay it between courses (no more than 16 inches of vertical separation) and run it back into the backfill as far as the wall is tall. Mind the direction: uniaxial geogrid is only strong one way — roll it perpendicular to the wall.
What do I put behind a block retaining wall?
A 4-inch perforated drain pipe run to daylight, non-woven filter fabric, and washed 3/4″ gravel backfill. Water pressure is what tips walls — give it somewhere to go and the wall just has to hold soil.
Keep building outside
Questions? Comments?
If you have any questions, drop them in the comments below — and when your build is done, post a picture. That’s the good part.
Would love to see this written out in a printable format!
Either way, thank you for this quick and to the point guide!