
Shop Dust Collection System
I have been needing to install a decent dust collection system for some time now and finally got around to it. There are many different levels of dust collection but I have a medium sized shop and wanted to create a flexible and easy system to use and install. I opted to go with a Dust Right unit from Rockler because it is a great fit for my shop and they have tons of components to go with it. Check out the video below and the step by step details to see the entire installation and setup.
Total Time: 1 day
Dust Separator
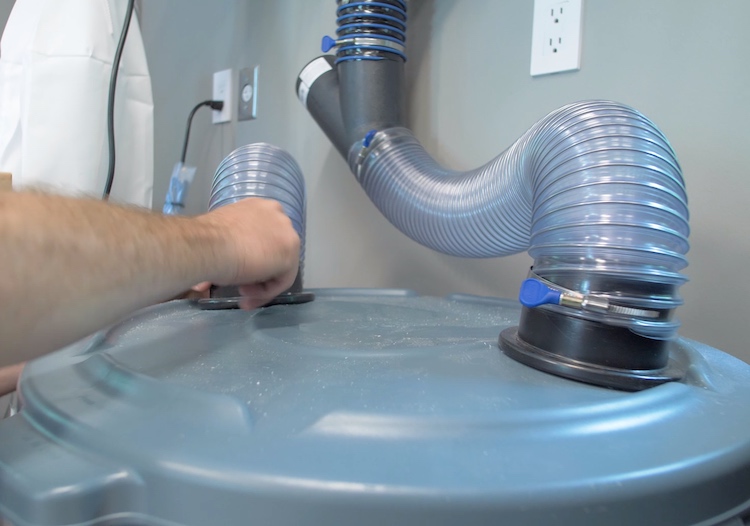
In an effort to try to make the dust collection and storage larger and more efficient I opted to turn a 32 gallon trash can into a dust separator to store the larger dust particles. I did so using the 4″ dust separator kit from Rockler.
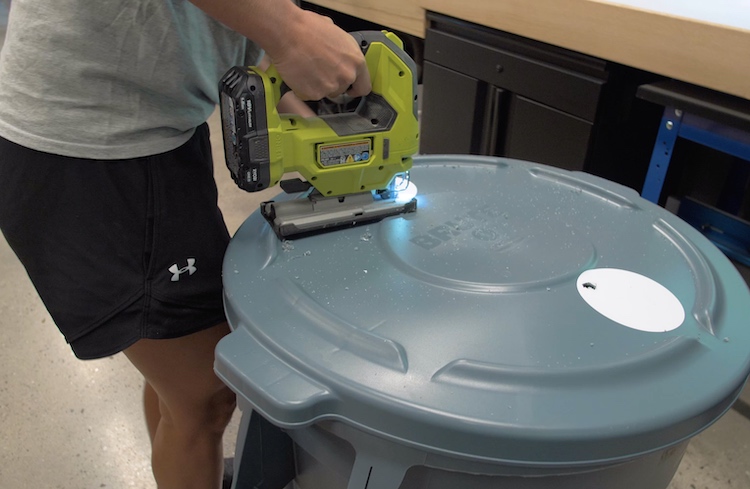
After cutting the holes and installing the elbows, I added whetherstripping to help seal the can even better.
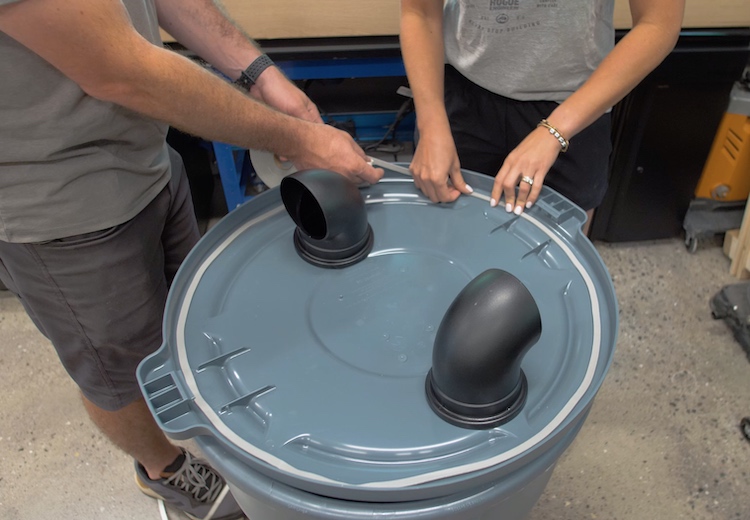
This will be in line right before the dust collector, which will filter out the finer particles.
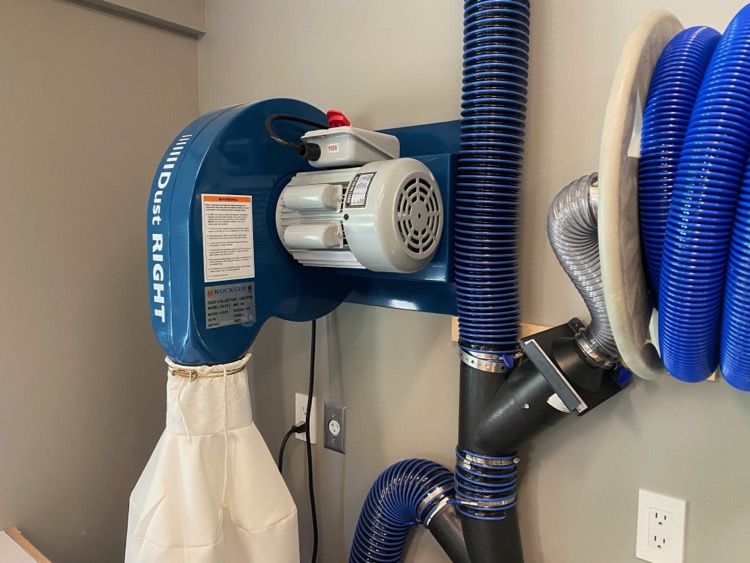
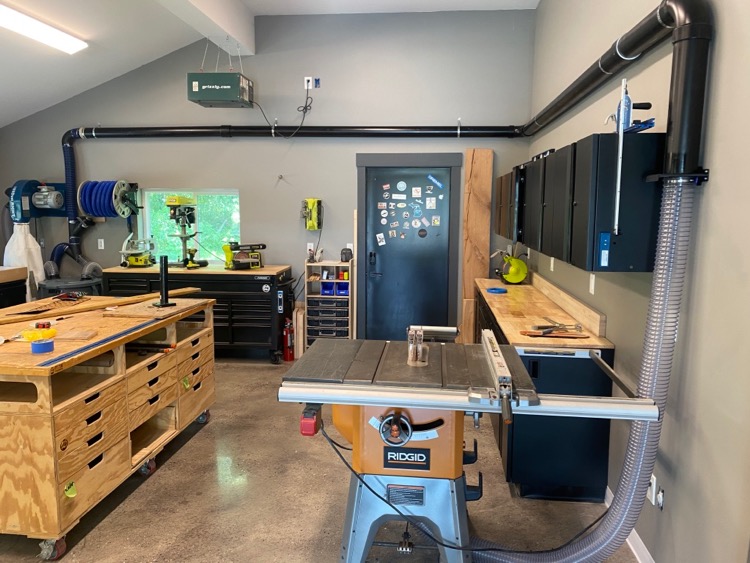
Mounting the Dust Collector
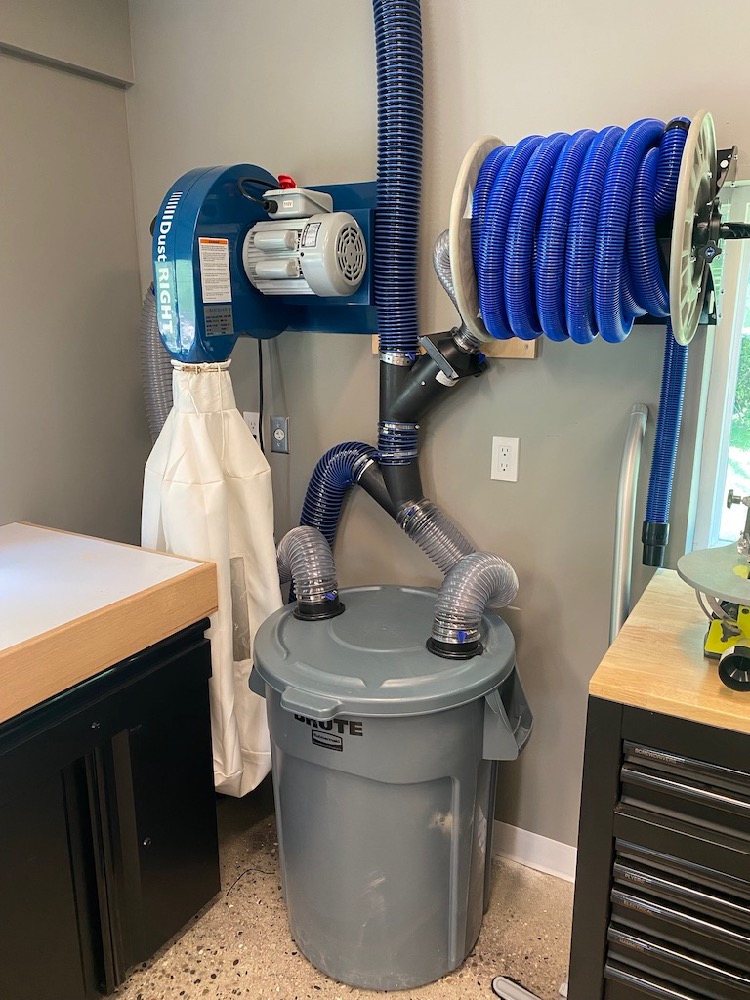
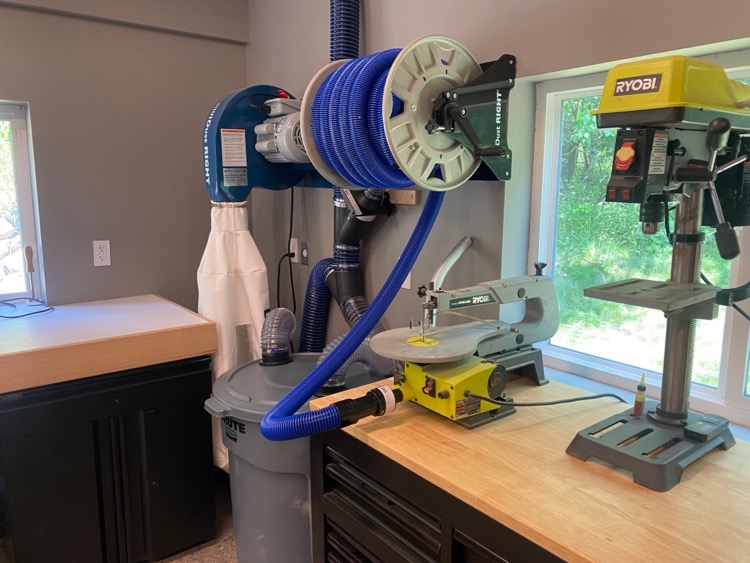
For the dust collector I went with the Dust Right 1250 CFM wall mounted unit. I chose this one because it doesn’t take up too much space yet it has enough power to take care of the tools I have in the shop.
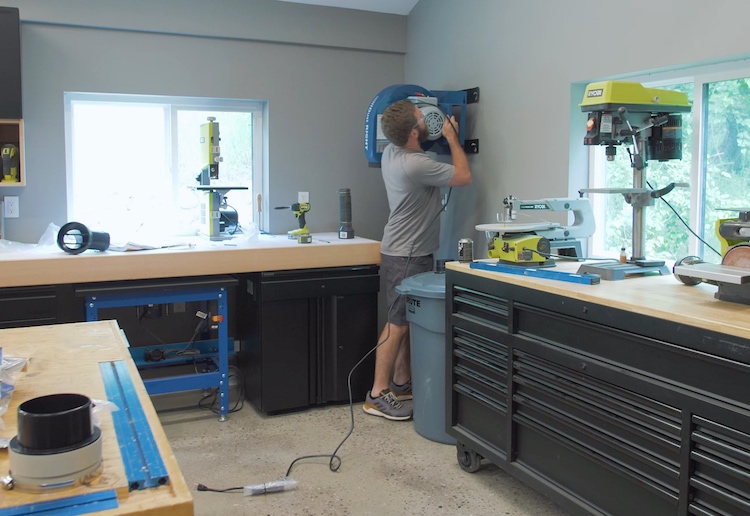
Mounting the unit is fairly straightforward, install lag bolts in the studs and hang the unit on the wall with the rubber vibration dampers behind it.
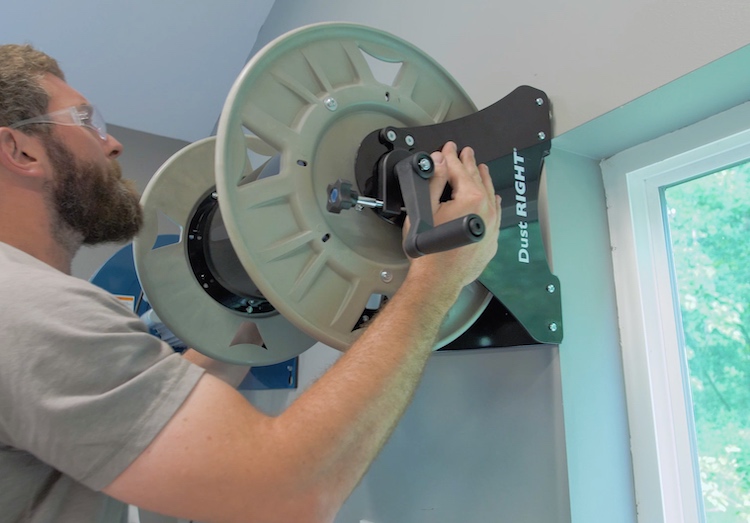
Mounting the Hose Reel
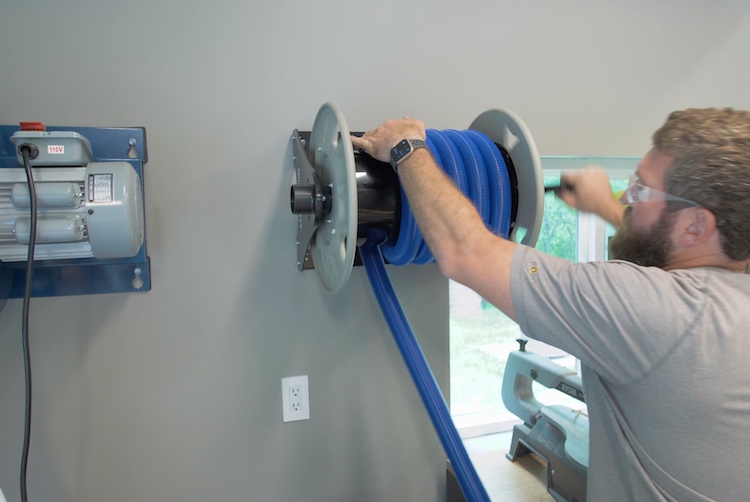
Rather than plumbing each benchtop tool I opted to install a hose that could be used for smaller tools or just to vacuum up the shop. The Dust Right hose reel gets assembled and mounted next to the collector.
I then installed 40 feet of heavy duty vacuum hose on the reel and got a floor sweep to vacuum the floors up.
Plumbing the System
Most of the lines I used the 4″ anti-static duct hose expect for a couple locations where I wanted to make sure the dust was flowing, where I used clear hose.
The main trunk goes into the dust separator before going to the collector. This trunk has two 4″ Y fittings that join the hose reel and the miter saw/Kreg Foreman. To prevent suction loss at the reel, I installed a 4″ to 2-1/2″ blast gate. The vertical line will run around the shop to the table saw.
PVC Line to the Table Saw
To make the run to the table saw as efficient and good looking as possible I opted to use 4″ PVC which I painted black first.
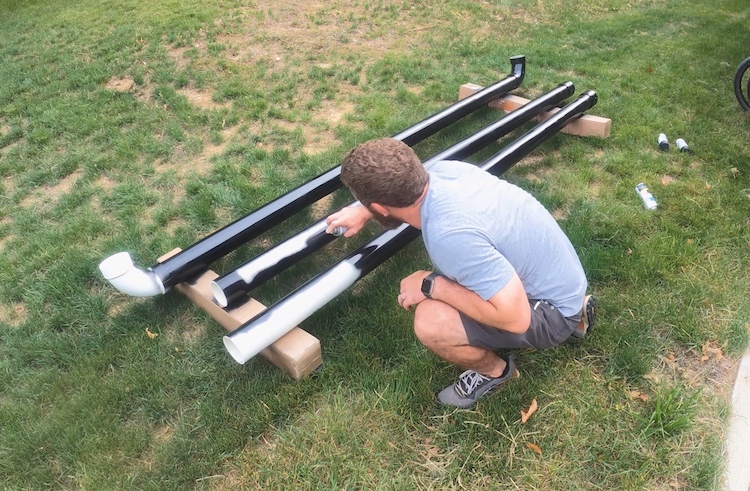
The PVC gets hung using pipe strap and screwed into the wall studs.
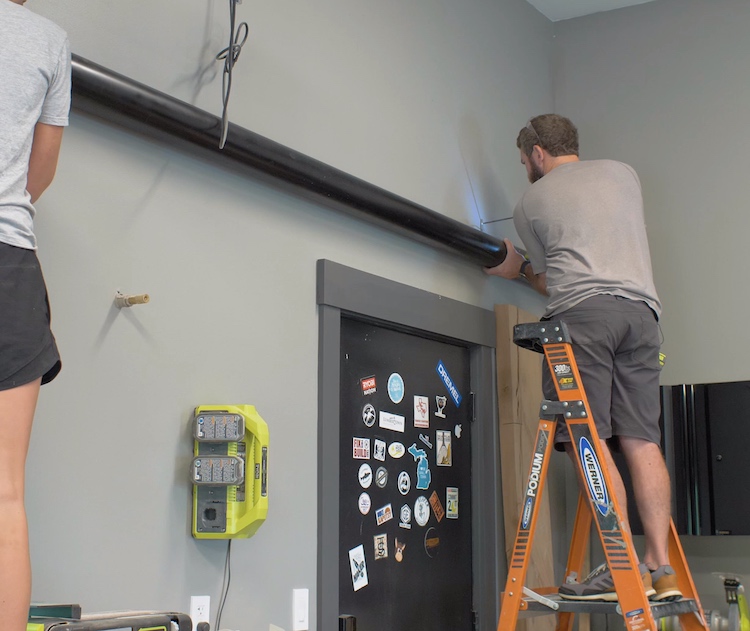
Long elbows were used to make the turns and a 4″ blast gate by the table saw will allow me to close off the line when not in use.

Final Connections
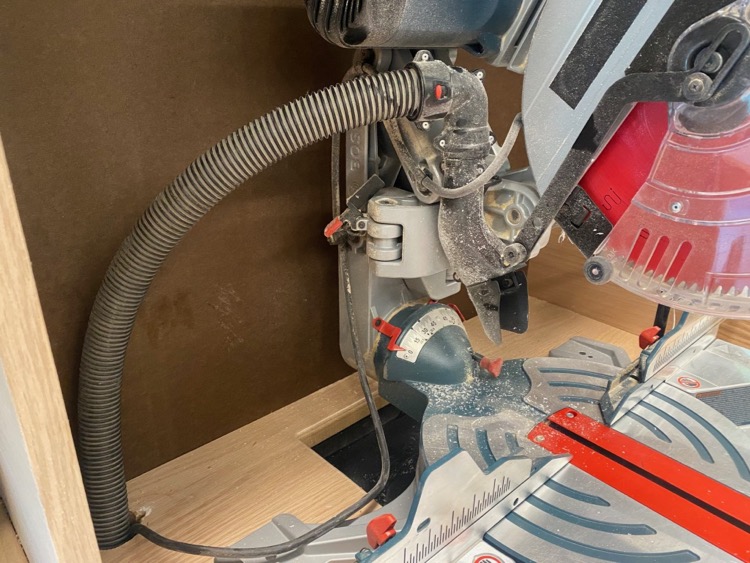
For my miter saw I opted for two layers of dust collection. One is a connected shop vac connected to the saw that will come on and off with the saw. The other is a funnel behind the saw that can be activated with the dust collector (blast gate beneath). This is good when making a lot of cuts to help pull the dust away that the shop vac misses.
The hose reel will be used for bench top tools with the appropriate adapter as well as the vacuum attachment for cleaning up the floor.
The table saw is pumped with PVC and the blast gate can be opened when in use to pull dust down through the cabinet of the saw.
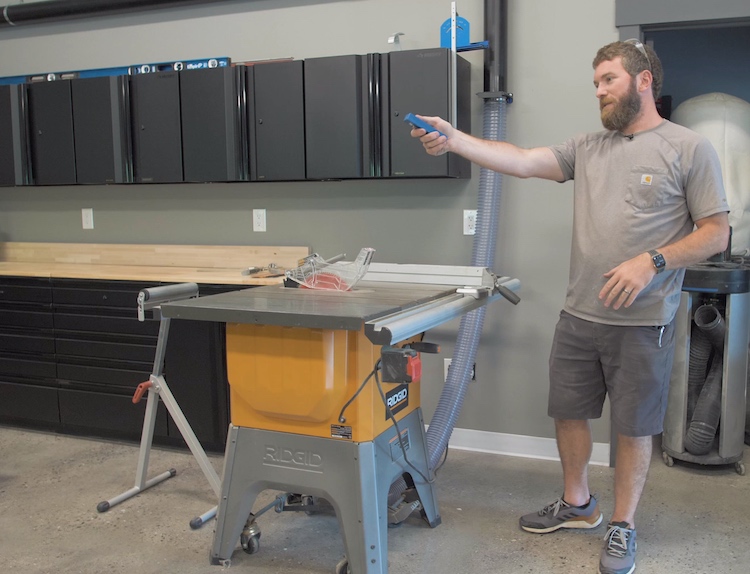
Luckily this dust collector comes with a remote so that I can activate it from anywhere in the shop. I leave this remote, attached with Velcro to a cabinet, by my table saw for easy access.
Overall, I am loving the new setup and it is one big step in the right direction of creating a healthier, cleaner shop.