

Tool Storage Wall Cabinet
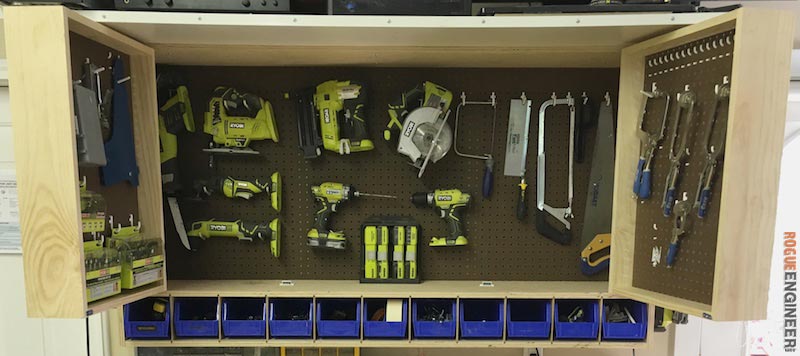
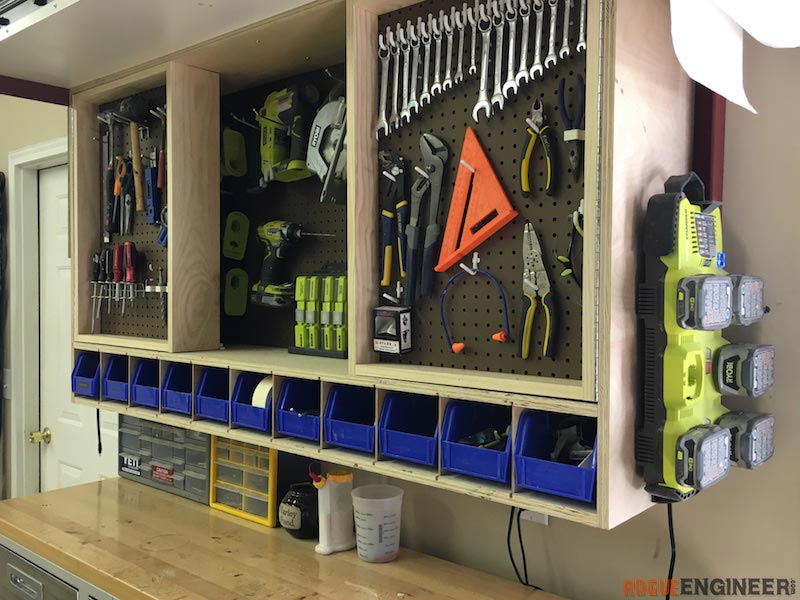
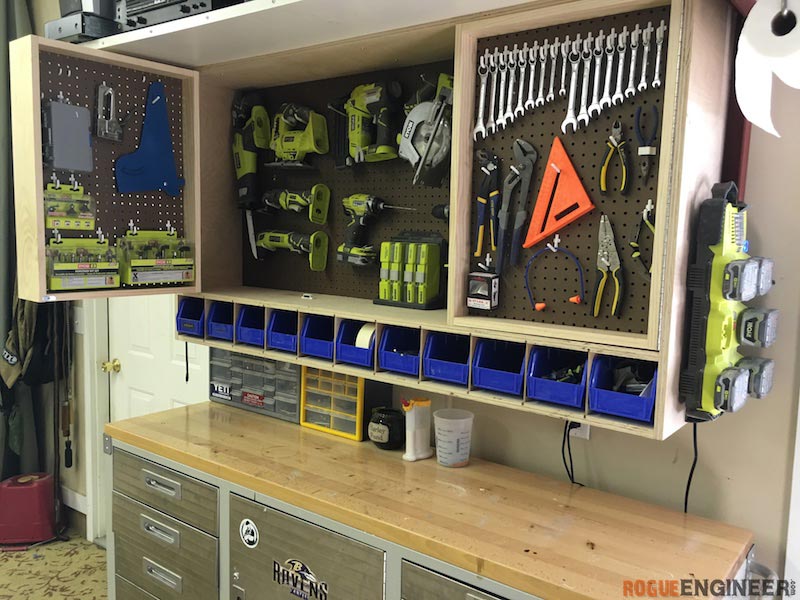
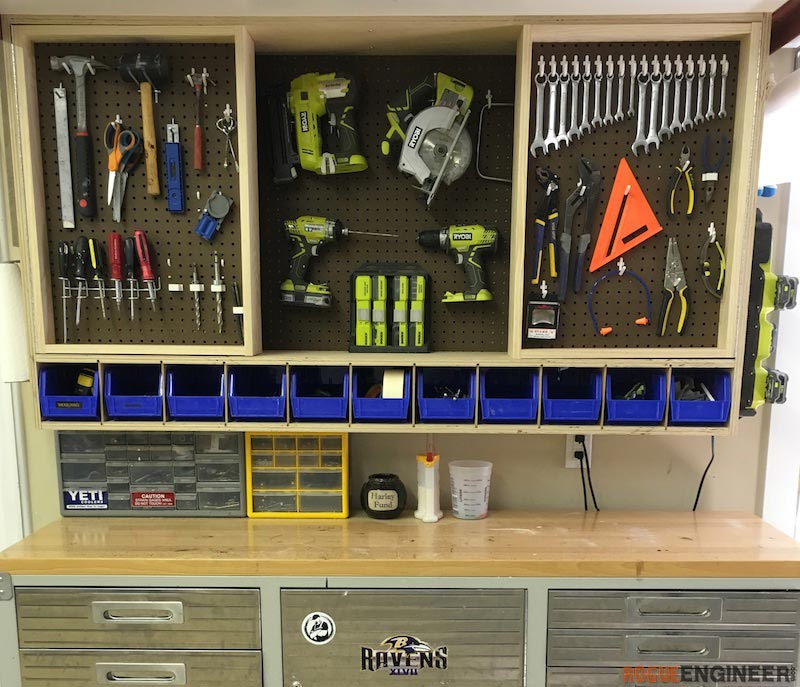
Tool storage is a necessity in any shop. While storage is great, accessible storage is even better. That’s why I designed this tool storage cabinet. I used pegboard to display the tools and allow for great accessibility. With doors, not only do you more than double your hanging space but you do so with a small footprint. Make sure to head on over to Ryobi Nation where I’ve posted the full plans exclusively for Ryobi Nation members.
For sneak peeks of our upcoming projects be sure to follow me on Facebook and Instagram. Also, follow me on Pinterest to get tons of projects plans from all around the web!
Required Tools
Materials
Disclosure: The links provided in the “materials” and “required tools” sections are affiliate links. If you would like to support our site and help keep our content free come find out more about how we can make money with no extra cost to you.
Dimensions
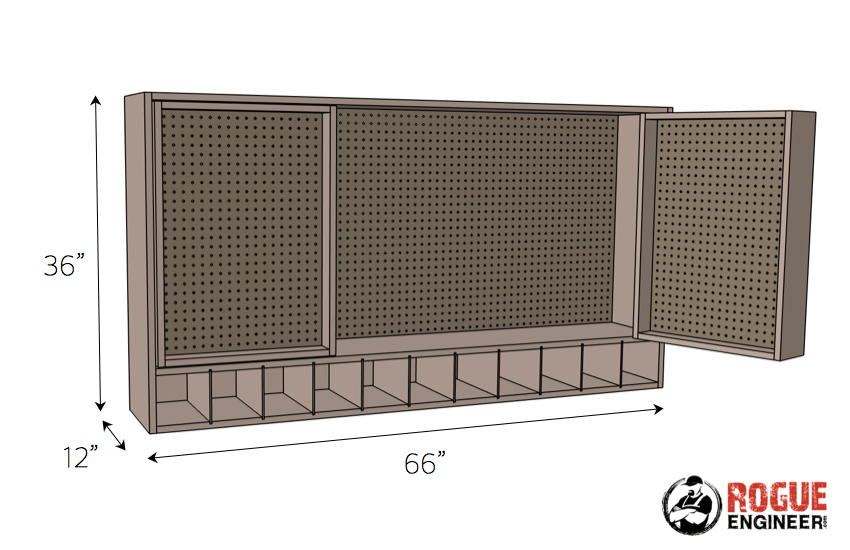
These plans were created exclusively for Ryobi Nation so make sure you hop on over there to get the full plans!
>> Full Plans on Ryobi Nation <<
Questions? Comments?
As always, if you have any questions don’t hesitate to comment below and especially don’t forget to post pictures of your finished products in the comments! ENJOY!
Great stuff. Want to tackle it this weekend but I don’t see the plans at RyobiNation or here. What am I missing?
Sorry about the delay on this! The plans are now up https://www.ryobitools.com/nation/projects/6462
Yes! So it’s our turn to move into a new house and this will be great for my new shop area 😉 So many things to build now and so little time!
haha yep! That’s what happens when you move. You start the building process all over.
I don’t see the plans at Ryobi Nation!
Here’s a link to the plans https://www.ryobitools.com/nation/projects/6462
Love everything about it (except that Ravens sticker…). 🙂 Thanks again for the plans – I could definitely benefit from building this for my work area.
haha! Well you are welcome for the plans. My workspace is a ton more organized now with this unit up.
What do you suggest for those who may not have a table saw to create the dados. I have a miter and trying to think of a creative way to reconstruct what you’ve done. Please help. Thank you. Love your projects btw!!!!
Thanks Carlos! What you could do is attach a trim piece to either side of the peg board to keep it in place instead of cutting the dados.
Jamison, can you elaborate on this? I’m good at following directions but not so good at veering off them.. Really want to make this!
Thanks!
Hi kmccb,
Dados are essentially grooves cut into the wood. Jamison is saying that, instead of using dados to hold the pegboard, use strips of wood to simulate a dado on surfaces where you need one.
For example: if the doors are 5″ wide, cut two strips of 1/4″ material with a width of 2 3/8″ and a length equal to the exposed length of the inner face of a board (i.e., between the inner edges). Attach the strips to the inner face with the strips’ outer edges flush with the outer edges of the board. Because 2 3/8″ plus 2 3/8″ equals 4 3/4″, you have now created a “dado” that is 1/4″ wide and 1/4″ deep across the face of the board.
Once you have done this for all four inner faces, you will have created a continuous groove that runs around the inside of the door frame (which will hold the pegboard). If you do this after the door frame has been built, just remember to add the strips to one side of the door at a time (front vs back), then position the pegboard against the installed strips, and finally install the strips on the other side of the pegboard to hold it in place.
Good luck!
Frank
Hi kmccb,Dados are essentially grooves cut into the wood. Jamison is saying that, instead of using dados to hold the pegboard, use strips of wood to simulate a dado on surfaces where you need one.For example: if the doors are 5″ wide, cut two strips of 1/4″ material with a width of 2 3/8″ and a length equal to the exposed length of the inner face of a board (i.e., between the inner edges). Attach the strips to the inner face with the strips’ outer edges flush with the outer edges of the board. Because 2 3/8″ plus 2 3/8″ equals 4 3/4″, you have now created a “dado” that is 1/4″ wide and 1/4″ deep across the face of the board.Once you have done this for all four inner faces, you will have created a continuous groove that runs around the inside of the door frame (which will hold the pegboard). If you do this after the door frame has been built, just remember to add the strips to one side of the door at a time (front vs back), then position the pegboard against the installed strips, and finally install the strips on the other side of the pegboard to hold it in place.Good luck!FrankPS – For the main pegboard across the back, the width of the strips will not be equal. The rearmost strip (towards the back) will be narrow – probably between 3/4″ and 1 1/4″. The strips in front of the pegboard will be wider – up to 1/2 the depth of the side panels (4 1/2″ to 5″). The wider strips should be sized so that they do not interfere with the operation of the doors.No matter what width you choose for the narrow rear strips, they can be made from thicker material than 1/4″ for several reasons: they will be hidden behind the pegboard, they will not interfere with door operations, and the thicker material will provide more support for the pegboard.
Carlos, did you end up doing this? I don’t have the tools to create the dados either but would love to make this!!
My solution. Use table saw, $100 @ Home Depot. Lower to depth of cut. I made multiple passes until groove was wide enough. No special blade. I would do all the boards at each pass, consistent and worked like a charm.
Thanks Carlos – this is a great idea. I’m going to try it as my first venture with a new table saw. One thing I was thinking of doing was doubling up the peg board on the doors so I could effectively use the holes on either side. Do you think this is necessary? My thinking was that if you use a hole on the front of the peg board, that hole is no longer available on the back of the pegboard. Also, do you have a link to the plastic pegs you have on the board?
great project! I’m going to try and tackle it in the next weeks or so. unrelated question. Where did you get the cabinet that is pictured below, or is that also something you built? thanks!
Awesome man. Can’t wait to see how it turns out. And the tool bench came from Sams Club.
Why does the material list call for 3/4″ thick boards and then also 1″ boards? Standard boards all all 3/4″ thick correct? Can I use all standard boards or is there a reason for stpecifying 3/4″ and 1″?
I bought excellent handbook from woodprix website. Just google woodprix and start your journey to the better life
nice
Love this project, and expanded it. Added table and cabinet of my own design. Everyone asks me to build one for them. Plans where easy and managered to build without all the tools needed. Devise solutions, and get inventive.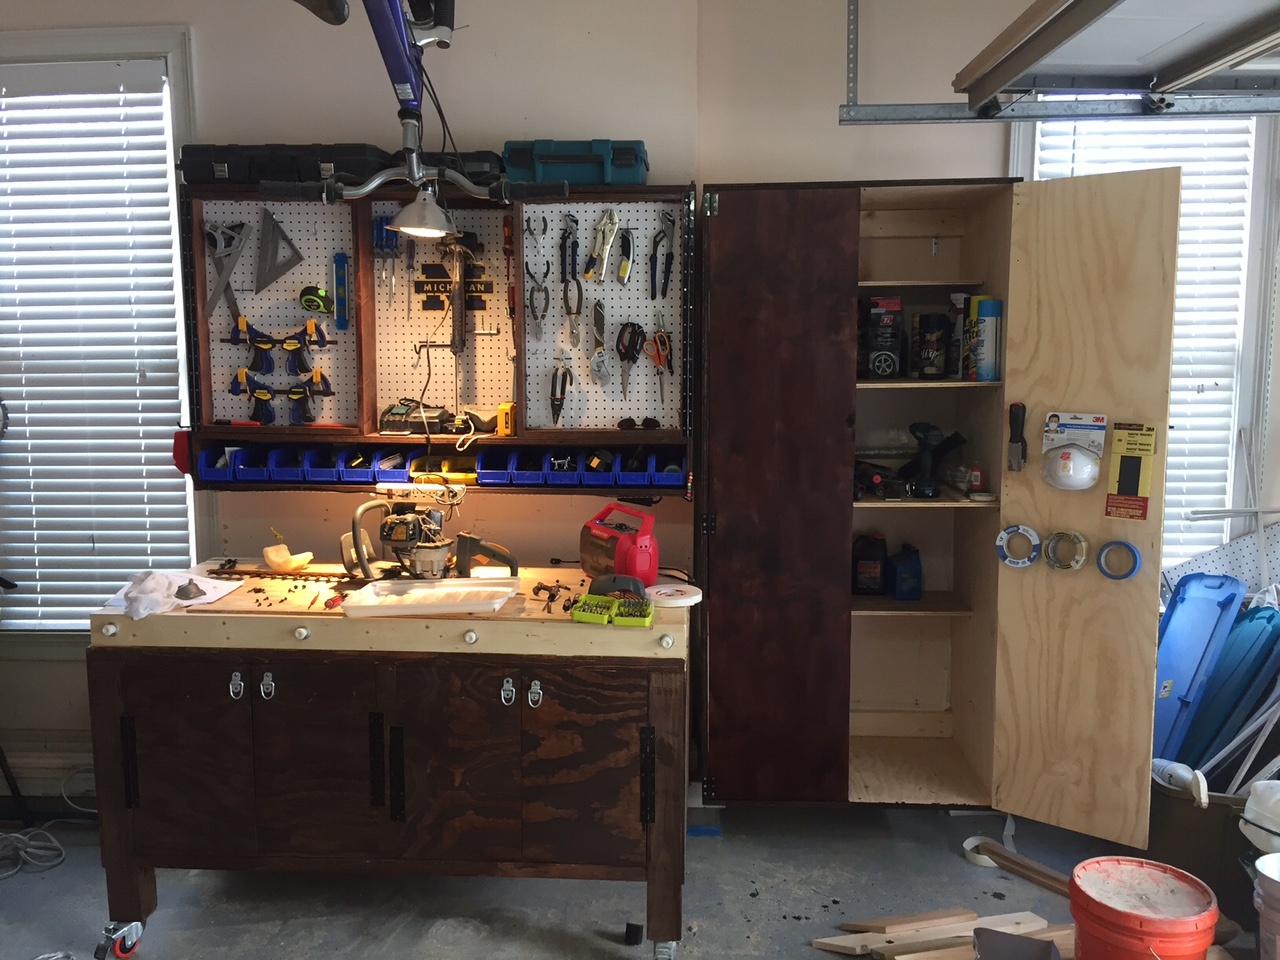
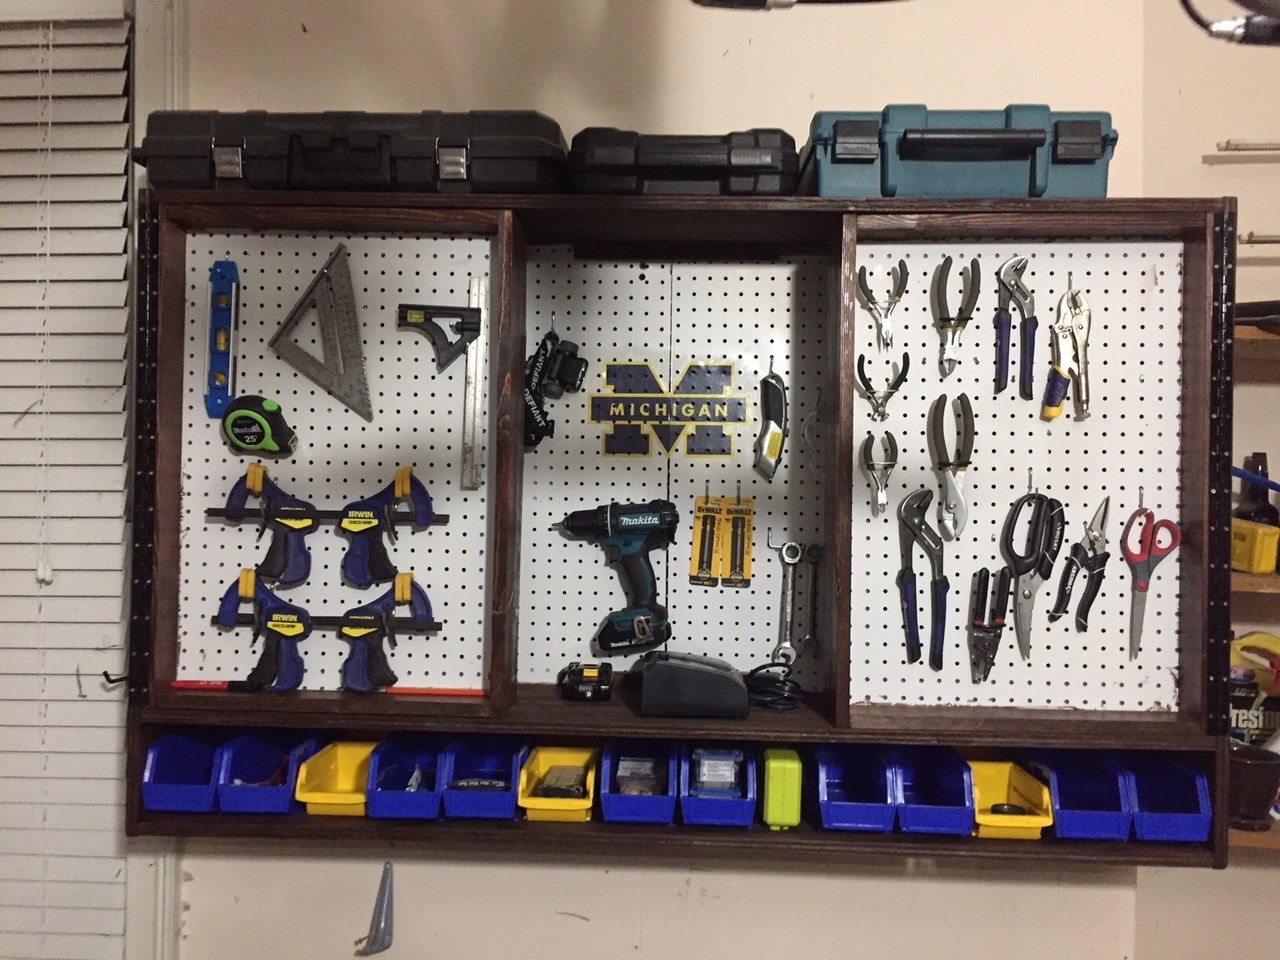
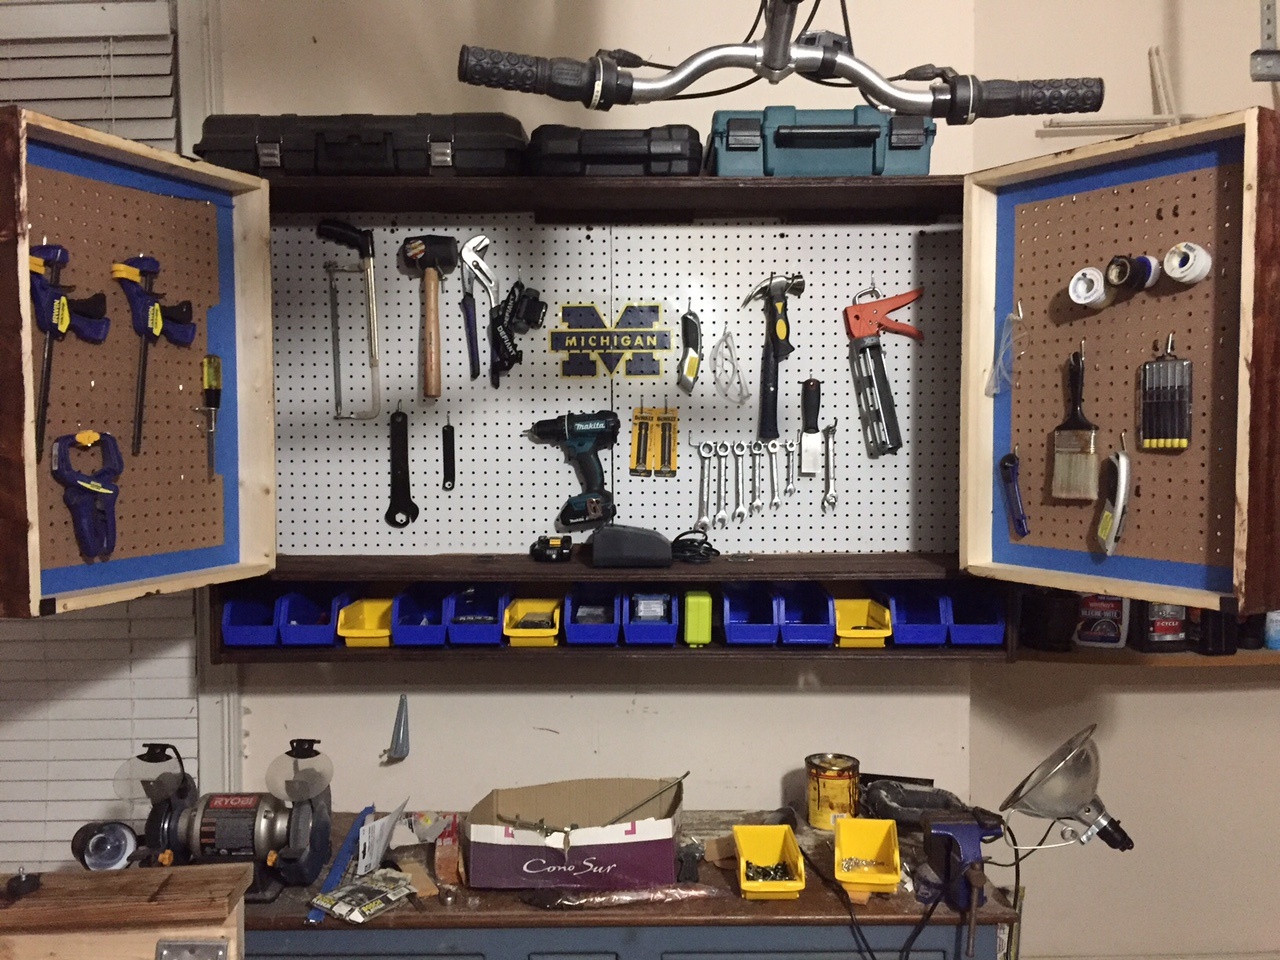
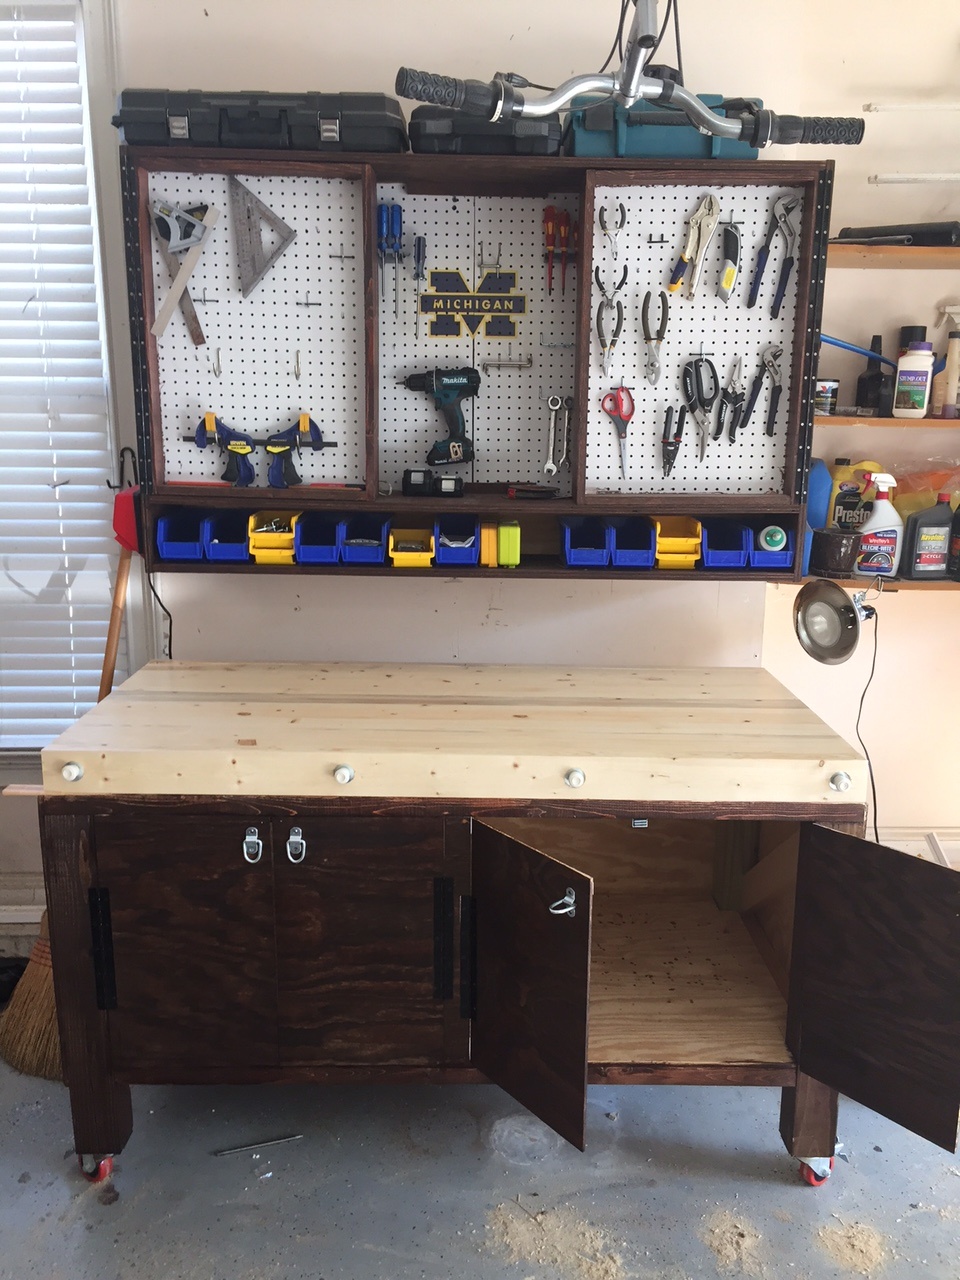
Even added the logo of choice inside. Table top is made of 2x4s that can removed if one is damaged.
The center back peg board is split, I had surplus that where not big enough to have single piece back.
Seems the plans are no longer available at ryobi nation?? Link is broken. Was working yesterday
Are the plans available in Metric?
Thanks Jamison – this is a great idea. I’m going to try it as my first venture with a new table saw. One thing I was thinking of doing was doubling up the peg board on the doors so I could effectively use the holes on either side. Do you think this is necessary? My thinking was that if you use a hole on the front of the peg board, that hole is no longer available on the back of the pegboard. Also, do you have a link to the plastic pegs you have on the board?
Love this project, and expanded it. Added table and cabinet of my own design. Everyone asks me to build one for them. Plans where easy and managered to build without all the tools needed. Devise solutions, and get inventive. https://uploads.disquscdn.c… https://uploads.disquscdn.c… https://uploads.disquscdn.c… https://uploads.disquscdn.c… Even added the logo of choice inside. Table top is made of 2x4s that can removed if one is damaged.The center back peg board is split, I had surplus that where not big enough to have single piece back.Disregard the uneven hinges on table, it was 2am and just wanted to finish it, fixed them later.I also put my hinges on the outside cabinet, it was just easier when doing project solo.
Do you happen to remember where you got this plastic hooks that you’re using on the pegboard?
You can get them on Amazon or at Home Depot
Hello – Thanks for these detailed plans – I’m looking forward to making this my next quarantine project! Question – I’m a novice with pocket holes (as in I’ve never done them). What depth/distance do use for these? Any suggestions on which jig to buy? Also, any tips on how to stabilize the pieces while connecting? Thanks again for these professional looking plans!
Kregg makes a few jigs you can get. They pretty much all do the same thing, and you set them up based on the thickness of the planks you use. The instructions are pretty good, so not hard to figure it out. Then, when you screw things together, the screws will pull everything snug and square. Just lay things on a flat-ish surface and you’ll be good.
Hi Jamison, it seems like these plans have appeared and disappeared on the Ryobi Nation site a few times over the years…I was able to access them before (and bought all the materials!) but now get a 404 error message. Can you provide an updated link, or email a PDF? Thank you!
Same
The link for the plans is dead!!!
If at all possible can you please provide them another way?!
The link to the plans does not work. Does anyone have them? Thank you.