
Ultimate Home Golf Simulator
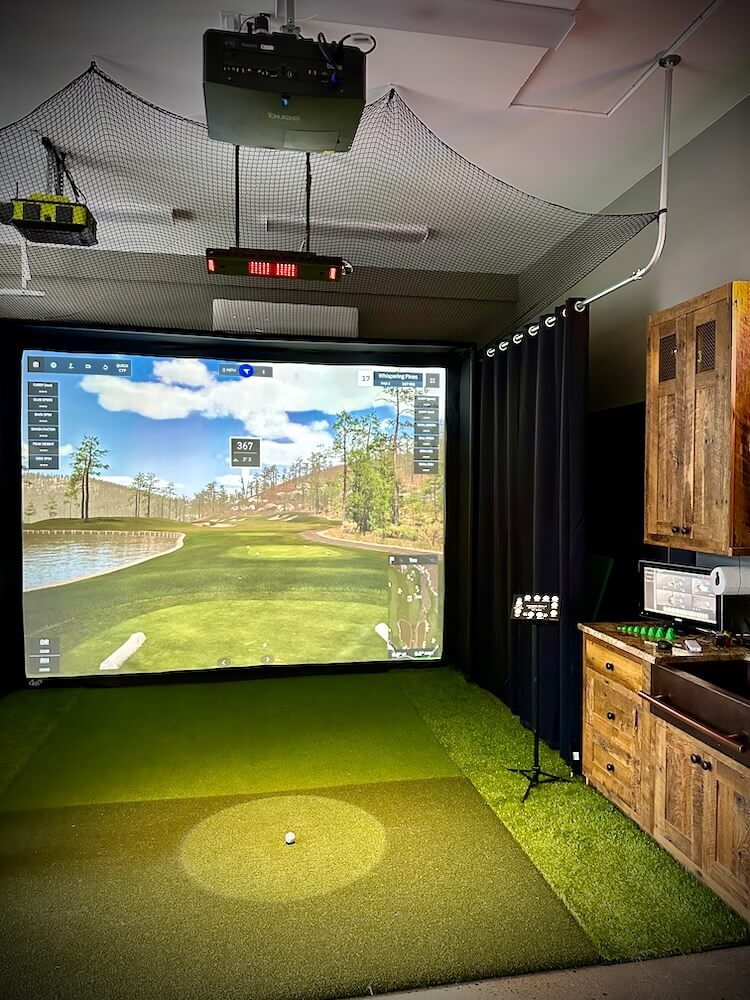
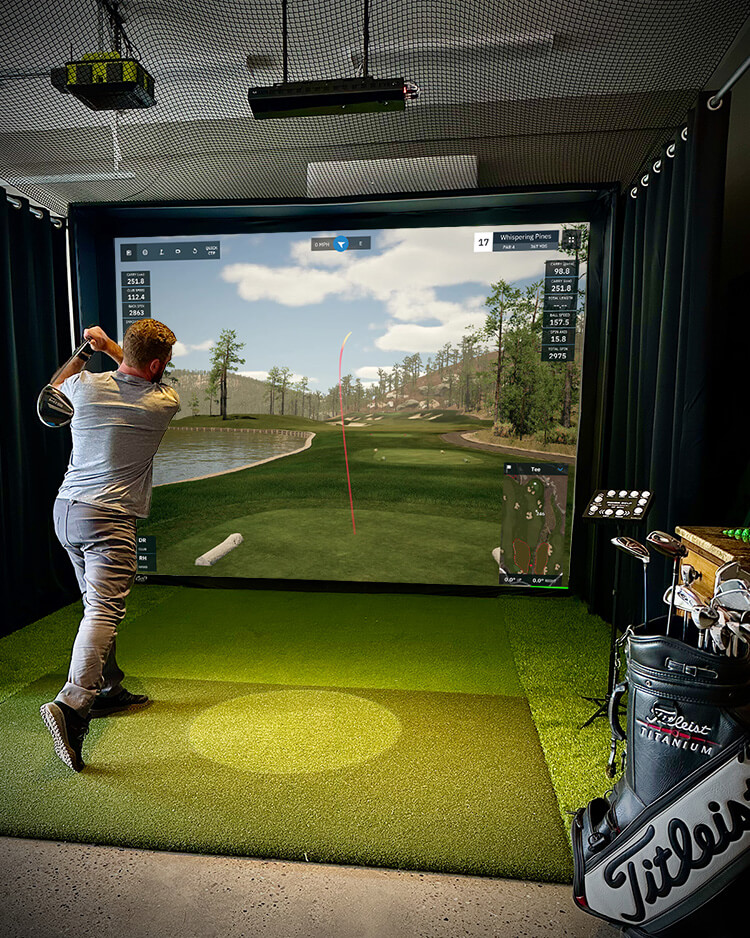
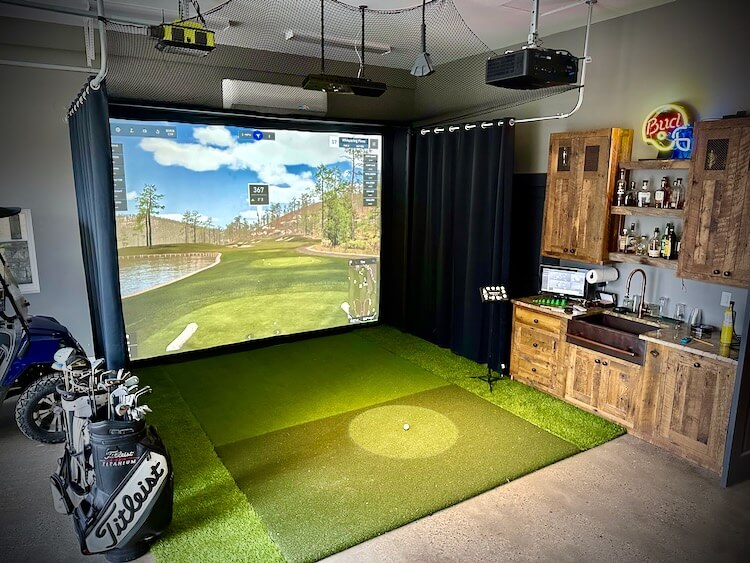
After seeing one for the first time many years ago, one of my dreams was to have a golf simulator in my home one day. That being said, a few years back I built a budget friendly golf simulator in my barn/workshop. While it was a lot of fun, the foam balls and cheap sensor limitations were quite unrealistic and ultimately fell short of what I had dreamed of. I finally decided to remove that simulator and give it a massive upgrade with the BenQ LK936ST 4K short throw projector, Custom Carl’s Place Enclosure, and Uneekor Eye XO Launch Monitor! This truly is a giant leap from what I had in past and the perfect place to enjoy winter nights with the guys, date nights with my wife, or improve my game in the off season. In this tutorial I’ll go over all the details of how it came together.
Full Project Video
How to Build a Home Golf Simulator
Research, Research, Research
Before I even started I did a ton of research. With an investment this big, I wanted to make sure I got it right. Luckily there are a ton of YouTube videos that go over the different components required for a golf simulator in depth as well as reviews and comparisons. One of my favorite channels was Golf Simulator Videos where Jay has a ton of golf sim content and is very helpful. There are so many options for each component required for your simulator and, based on your space and budget, deciding what and where to spend your money on can be a daunting task.
Enclosure
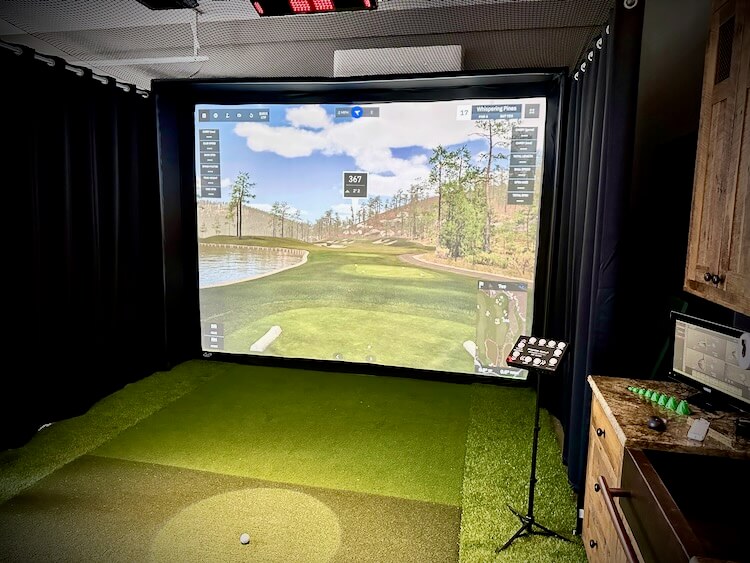
My space was a little unusual. It’s actually the side of a car bay in my barn/workshop. That being said, I didn’t want to permanently close that car bay off with a large enclosure. After looking into ways to build my own I ultimately landed at Carl’s Place where they sell everything required from a golf simulator. They even have a “Build Your Own Golf Simulator” design tool. I was able to customize the enclosure size and aspect ratio to fit my area perfectly (down to the inch!). Not only does it show you the viewable area but it also defines the total enclosure width, height and depth.

In an ideal world, 16:9 is the best aspect ratio to give you that immersive feeling. I have an area that is 12 feet wide which would leave me with a height of less than 7 feet and I didn’t like that. Another option is the 16:10 option, this is better but still didn’t give me the height I wanted. Which brings me to the option I went with, the 4:3 aspect ratio. With a 12 foot wide enclosure, the height is now 111″ (over 9ft) which felt like it would be great for those high loft shots.
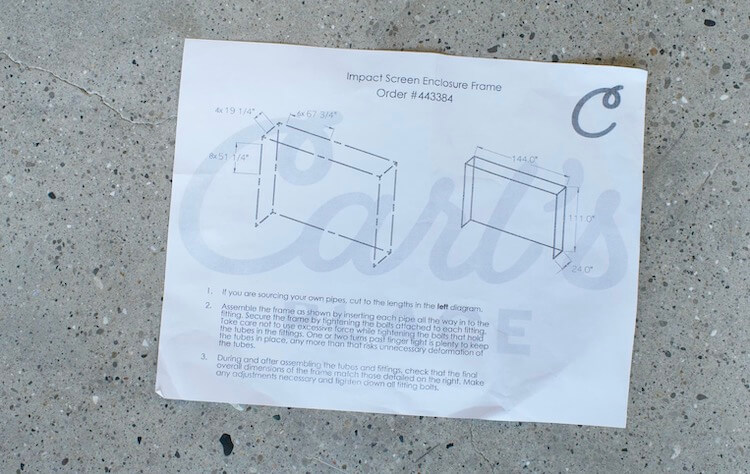
Now the depth of the enclosure was a concern to me, I really wanted to minimize the depth to allow use of that car bay if needed. Therefore, I went with a 24 inch deep enclosure, which meant I was going to need some curtains on the sides and netting above to catch any stray balls.
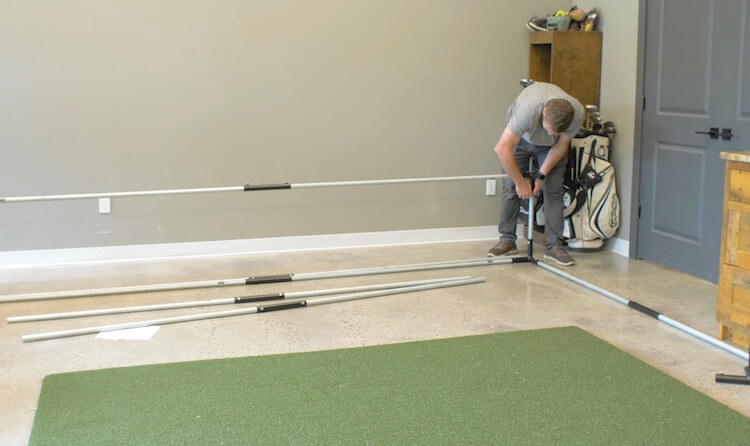
Assembly of the unit is very straightforward with a diagram noting pipe lengths and assembly instructions. The screen and enclosure fabric are installed with the included bungees and foam is installed with velcro. This process took an hour or so.
On my enclosure package, I opted to purchase and cut my own pipes which saved me some money but they do offer pre-cut pipes for a fee. I also added foam inserts to prevent ricochet off those pipes.
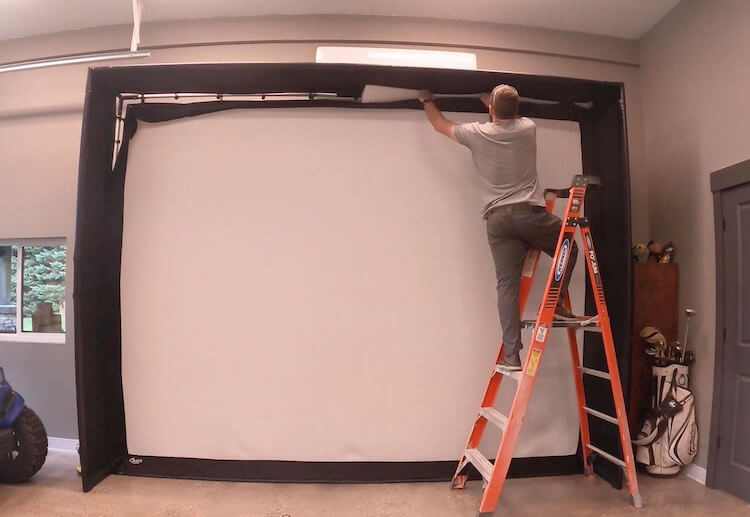
For the viewing area I went with the premium screen which is a 3 layer impact screen that has a smooth finish for a high quality image and reduces noise from the impact of the ball.
Another thing I did to decrease the bounce back of the golf ball was to mount a couple of heavy duty moving blankets. As it turns out, this was a bad idea and resulted in a lot of clean up.
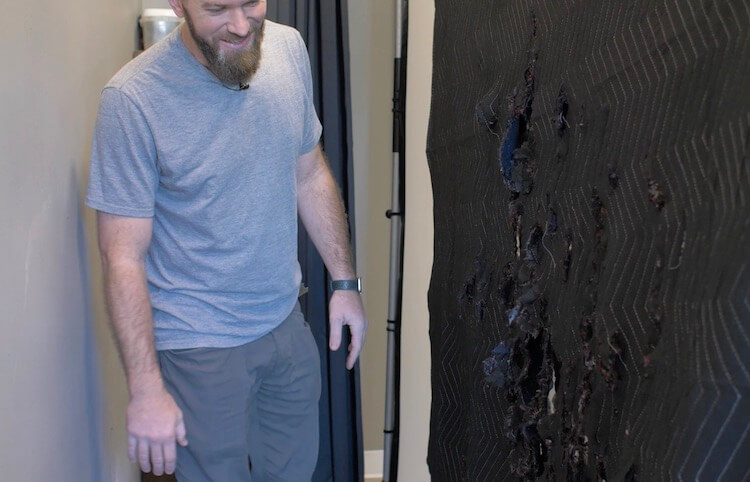
After the clean up I tried again with a memory foam mattress topper. I found one that was more dense than most and it worked like a charm. I simply used the holes in the topper to zip tie it to a board and suspended it about 6 inches behind the screen.

Projector
When it comes to selecting a projector for your golf simulator there are a few key features that should be high on the list. A short throw projector will require a shorter distance to be mounted from the screen to get a large image. This will prevent shadows from the golfer when addressing the ball. Another feature that should be strongly taken into consideration is the brightness. This is measured in lumens and I think the ideal target should be 5000 lumens or above. Regardless of ambient daylight, you will require some light to hit the ball and a higher lumen count will make sure that doesn’t effect the image quality.
I happen to think I found the best projector for the job, the BenQ LK936ST 4K short throw laser projector, which is designed for this specific application with 5100 lumens and has a ton of other useful features.
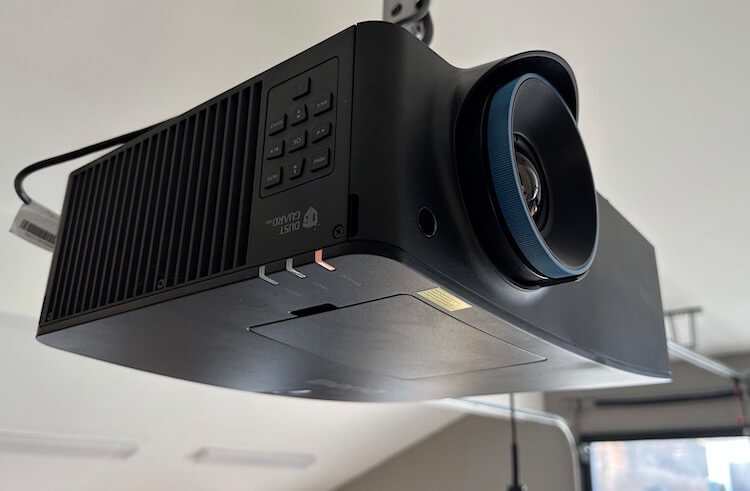
The 4K resolution allows the software to perform at its peak giving you the most realistic image. But even more so when you enable “Golf Mode” which corrects purple fringing using the blue and green colors from popular golf software and allows golfers to view the game with more natural reproductions of blue skies and green grass.
Since this is a laser projector we will get about 20,000 hours of life whereas with a standard lamp projector, the lamps will need replacing about every 1500-2000hrs. Plus lamp projectors take time to warm up versus the instant on capability of a laser projector.

The installation of this projector is a breeze. After using BenQ’s calculator to determine a position for my projector, I was able to fine tune it with the lens shift and corner fit adjustments.
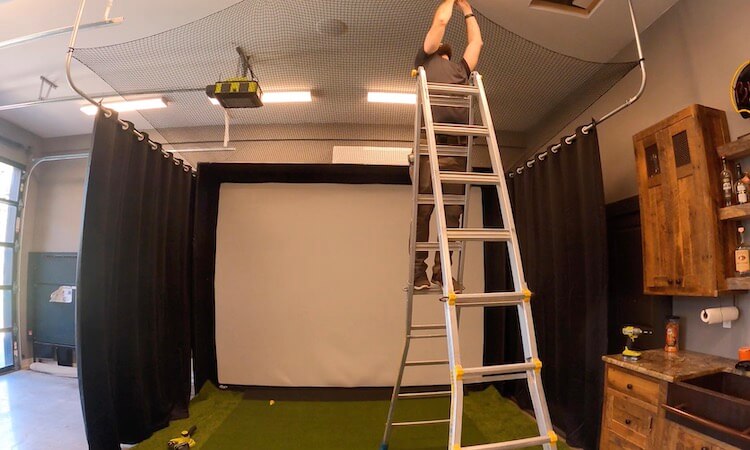
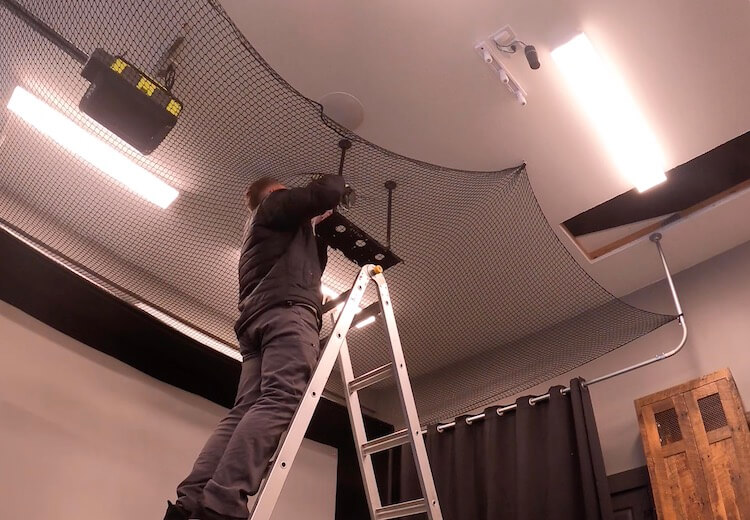
Curtains and Netting
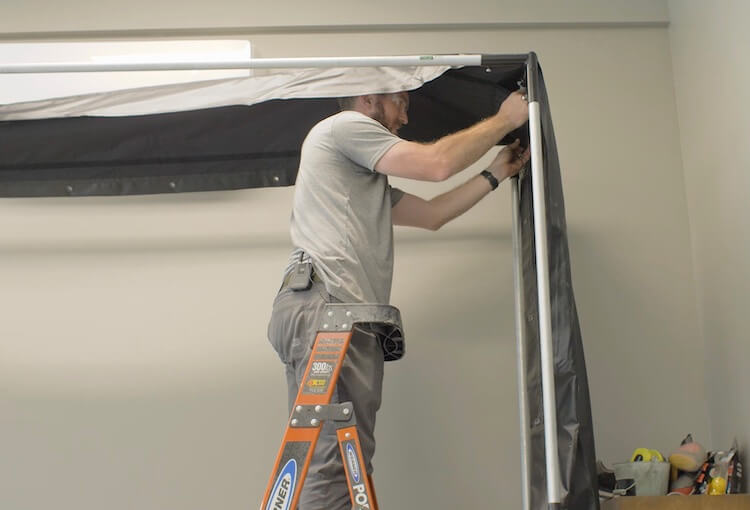
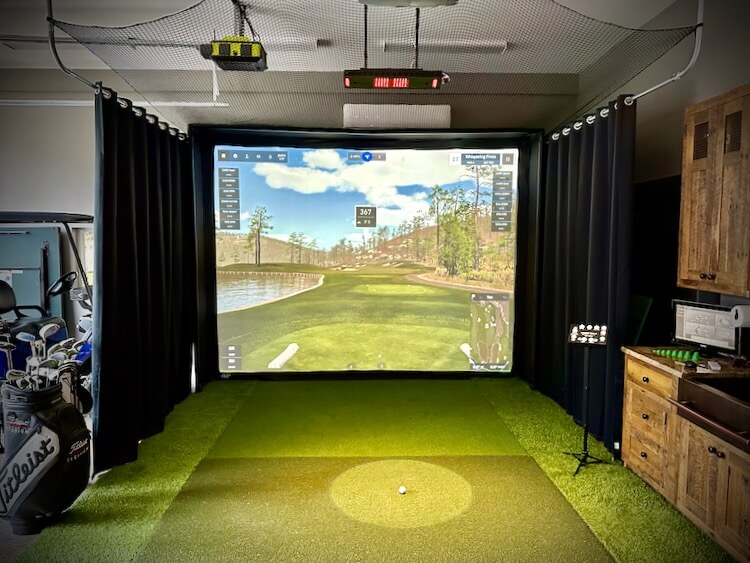
Since the enclosure was less than the ideal depth, I needed to extend the sides and top. I did so by installing 1 inch EMT pipes that extended from the back wall and tied into the ceiling. Those pipes carry the blackout room divider curtains that will not only collect any stray balls but act as a sunlight barrier when playing in the late afternoon.
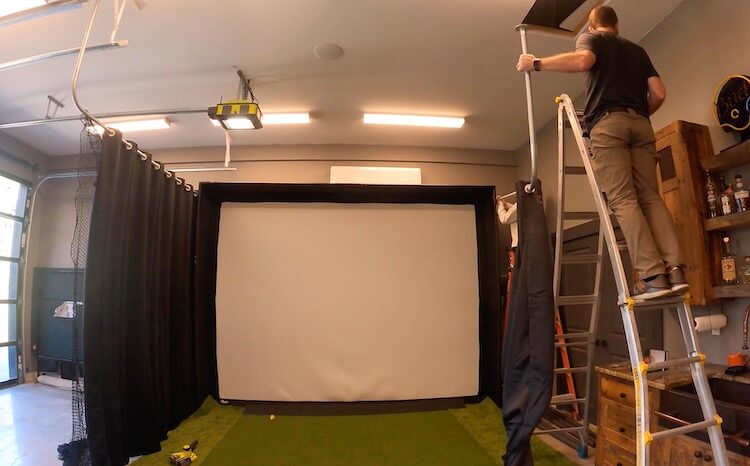
To protect the ceiling I opted to install netting which gets connected to the enclosure, curtain rods and ceiling (using hooks).
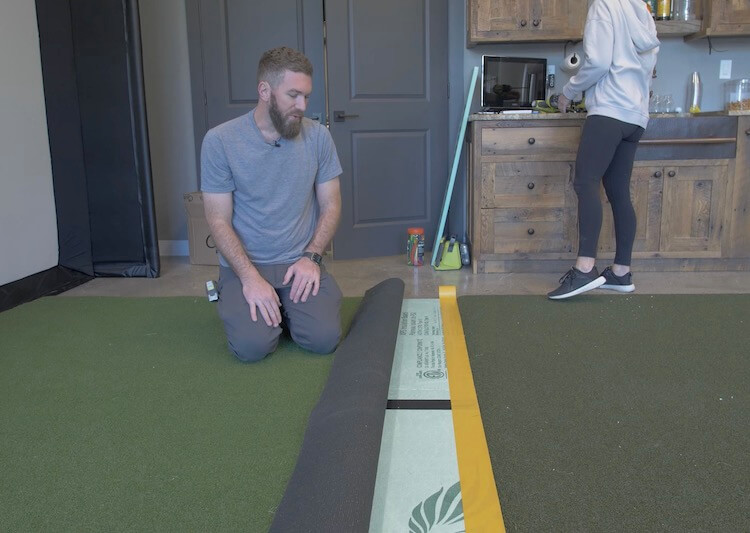
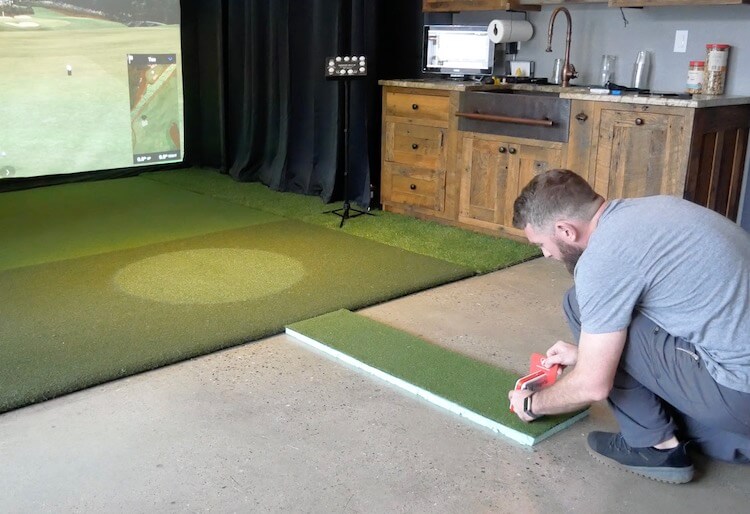
Hitting Mat and Putting Surface
The surface in front of the hitting mat needed to be level to putt onto. For this I ordered some putting green turf and laid that over 1 inch thick rigid foam insulation with double faced tape. It feels great to walk and putt on but the lightweight foam makes it easy to move if I ever needed to.

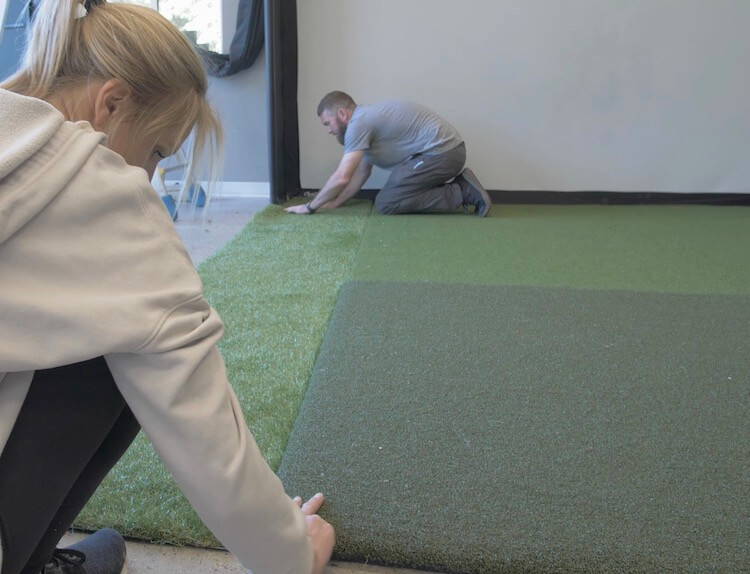
The hitting mat I went with is the 5′ x 8′ Country Club Elite Mat. This is an amazingly realistic and durable hitting mat. If you wanted to save som cost here you could make a cutout for a small section to hit off however I liked the idea of feeling like I’m standing on the course.
With the hitting mat and putting surface being only 8 feet wide and my screen being 12 feet, I needed to fill in the gaps on the sides. For this I though some thicker turf, to simulate the rough, would be a good accent and slow down any balls rolling
Launch Monitor
The launch monitor is the brains of the entire golf simulator. This is what tracks the ball trajectory and provides club data. This is where my budget golf simulator fell short.
For this simulator a lot of my research was pointing to the FlightScope Mevo+. It’s an accurate sensor for a decent price but after using it for a few weeks I decided it wasn’t for me. Here is why. The Mevo+ needs to sit on the ground 7-8ft behind the hitting area. This took up some valuable floor space and needed to be set up before every round as well as realigned when someone inevitably bumped it. It also runs on an internal battery which wont last a full round and had to be supplemented with an external battery pack or power cord. Another issue I had was that it connected to the computer via WiFi and that signal was pretty weak causing the unit to have to constantly be reconnected. Lastly, since this is a radar based system it tracks the ball flight but no club data. Furthermore, I was also getting radar interference from the mini split if that was on during putting causing the sensor to hit phantom long putts.
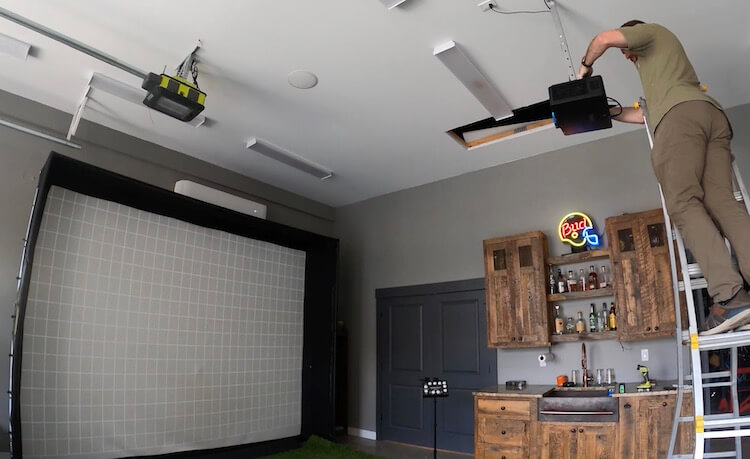
So, the launch monitor that I went with is the Uneekor Eye XO. This is a big investment for any simulator but the accuracy, reliability and club data that it provides is truly unmatched. The unit is mounted up and out of the way, 10 feet above and 3.5 feet in front of the tee. It also is hardwired to the computer so no connectivity issues. To drop it from the ceiling I used 1/2″ black steel pipe and flanges.
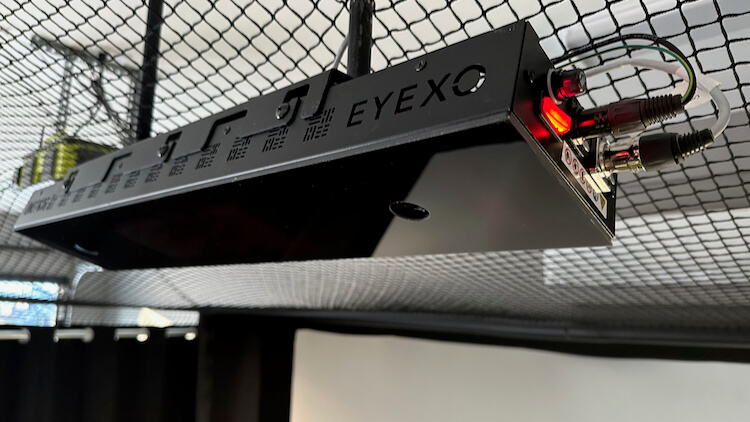
One of the biggest things to me though is the club data that I get from this sensor. It uses dual high speed infrared camera technology to capture a full range of precision data with the ball of your choice. With the included stickers added to the club face, it provides the swing speed, club path, face angle and impact location which has helped tremendously with analyzing my swing and what needs to be fixed. Plus the high speed camera provides a slo-mo replay of the impact. (So me and my hack buddies really have no excuses after a bad shot 😂)
Gaming Computer and Software
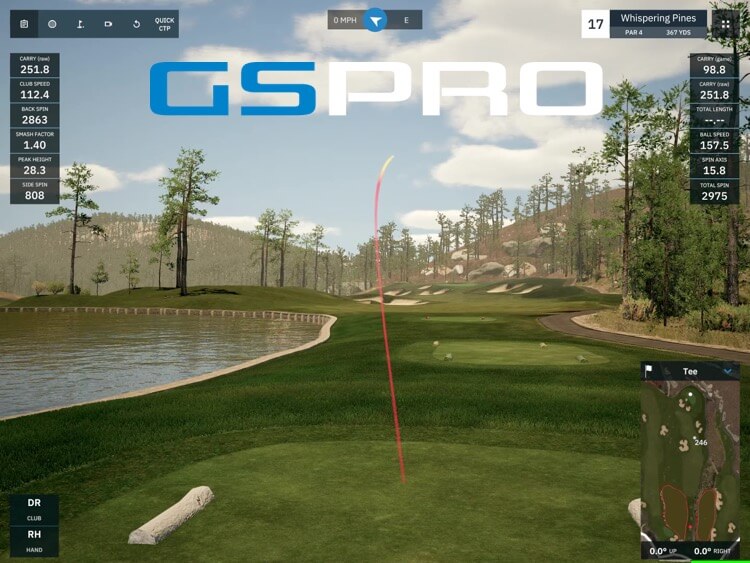
The computer that you need will depend on the software that you are running. Some software such as E6 only requires a Nvidia 1070 Graphics Card or equivalent to run in 1080 which you may have a PC or laptop that already has this in it. Since we have a 4K projector I wanted to go with the highest resolution software out there to get the best performance. After doing a ton of research I ultimately I landed on GSPro. I loved the realistic 4K graphics and ball physics but what really sold me was the company. The fact that they are continually rolling out updates and improving the game was something I wanted to see.
For a great 4k experience they recommend the RTX 3080 GPU and 16GB memory. To meet and exceed those requirements I picked up this gaming computer from Newegg with a 3080ti GPU in it. Unfortunately it looks like they are sold out at the time I’m writing this so here are some other 3080ti options. I will say that this computer has worked flawlessly and my son is pumped because now he can use it for gaming (when I’m not playing golf 😉)

Controls
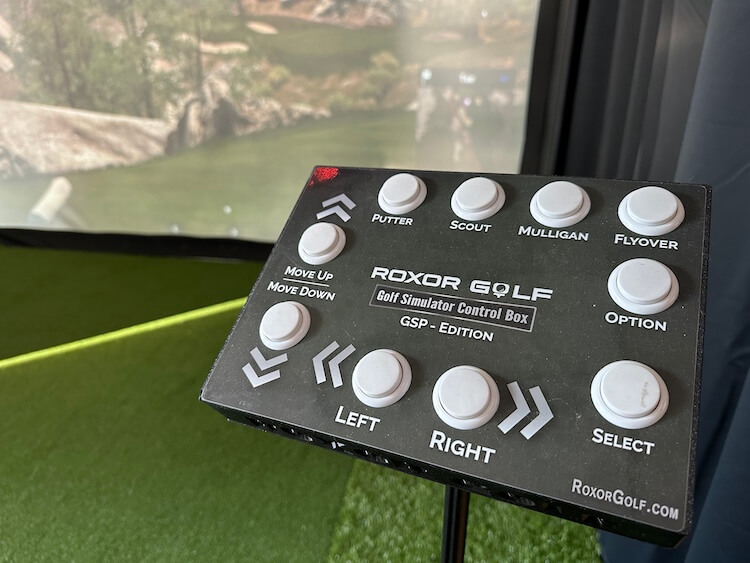
You can definitely use the mouse and keyboard when making adjustments to the game. But after seeing this control box from Roxor Golf, I had to have one. This controller, once the game is launched, will make it easy for others to control the game with the intuitive buttons.
Other Uses
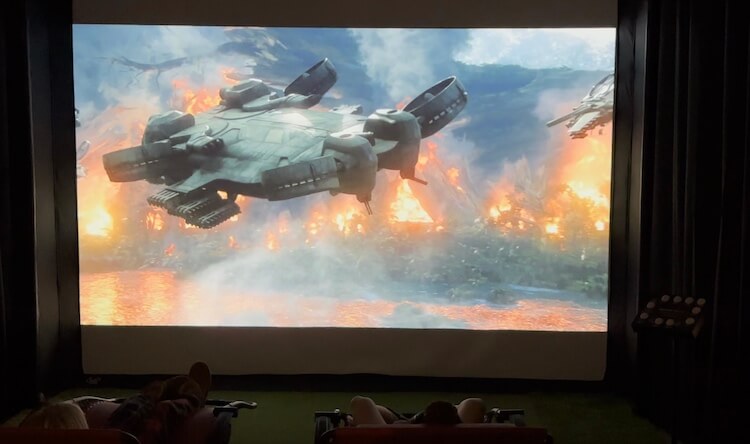
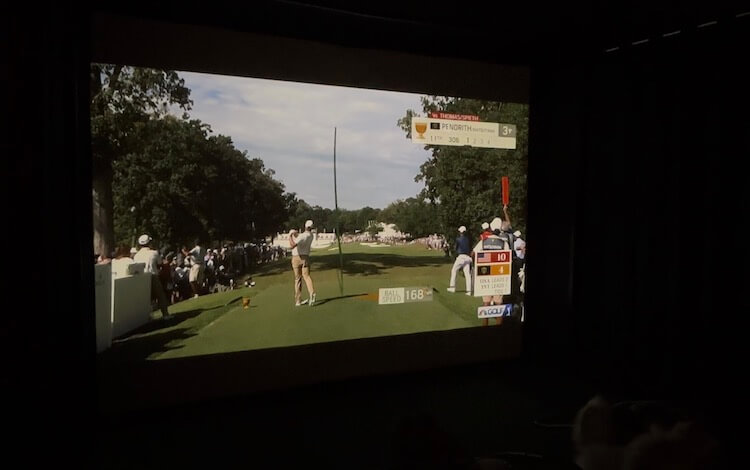
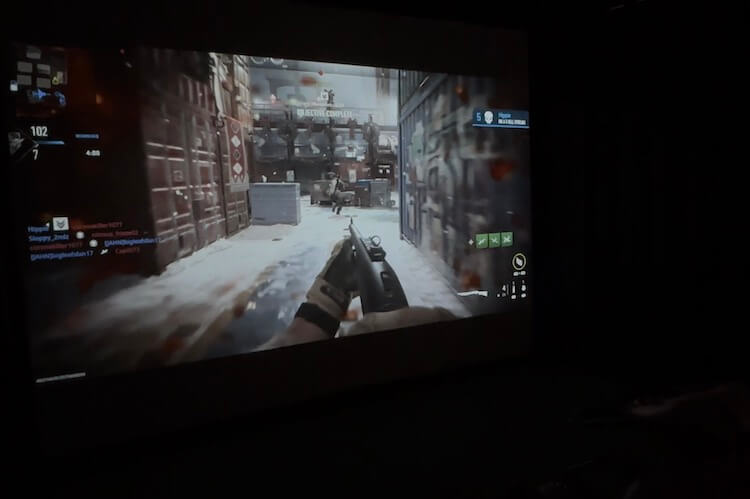
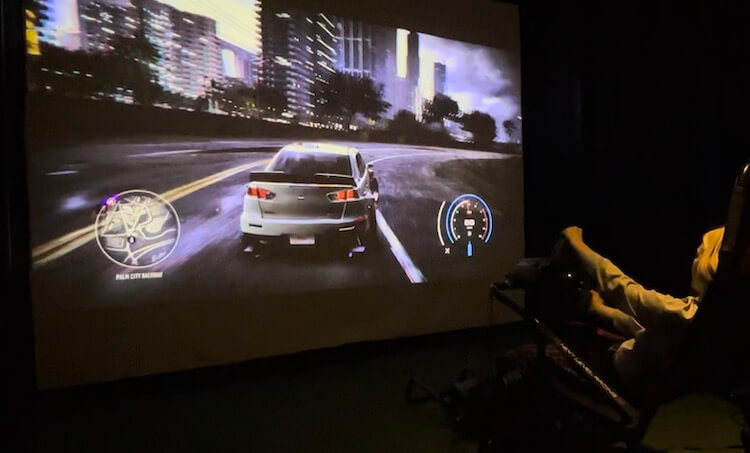
Golf simulators require a lot of space. The good thing is that they don’t have to be used for only golf. We are able to digitally shrink our projector area and cast a 16:9 viewing area for things like TV or movie viewing and even gaming! To make this happen we ran the HDMI from the computer to an AV receiver before the connection to the projector. Then, we connect speakers and through another HDMI input we connected an Apple TV.
Movies through Apple TV:
Live TV from Apple TV:
Gaming on the PC:
Driving simulator on the PC:
I could not be happier with how this turned out! It is extremely accurate and already gotten a ton of use. Our golf season up here in Michigan is pretty short so being able to have golf nights in the winter are a blast. And hopefully I can work on my swing as well.
One thing I wanted to mention is that this setup in a huge investment. If you want a home golf simulator but don’t have the budget for it all at once, you can easily pick one component at a time to upgrade the course of many years.
If you do choose to build your own golf simulator, I’d love to see how it turned out so be sure to post a picture in the comments!