
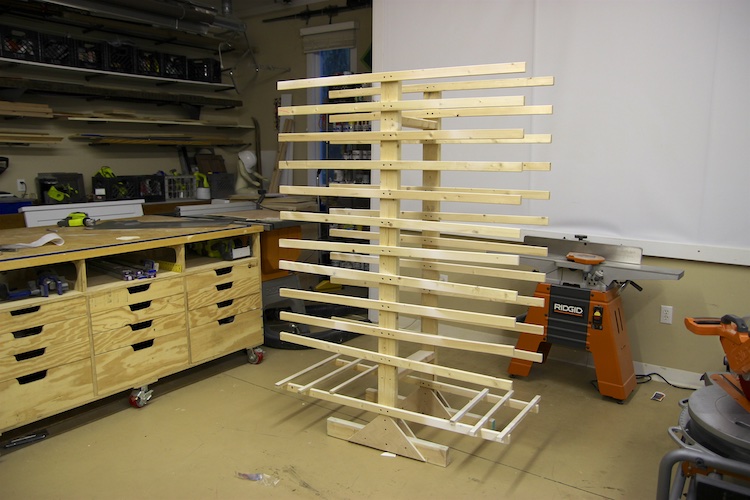
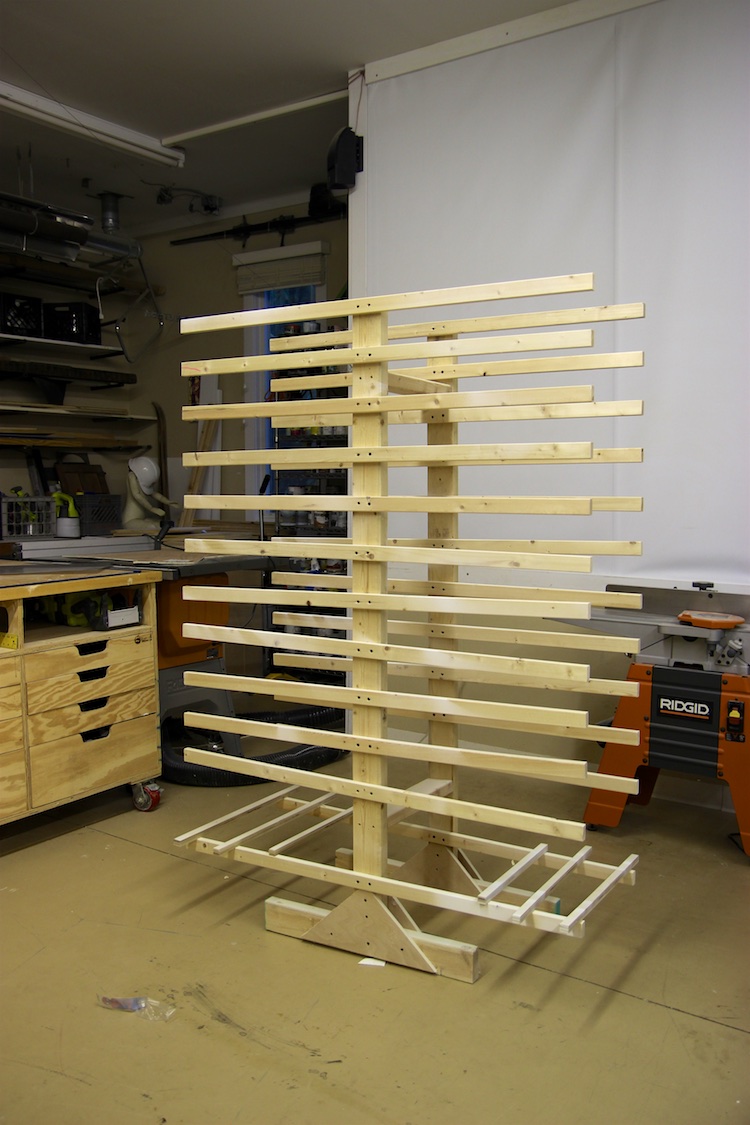
Cabinet Door Drying Rack
Recently we took on a full kitchen remodel in our first flip house and one of the biggest tasks was going to be painting the cabinet doors and drawer fronts. We knew trying to lay all these doors out was going to be a challenge in itself so we decided to build an inexpensive drying rack that would accommodate all of our cabinet doors and drawer fronts. At first I was looking at dowels for the arms of the rack but that can get expensive quick and this was really only going to get used once so I opted for 1x2s which can be purchased for next to nothing. That being said, I was able to come up with a quick, easy and inexpensive drying rack design (under $40) that I think most people on similar situations will find useful.
This is the beginning of lots of cabinet plans and kitchen renovations stuff to come so sit back and enjoy. Or unsubscribe, either way, you’ve been warned. Cheers!
Our Flip House Kitchen Renovation Series
- Frameless Cabinet Carcasses
- Cabinet Door Drying Rack
- Countertops
- Cabinet End Panels
- Spraying & Installing Cabinet Doors
- Upper Cabinet Crown Moulding
Oh, and don’t forget to subscribe on YouTube and for sneak peeks of our upcoming projects be sure to check out Our DIY Life on YouTube, follow us on Facebook and Instagram. Also, follow me on Pinterest to get tons of projects plans from all around the web!
Required Tools
Materials
- Qty 1 – 3/4″ x 2′ x 2′ Plywood
- Qty 1 – 2 x 4 x 8′
- Qty 1 – 1 x 2 x 8′
- 1-1/4″ Wood Screws
- 2″ Wood Screws
Disclosure: The links provided in the “materials” and “required tools” sections are affiliate links. If you would like to support our site and help keep our content free come find out more about how we can make money with no extra cost to you.
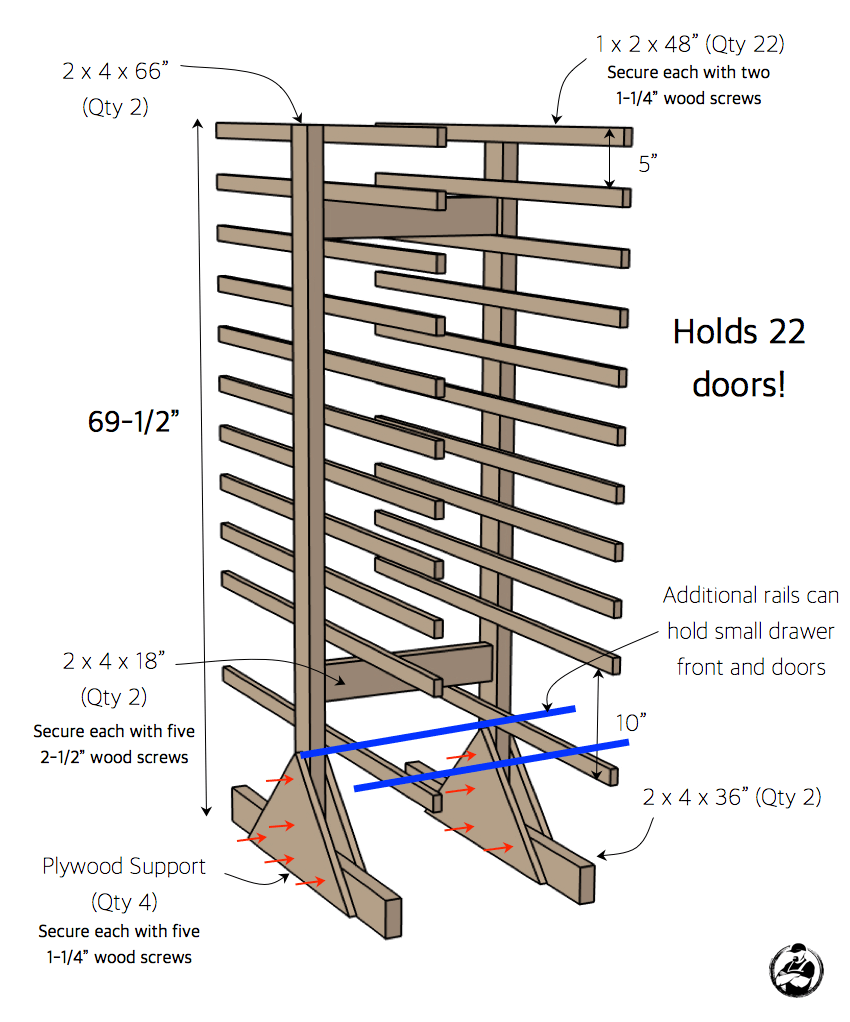
Cut List

How to build a Cabinet Door Drying Rack
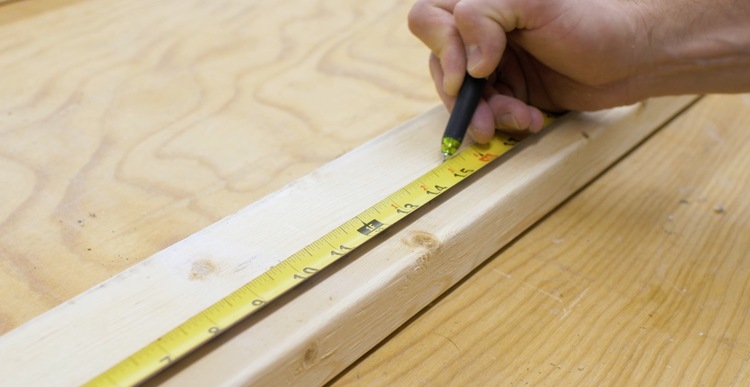
Step 1: Cutting the Wood
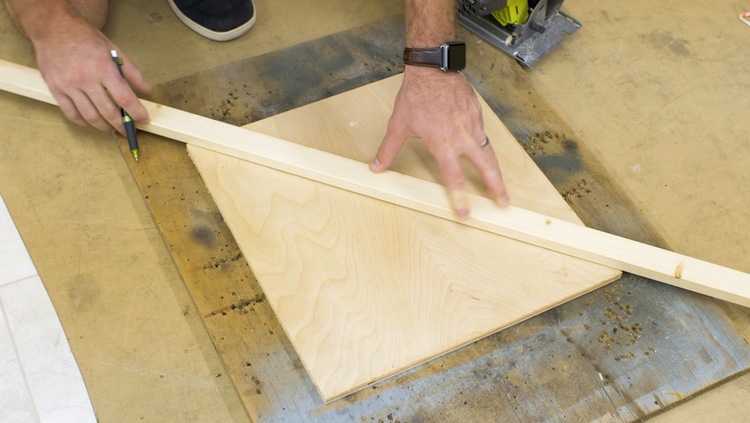
Use the cut list above for the dimensions. All you’ll need for this is a circular saw and a speed square to ensure 90 degree cuts. For the plywood supports, just draw a diagonal line from corner to corner, making an X, and cut out 4 triangle with the circular saw.
Step 2: Layout the Arms
Make a line every 5″ down the 66″ long 2x4s ending at 60″. This will designate the top of the 1x2x48″ arms.
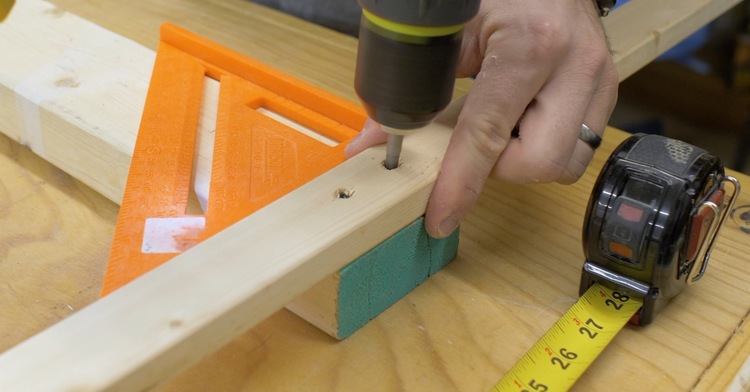
Step 3: Attaching the Arms
Center each arm on the 2×4 and attach them with two 1-1/4″ wood screws and wood glue if you want added strength. I used a speed square to assure they were installed at a 90 degree angle.
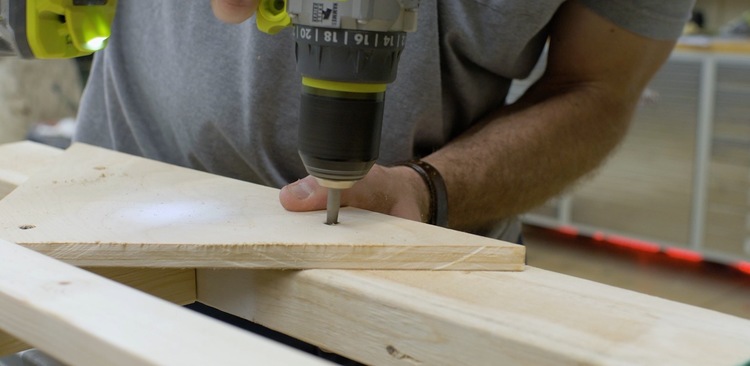
Step 4: Install the Feet & Supports
Using five 1-1/4″ wood screws, install the triangular plywood supports to the 36″ long 2×4 feet and the 66″ long 2×4 uprights.
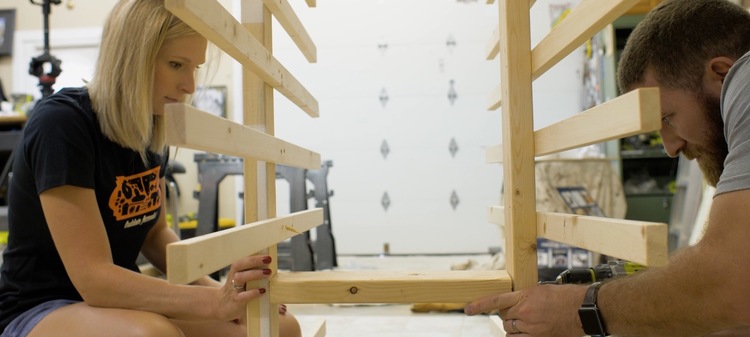
Step 5: Final Assembly
With both sides done, all that’s left is to attach them. Install 2 18″ long 2x4s with two 2-1/2″ wood screws at each end. We installed them horizontally, which was fine but I if they were installed vertically the rack would be a little more stable.
Questions? Comments?
As always, if you have any questions don’t hesitate to comment below and especially don’t forget to post pictures of your finished products in the comments! ENJOY!
Nice project. Did ou use it ? Please post a picture showing the doors on it.